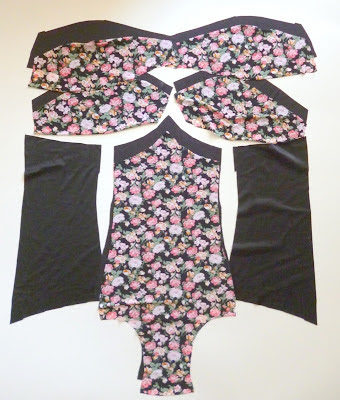
- Cut 2 of the Upper Cup in Self and in Lining
- Cut 2 of the Lower Cup in Self and in Lining
- Cut 1 on fold of the Centre Front in Self and in Lining
- Cut 1 on fold of the Centre Back in Self and in Lining
- Cut 2 Side front in Self – optional to cut lining too. I am using a heavy spandex so I didn’t feel I needed a lining. If you are using a light coloured fabric, or an unstable knit, line it!
- Cut 2 Side back in Self – lining here is optional too
Why line a swimsuit if your fabric is opaque? Lining does a couple of things. It gives your fabric stability – especially if you are not using a spandex swimsuit fabric. Fabric clings when they are wet, proudly displaying every nook and cranny that you may not necessarily want on display at the local beach. Lining gives you that extra layer. Lighter fabrics, as many of us know, lose their opacity when wet. Lining will prevent an unwanted “Surprise” when you emerge from the water. So, the moral of the story is, it’s very important to line a swimsuit.
Pins are your friend when cutting knits. When sewing for myself, I am sometimes so excited to get a project underway, that I am skimpy on the pinning. Properly pinning your fabric will prevent it from sliding, so you’re sure to get exact cuts each time.
**If you are sewing a 2 piece version, you follow these directions exactly, except that you cut along the waist lines** I’ve included a crotch lining gusset piece for people who may want to sew the bottoms as panties, but don’t want a fully lined garment. You will find that the crotch seam on this garment sits pretty close to the middle of the legs, which slightly off-sets the crotch lining, providing more coverage up front than towards the back.


No Comments