We had frost here last night…
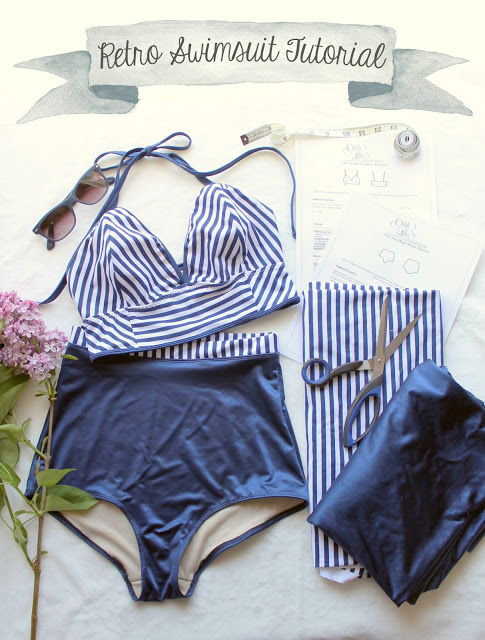
BUT! I’m not going to let that get me down! Last weekend I made this swimsuit. I was inspired by Alexia (from
Whimsy Tails ) who made an amazing 2-piece version of my
Abigail Swimsuit.
You can see it on her Instagram. I really loved the way she place the stripes on the top. I decided I’d give it a go using my Sarah & Ava Pattern to do something kind of similar. I really loved how it turned out and I get lots of emails about using my patterns for swimwear so I thought I’d offer an indepth tutorial.
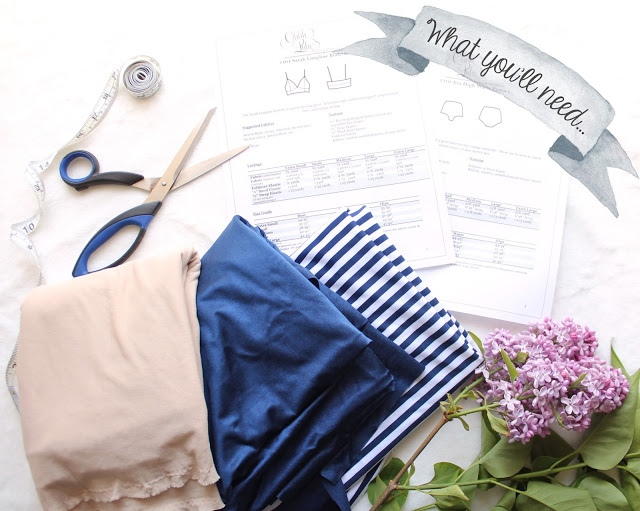
What you’ll need:
1. The Sarah Bralette Pattern and Ava Panties Pattern
2. Coordinating Swimsuit (Spandex) fabric.
3. Swimsuit Lining
4. Thread
5. Twin Needle
6. Rotary Cutter (optional, but handy)
Instructions:
1. Print out your patterns.
2. Trim away margins where indicated.
3. Tape pattern together.
4. Optional: I wanted to have a diamond motif pattern layout on the back, so I added seam allowance to both my back pieces, instead of cutting them on the fold.
5. Make adjustments. I have a slightly larger cup size than what I’ve drafted this pattern for. All I have done is cut between a size small and medium. If you need a significant change to the bust area, you can slash and spread the cups to increase the size. You can also wing it, like I sometimes do, by just exaggerating the curve of the cup and adding some height. If you are more petite, just straighten that sucker out. Check out my tutorial on adjusting the cup size of my Jasmine Bra for some further instruction.
 |
| Cutting between a small and medium |
5. Optional Pattern Placement: I have drawn a line on my pattern pieces so I know where to place my stripes. I wanted to create a chevron motif over the bust so I took a little bit of time before cutting my fabric to make pattern placement indicators on my pattern pieces.
7. Cut your fabric! For a swimsuit, you’ll need to cut Lining & Swim Fabric. You don’t have to line the back, but I think it makes for a nicer suit.
8. Cut your binding. Using a contrasting fabric, cut several long strips of binding (stretch should be going lengthwise). I cut mine in 1 inch strips, as I wanted narrow, quarter inch straps and binding. Cut accordingly! Using a rotary cutter makes life a lot easier.
9. Baste lining to Front Cup.
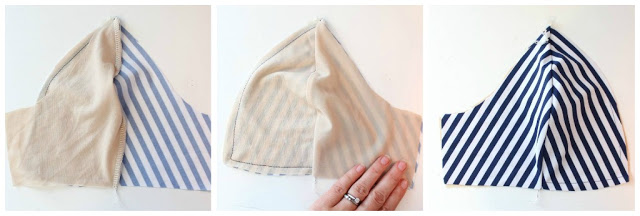
10. We’re going to line and sew our cup seams in one motion so that our seam is encased between the lining and swim fabric. Layer your pieces like so: Side Cup Lining, Basted together Front Cup (lining side down), finished with Side Cup (right side down). Sew your seam (1/2″ Seam Allowance). Why do it like this? This way your lining and exterior fabric won’t shift and you’ll have less seam allowance to worry about between your layers. I’m serging my seams, but you can also just use a zig-zag stitch.
11. Prepare your binding by turning under the raw edges by 1/4″ and pressing with a warm iron. Careful not to melt your farbric!
12. Baste Binding along front edge of cup using a narrow zig-zag stitch. Gently pull on the binding as you stitch. You wan the suit to contour along your bustline. When you’re done, turn the binding under and top stitch with a twin needle. If you don’t have a twin needle, you can also zig-zag stitch. The binding gets applied exactly the way you’d apply any binding (though I apply mine to the right-side first). I made a Video! Watch!
 |
| Raw edge trimmed back, binding is ready to be turned under and top stitched. |
 |
| Twin-stitched binding. |
13. Baste Lining to Center Front Band.
14. Just like we did with the cups, we’re going to sew our lining and exterior fabric in one motion. Layer your fabric like so: Side Front Band Swim fabric, Center Front Band Basted Piece (Swim Fabric Down), finished with the Side Front Lining. Sew your seam, and now your seam allowance is encased.
15. Stitch cups to Front Band
16. Prepare your back pieces. If you’re doing it like me, you’ll have to sew your Center Back Seams. Then, go ahead and baste your lining to your swim pieces. Stitch your Upper Back to your Lower Back.
17. Sew your side seams then try this baby on! If you’re happy with the fit, finish your seams by serging or zig-zag.
18. Apply Band Elastic on the inside of the garment using a wide Zig Zag stitch, as indicated in the pattern instructions. I have also made a video to show you exactly how to do it.
19. Now it’s time to bind the upper edge of our tops. I used a length of binding approximately 80″ long (I had to attach two pieces in order to get this length). I started basting on my binding approximately 31″ down the length of the binding – this extension forms your strap. You will be left with a long extension on the opposite end as well.
20. Folding your binding in half, and making sure all of the raw edges are turned towards the inside, top stitch with a twin needle.
21. Cut your straps so that they are both an even length and tie the ends into knots.
22. Cut a strip of elastic approximately the same lenth as the bottom of your top. Stitch it into a loop.
23. Pin the binding evenly around the bottom of your swimsuit top and baste on. Finish just like we did all of the other bindings by top stitching with a twin needle.
I’ll post the tutorial for the coordinating bottoms in a separate post!






6 Comments
OnePerfectDay
May 22, 2015 at 7:45 pmWow!! This swimsuit is sooooo beautiful!
Thank you so much for sharing the tutorial!
Diana Nuland van
May 24, 2015 at 6:30 pmNice swimsuit, thank you for sharing
Swimsuits Direct
May 25, 2015 at 5:38 amSwimsuits Direct :
Wow! thanks for sharing this. Helpful tutorial.
Beautiful swimwear.
Mallory
April 5, 2019 at 4:10 pmHey there! I am tackling this pattern! and I just wanted to know about how much fabric I’ll be needing? I know your Sarah pattern says 1/2 yard for size small, but for the swim top version I didn’t know if that would be enough for straps and binding and everything?
Also, I am brainstorming on how to add soft cups to this top, so if you have any advice I’d love it!;) thanks!
sarah norwood
April 12, 2019 at 9:00 amHi Mallory! Are you just making the swim top? I am pretty confident that even with the added binding you’ll have enough with your 1/2 yard. If you’re concerned, bump it up to 3/4.
Padding is easy to add! I’ve got a couple tutorials.
Adding cut and sew foam: https://www.ohhhlululingerie.com/2017/09/20/how-to-add-cut-sew-foam-padding-to-the-jasmine-bra-and-more/
Adding preformed cups: https://www.ohhhlululingerie.com/2014/07/05/ohhh-lulu-pattern-hacks-adding-padding/
Mallory
April 12, 2019 at 2:52 pmOh those tutorials are perfect! Thank you! I am making the Sarah top, and then the high waisted bottoms will be from your Abigail pattern(which I am also making for another suit!) thanks this was super helpful, first time with swim wear so I’m nervous!