All Posts By

sarah norwood

The Ginger Swimsuit Sew Along: Adding a little support

Uncategorized
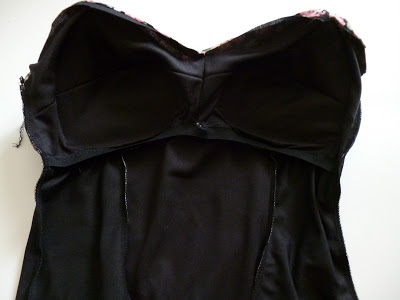
If you are larger chested, you might find that you need some support under the cups to keep everything in place.  Before you sew your side seams, you might want to try adding a piece of 1/2″ wide elastic onto your seam allowance, under your cups.  For those of you who followed the Oooh La La Sew Along, we’ll be doing the exact same thing we did there!  This step is completely optional! 
See the yellow dashed lines? That’s where I need some more support.  I am going to apply the elastic right along the seam allowance where the bust cups meet the body of the swimsuit.

Line your elastic up with the seam line, so that the excess of the elastic hangs over the seam allowance.  Using a long zig-zag stitch, make a couple of stitches through your elastic and your seam allowance to anchor the elastic.  As you sew, gently pull the elastic so you create just a LITTLE bit of tension.  We want the elastic to just hold the base of the cups closer to our bodies, we do not want to pull so tight that it shirrs the fabric.

When you get to the center, with the needle down, lift the presser foot, gently pivot, and continue on.  You could easily do the same thing by adding clear elastic into your seam line.

If you need some extra clarification on this step, Visit this Post, which talks about it in more depth.  Once you have zig-zagged the elastic on, you can top stitch with a zig-zag stitch, or twin needle, or just leave it loose. 

Ginger Swimsuit Sew Along: Sewing the Seams + Flat Lining

Uncategorized
While swimsuits are normally sewn with a serger, I’ve sewn bathing suits for myself before on a straight stitch machine.  If you only have a straight stitch, long-length, narrow-width zig zag stitches are your friend, as is gently pulling your fabric as you sew, so that your seams will stretch. Most machines, if not all, can accommodate twin needles.  This is also an excellent way to achieve a stretchy seam without a serger. I am a firm believer in making do with what you’ve got at hand!
You are going to start by layering your lining and self pieces, wrong sides together.  You will treat them as one piece.  Line up your side back and centre back piece, and stitch together, 1/2″ away from the raw edge. 
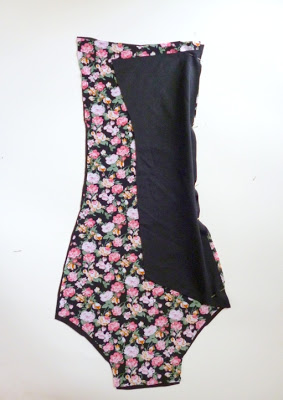
You will assemble the front in the same manner.  Layering your self and lining, treating as one, and sewing side front to centre front, ending up with this:

Looks nice and neat on the inside, huh?

Flat lining is the easiest way to line a garment, since you just treat your lining and self as one piece.  I like this method for lingerie and swimsuits because it prevents any shifting between the lining and outer layer, which is important on garments that are close fitting.  A shifted lining can cause lumps and bumps that show through.

Once you have completed sewing the side fronts to the centre, you can stitch your bust cups on.  I start my stitching line from the centre.  For me this is the best way to keep that nice sharp point where the cups meet in the centre!

Oh what a week!

Uncategorized

Well Dan got that job, so I’ve lost my house-husband/ chauffeur! But I am very excited for him to start this new venture!


I am so grateful it is Thursday already… This has been one heck of a week!  On Tuesday morning, Dan got let go from his job.  He had already been handing out resumes because work had been slow and he wasn’t enjoying it there, and was lucky to get an interview pretty quickly, but it still came as quite a shock, and I can’t help but feel a bit of deja vu!  Didn’t this happen last summer, at a franchise that also started with an “M”? Weird!

The timing for these things is always so peculiar – right on the cusp of me being ready to take the leap! Ohhh Lulu is doing so fantastic right now, but it is hard to rely solely on a small business.  Luckily I talked to my boss about how overwhelmed I am with the amount of work on my plate, and she is open to the idea of me doing 2 or 3 days a week at the office, and training someone to do what I do there. My day job has it’s moments of serious frustration, but working for someone who is an entrepreneur herself, she understand my position.

Of course, on  top of that, is life.  I had my yearly (ok, once in three years…) check up yesterday and am healthy, but need to have blood work, an ultrasound for an ongoing “issue”, an eye exam because I am having headaches from straining my eyes over my sewing machine…. so I need to fit all this life-business in as well.  So, the next time you see me, I may be wearing some chic reading glasses.  My doctor says this is what happens when you get “older!”  While I’d rather be spending my time sewing than waiting in the Doctor’s office, I will be happy to be able to see and not get so many headaches…

On the fantastic side of things, since Tuesday, Dan has had an interview at a shop that sounds great – nice work atmosphere, and great pay.  He also has been looking into another job, not quite as a mechanic, but working with cars, that he is very interested in.  So, I feel hopeful and excited for Dan to move on to a new position… I never liked the place he was working at anyway!

So, that is life right now, nothing I can’t handle and am not terribly stressed about it.  It’s nice to have a stay-at-home husband to clean the house and chauffeur you everywhere.  I could really get used to it!

How to take your own measurements…

Uncategorized

Taking your own measurements isn’t easy.  First of all, sometimes it’s a shock to see what the numbers actually show.  Secondly, many people are unsure of where their natural waist or hip is.  Unless you’ve taken a fitting course, it’s not really common knowledge.  I wanted to show where to measure on a *real* body – We have all seen measurement diagrams on a croquis, but because no one looks like a fashion croquis, it can be hard to relate it back to our actual bodies.

Start either in your skivvies, a tight fitting dress, or a tight tank top and leggings.  Wear an unpadded bra, or no bra.
To measure your true bust, find the fullest part of your chest, and wrap the measuring tape around so that it is parallel to the floor – it should not go up higher or lower in the back, than it is in the front.  To determine your band, measure below the bust, right around where a bra band would sit.
Measuring your waist is a little more tricky.  A lot of people think that their waist is either a) where their pants sit, or b) where their belly button is. While that is sometimes the case, it is not always 100% accurate.  To find the narrowest part of the waist, wrap a measuring tape around your waist – area, and bend from side to side.  Wiggle Wiggle! The tape will end up nestled in the narrowest part of your waist.  This measurement is your waist measurement.

 Your hips, like your bust, should be measured around the fullest point. Take along look at yourself straight on in the mirror, as well as in profile.  You want to wrap the tape comfortable around your seat.  Here’s your hip measurement.

 Your High Hip sits around where a pair of hipster panties would sit.  This is a helpful measurement for fitting.

The deadly sins of measuring include pulling the tape TOO TIGHT! I have to admit, it’s tempting to pull round down to the lower inch, or suck in a little bit, but accurate measurements are so important. Plus, it’s not the number that counts, it’s how you carry it!  Make sure you check yourself from multiple angles to avoid measuring too high or too low. Always keep your measuring tape paralell to the ground as much as possible – the tape will sometimes want to dip up or down in the back, which can add on inches.

Ginger Swimsuit Sew Along: Assembling the Cups

Uncategorized
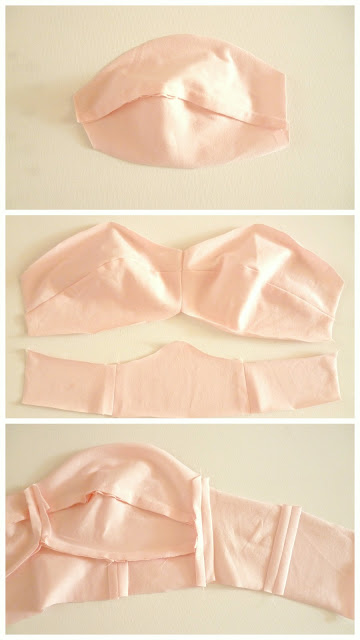
The first part of construction, is assembling the bust cups.  What you do to the exterior fabric, you will do to the lining.
Start by pinning your upper cup to your lower cup, easing in any excess. 

Sew 1/2″ away from the raw edge.  I’m straight stitching mine.

Any time you sew a seam that curves out, you always have to notch your seam allowance, so that when you press your seam allowance open, you avoid any extra bulk.

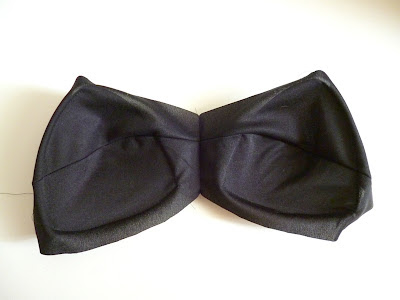
Once you have assembled both cups, sew them together down the centre seam.  To ensure that the horizontal lines running across the bust match up, I often place them together (right sides together), and make a small tack on the sewing machine, through the seam that I want to match up.  I find this works better than pins, because pins can slip.  This is an easy way to get seams that match up, every time.

After you have sewing your lining and your self, and notched your seam allowance, using a pressing ham, press your seams open.

 Now we are sewing our cups to our lining.  Mine sit about 1″ up from my raw edge at the end, and about 1/2″ up from my raw edge, towards the middle of the cup.  I want to avoid getting the cup stuck in the seam where the body of the swim suit gets stitched on.  This is why I have placed it here.

I stitched around the entire circumference of my cups, directly onto my lining.  I literally placed the lining over my bust, the smacked the cups down over top to see where they felt “natural.”  You’ll feel like a goof, but it’s the best way to see where the cups will feel best on you. I get the weirdest looks from Dan when I sew…
Now that the padded cups are stitched in, lay your exterior fabric over top, so that the wrong side of the lining is facing the wrong side of your self fabric, and baste the two parts together.  Now you can treat this as 1 piece throughout the rest of the process.

Ginger Sew Along: Cutting your fabric and lining

Uncategorized

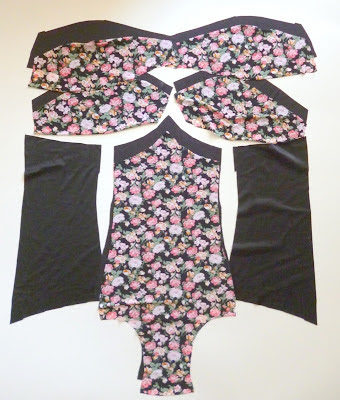
Now that you have transferred your alterations to your pattern you can cut your fabric. Cutting your fabric and lining is easy. 
  1. Cut 2 of the Upper Cup in Self and in Lining
  2. Cut 2 of the Lower Cup in Self and in Lining
  3. Cut 1 on fold of the Centre Front in Self and in Lining
  4. Cut 1 on fold of the Centre Back in Self and in Lining
  5. Cut 2 Side front in Self – optional to cut lining too. I am using a heavy spandex so I didn’t feel I needed a lining.  If you are using a light coloured fabric, or an unstable knit, line it!
  6. Cut 2 Side back in Self – lining here is optional too

Why line a swimsuit if your fabric is opaque?  Lining does a couple of things.  It gives your fabric stability – especially if you are not using a spandex swimsuit fabric.   Fabric clings when they are wet, proudly displaying every nook and cranny that you may not necessarily want on display at the local beach.  Lining gives you that extra layer. Lighter fabrics, as many of us know, lose their opacity when wet. Lining will prevent an unwanted “Surprise” when you emerge from the water.  So, the moral of the story is, it’s very important to line a swimsuit.

Pins are your friend when cutting knits.  When sewing for myself, I am sometimes so excited to get a project underway, that I am skimpy on the pinning.  Properly pinning your fabric will prevent it from sliding, so you’re sure to get exact cuts each time.

**If you are sewing a 2 piece version, you follow these directions exactly, except that you cut along the waist lines** I’ve included a crotch lining gusset piece for people who may want to sew the bottoms as panties, but don’t want a fully lined garment.  You will find that the crotch seam on this garment sits pretty close to the middle of the legs, which slightly off-sets the crotch lining, providing more coverage up front than towards the back.

Blog Love!

Uncategorized
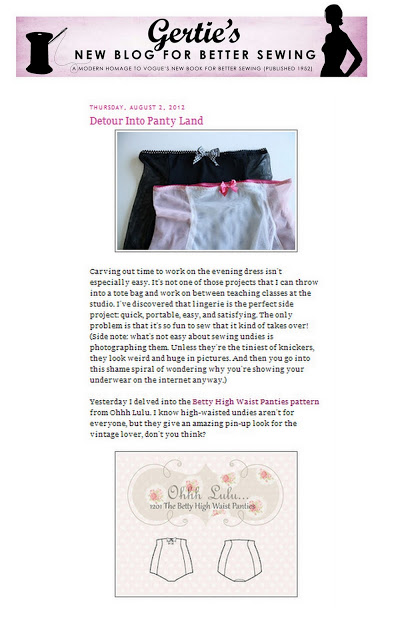
This week was a brutal one for me.  All week I’ve felt like my patience had been tested, I was tired, dragging myself to work each day, feeling like just nothing was going right.  We all have those weeks, right?  Then, to my surprise, I found my Betty Pattern had been featured on one of my sewing idol’s blogs – Gertie’s Blog for Better Sewing! Totally turned my sour mood right around.  In the last couple of months, I have had some great feedback from the Lingerie Addict, and now Gertie.  I am feeling even more confident and excited about Ohhh Lulu.  A Big, big, big “Thank you!”

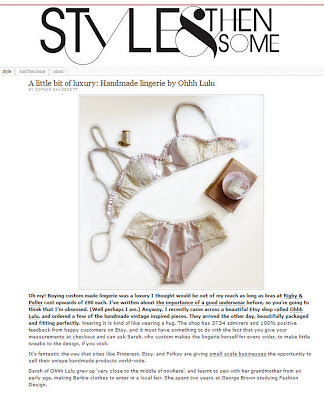
Remember the lovely padded sets I made a few weeks back? Well, I was so please to see the recipient wrote this amazing post on Style & Then Some.  Sophie was such a doll to work with.  Feedback like this quite literally brings a tear to my eye.  After years of working hard and doing jobs I didn’t really want to do (and sometimes down right hated), it is so rewarding to be able to do something that I love, and to make something that other people cherish.

Thanks everyone! It has been a great week! I am excited to have a 4 day weekend this weekend, and a mini vacation coming up.  I’ll be sticking around the house, sewing, gardening, dog-sitting, and of course, blogging

Ginger Sew Along: Preparing your Pattern & Sewing your Muslin

Uncategorized
Now that the “Fun” stuff – like the Give away – is over, it’s on to the un-fun stuff.  Sewing a Muslin! I always hate this step, because I get to anxious to get down to the nitty-gritty and see my envisioned garment come to life. But, with the one-piece version it is especially important.  I’ve sewn several bathing suits from commercial patterns, and I’ve always would up adjusting length.  I am a petite lady, just 5’2″ – sometimes torsos are too short, sometimes too long…

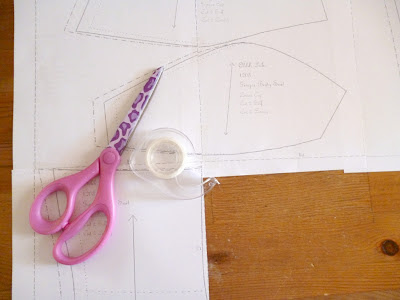
 First, print your PDF Pattern – make sure that you have selected “none” for page scaling.   Cut along the dotted lines of the margins and tape your pieces together.  Use the Alpha Numeric markings as a guide so your pages don’t get mixed up.  For me, this is a large pattern – 12 pages, and some pattern pieces look similar, so it’s easy to get mixed up.

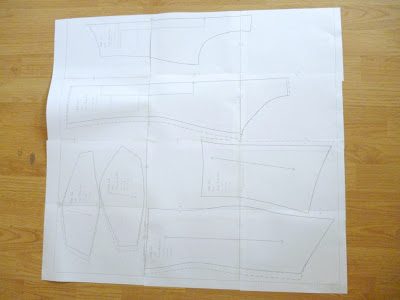
And, if all goes as planned, you should wind up with a pattern that looks like this.  You can cut out these pieces and use them as your pattern, or trace them onto tissue paper.  I have already added 1/2″ SA to all seams, and 3/8″ SA to the leg and neck openings.
I am going to keep the muslin sewing breif.  Your “muslin” will be made out of a fabric similar to your actual garment fabric.  I use an inexpensive jersey to sew my test garments – it’s stretchy, like my spandex so I know my finished garment will fit.  
There is no need to line your muslin.  Just follow the “Self” cut guidelines on the pattern.  
Assemble your Cups first – sew side front to center front, attach to cups.  Sew side back to center back.  Stitch Side Seams.  Stitch Crotch seam.  The pictures below show the 2 piece version of the pattern, but the general construction will be basically the same.
From there, try it on, pinch and pin anywhere that needs to be pulled in.  Slash anywhere that needs to be let out.  Transfer your changes to your pattern, or take apart your muslin and use that as your pattern.
Some common fit issues:
1. Bust too big.  If the bust cups are too big, decrease the curve of the cup seams.  You can also decrease the height of the cups, but rememember you will have to decrease the height of the side back and center back seams as well.
2. Bust not Big Enough.  If the Cups are Not big enough, you can increase the curve of the cup seams.  Gertie has some great tips and links on Bust-Fit Issues Here
3. Garment is too short.  Slash each piece at the waist and extend.
4. Too Tight around the legs.  Add extra to your side seams, and/or crotch seam length.
5. Not Tight Enough! Take in your side Seams, adjust the side back seams.
6. Too Long! Cut your patter at the waist, and overlap, reducing the overall length of your pattern.

How to – The Ruffle Thong

Uncategorized
With the gracious help of Anna, from Mrs. Depew Vintage Pattern, my ruffle thong pattern has been fully digitized!  Digitizing is a breeze when Anna does it! 🙂  
I’m really excited about this pattern because it is super easy, quick to sew, and is a great way to use up scraps of fabric since it takes only about 1/2 yard of fabric + a small scrap of cotton jersey, and regular, ol’ 1/8″ elastic that you can get at any fabric store.  This pattern is designed for wovens, so you can use cute quilting cotton prints, woven silks, whatever your heart desires!
First thing’s first, you’ll need the Pattern, 1/2 yard of woven fabric, 3 yards (or a hank) of skinny elastic, and thread to match.  You can also pick up some ribbon for bows, or lace to trim the edges. 

Print your PDF File, selecting “none” for page scaling in your Print Options window.

Tile your pattern pieces on a large table, using the Alpha-Numeric Key to help you align the pieces.  Trim off the excess margins along dotted lines, and tape your pieces together.  You can now either trace out your pattern pieces onto tracing paper, or use the printed pieces for your pattern.  Â˝â€ť Seam Allowance has been added, so do not add seam allowance.

Cut your elastic using the measurement guide provided in the pattern. Double check the length by wrapping it around your waist, and leg (and inseam, where the thong would sit). Pull the elastic snug, but comfortable.

Fold your fabric on a 45 degree angle to the selvedge, this is the “Bias”.  Place your front and back pieces on the fold, and cut out.

 Cut 1 Crotch piece in jersey lining & your self fabric.

 You have a total of four pieces – 2 crotch pieces (one lining, one self), and a front and a back.

 Layer your crotch pieces, wrong sides together.  Treat them as one piece from here on in.

 Stitch your back crotch seam to the back thong piece, and the front crotch seam to the front thong piece.  I serge mine.  You can straight stitch, and zig zag.  Optional, you can topstitch down.

Finish your leg openings with a rolled edge, pearl stitch, OR simply fold under and zig-zag stitch.  You can also zig-zag stitch stretch lace around the leg openings.

Now it’s time to apply your elastic. Take your shorter length of elastic, and pin along the leg opening, ½” to ⅝” away from the finished edge.  The elastic is considerably shorter than the leg opening – this will create the ruffle effect.  You will want to pin the elastic to the start of your leg opening (on the wrong side), at the end of the leg opening, and in the middle, so that the thong will ruffle evenly the whole way around.


Using a narrow zig-zag stitch, and pulling the elastic evenly as you stitch, sew your elastic onto the wrong side of the thong. As you sew you will see that the elastic gathers the fabric, creating a ruffled effect. Finish both leg openings in this manner.
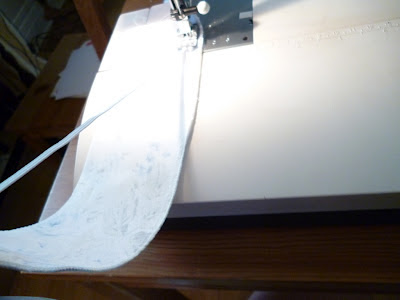

The Elastic is much shorter than the length of fabric you are sewing it on to  

Once you have stitch the elastic onto both leg openings, you should have something that looks like this – all scrunchy and ruffled.  This is a good time to give it a press with a hot iron. 
Now, Stitch ONE SIDE SEAM ONLY, making sure that your finished edges line up, and your elastic stitching line matches up.  I sometimes make a small thread tack so that the fabric doesn’t shift- works better than pins!

To finish, pearl stitch your waist band (or zigzag, add lace, etc), and sew up your final side seam.  Top with a bow, rosette, or leave plain.
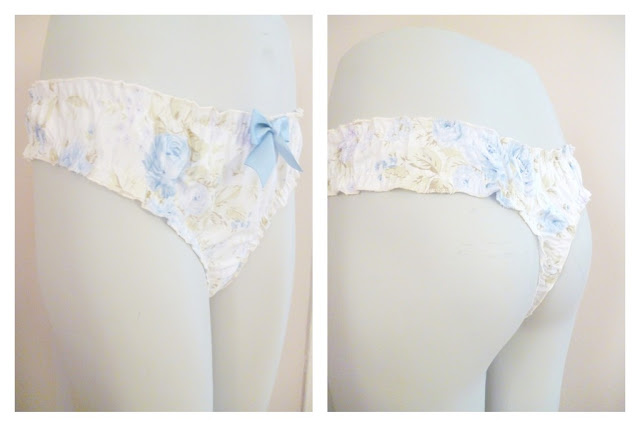
Ta Da!