All Posts By

sarah norwood

Black Friday Sale is ON!

Sales

Today is the day! I’m launching a Black Friday sale that will end on Monday, November 27th 11:59PM.

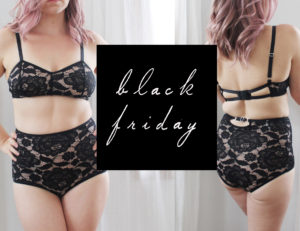
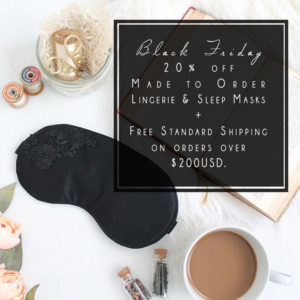
I’m offering 20% off everything (excluding some custom orders) in my lingerie shop, PLUS free shipping when you spend over $200USD.

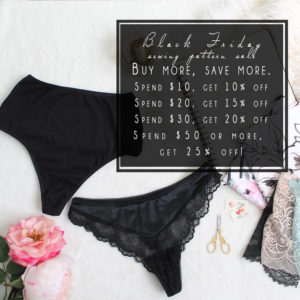
In my sewing pattern shop, I’m offering 10%-25% off depending on the total value of your order!

All discounts will be applied at checkout, so there is no need for a coupon code. Sales are valid ONLY in my Etsy shops!!!

I know I told myself I would not, could not, would not allow myself to buy any fabric… but I’ve got my eye out for some nice pastel felt for making some christmas stuffies for the daycare kids, plus I already spent a small fortune at fabric.com yesterday (cringe… I did not need half the stuff I bought!).  What are you stocking up on this Black Friday?

Find me in Artful Blogging

Anxiety, Interviews, Personal

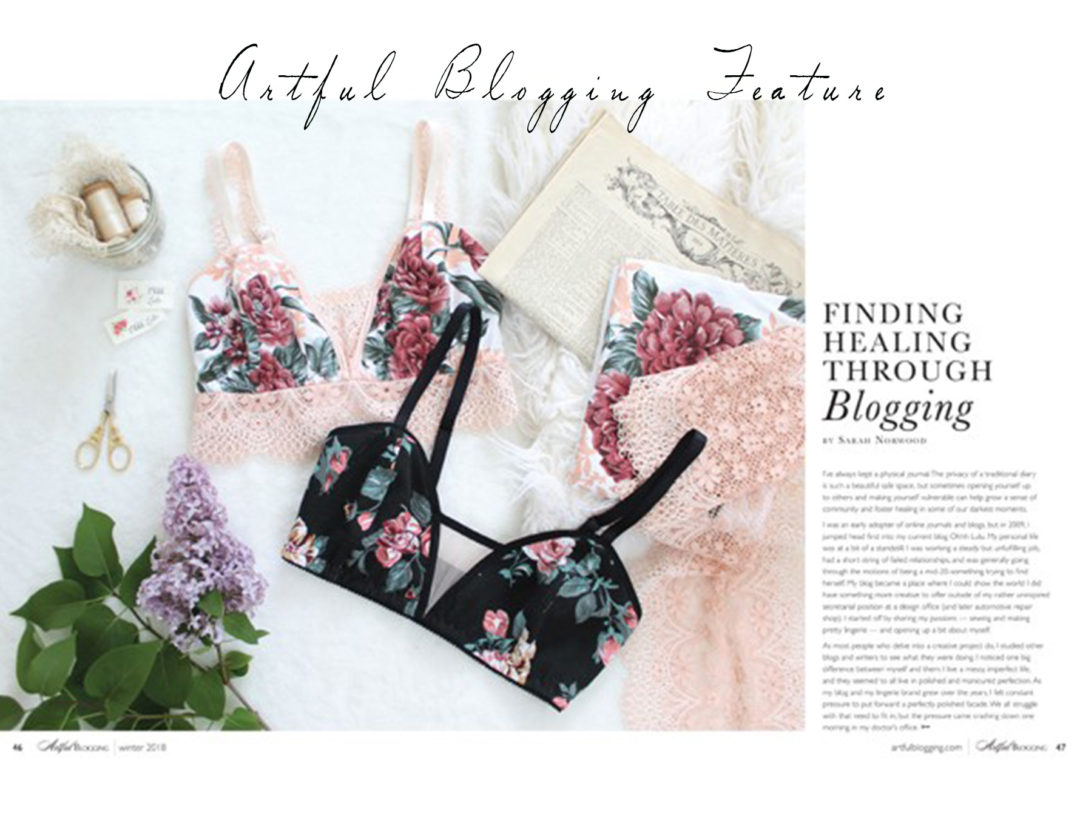
When Artful Blogging contacted me about writing a piece for their magazine, I knew exactly what I wanted to write about and was really excited about being able to contribute.

Artful Blogging was new to me, but I loved the idea of writers and makers sharing how blogging has changed or impacted their lives.  Plus the format and photography included in it’s pages are just so beautiful… It’s really inspiring.

My blog has been not only a place to share my love of sewing and pretty underthings, but an open journal. As scary as it is sometimes to share our private thoughts, it can be so liberating, especially when you find out you are not alone.

In my article, I wrote about how I’ve found healing through my blog, specifically after my miscarriage, but I think a lot about how therapeutic sharing my mental health struggles have been. Just knowing I am not alone, and that in sharing my struggles, maybe I’ve encouraged one other person to seek help, is encouraging.

Every time someone reaches out to me to talk about their struggles with anxiety, depression, or experiences with loss, it really touches my heart – the fact that strangers are willing to open up or to lend a listening ear. It means a lot to me, and I am so grateful. I’m not grateful for some of the crappy experiences I’ve been through, but grateful for the kind and understanding words you all have extended towards me. The world isn’t such a scary place as it may seem. This is a mantra I keep trying to remind myself of!

If you would like to pick up the issue of Artful Blogging that I am featured in, you can do so here. I had a sneak peek at the pages and it truly is a beautiful publication.


Read me on Craftsy!

New Items, Sewing Patterns, updates

Exciting news! I am now a contributor to the Craftsy Blog.

I published my first post last week, which outlines some tips on how to sew lingerie on a regular sewing machine. Can you believe I started sewing lingerie on my mom’s 1970’s Singer on my dining room table? Well, I did!

I’ll be contributing a couple times a month and have so many ideas about topics I’d like to cover.  If there is anything specific you would ever like me to cover, please let me know in the comments for via email! I can’t always reply to every message I get, but I do read every single one.

Nothing will change over here! I’ll still be bringing you new tutorials, hacks and inspiration through my own blog, but Craftsy will be a great sewers resource!

Halloween flash sale!

Lingerie, Sales, Sewing Patterns

Happy Halloween, everyone! It’s one of my most favourite times of the year. I love the costumes, scary stories, horror movies, candy, crisp fall air, the crunch of leaves underfoot… It’s just the best!

To celebrate I’m offering %15 off sleep masks… and….

20% off orders over $10 in my Sewing Pattern shop on Etsy (Etsy only!).

Enjoy this little treat!

I’ll be posting soon with some cute pictures of Izzy in her halloween costume. It’s a super cute one this year.

The costs of doing business.

Design Diary

If you follow my social media pages, you’ve probably already see this, but it brought up an interesting (albeit frustrating) conversation that I thought I’d address here in a little more depth.

A couple weeks ago, a photographer friend of mine made me aware that Buzzfeed had kindly featured one of my items (and a photo she had taken years ago) in an article. However, the article linked to a cheap knock-off that was being sold on Amazon. The seller had stolen several of my photos to deceptively market their knock off.
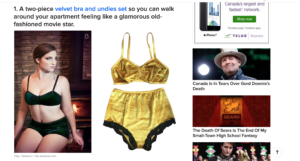
Several people commented to tell me that the same set was being sold not only on Amazon, but also on  Zaful. I actually had been previously aware of it, as it had popped up through a facebook ad on my personal account one day!

Here’s the thing: unfortunately nothing can be done about a similar facsimile. It’s unfortunate for me, the designer, but really, how would anyone police who came up with what style first? Cora, from The Lingerie Addict wrote a really great piece about this last year.  We all draw inspiration from many other sources, and if you follow trends in your design, you’re sure to run into similarities with other designers along the way. In this instance, I think there was very little doubt they were selling a knock off, though they offered it an additional colourway. But, it is a hard thing to police, and as a designer, I have little recourse. More than anything, it’s a a frustration.  However, I’m confident in my skills as a designer. I know that I can and will continuously come up with new and unique garments. Being knocked-off comes with the territory.
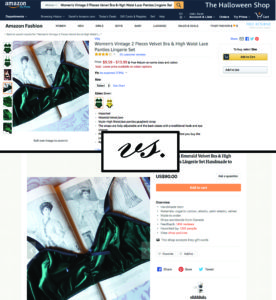
Theft of photos, on the other hand, really makes me angry. With the exception of a few collaborations that I do with photographers, all of my photos are taken by myself and are my intellectual property. Using someones photo without consent is a major no-no,  and using  a photo of a garment to sell a similar item is totally wrong.

Luckily for me, the photos were removed fairly quickly. However, Buzzfeed is still directing it’s readers to the knock off garments. I find this to be pretty hypocritical considering in April of 2016 they published a lengthy article about ultra-cheap knock-off shops that are popping up everywhere online. These shops steal photos and sell their own version of the garment. Often, the garment is made with sub-par materials, shoddy workmanship, and many of the details of the original garment missing (these can sometimes have some pretty hilarious results). This really really makes me angry.

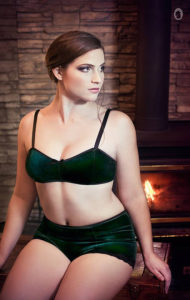
These ultra-cheap knock-offs devalue everyone’s work. I was shocked when I saw that this Amazon seller was selling a velvet lingerie set for $9-$13. My Wintergreen Lingerie Set retails for $90.

There are several telling differences between my garments and the knock-off. Mine has a back closure, proper band and strap elastics, bow, lined cups, organic cotton gusset lining, adjustable straps, and customizable sizing… However, even if I omitted all of those features, I still could not produce a garment that cheaply. I wouldn’t even begin to cover the costs! Funny enough, the product description, wording which was partially lifted directly from my Etsy listing, says that the “straps are fully adjustable, and the back closes with a traditional hook and eye closure.” However, if you look at their actual garment, neither of those things are there.

So, how are they able to sell these items so cheaply? I’m not sure I have the answers. They use cheap materials and cut corners. As a maker I can see that in the changes they have made to my design. They likely are able to purchase those materials in much larger quantities than I can, making their cheap fabrics cost even less to them. I am also assuming that whoever is making these is being paid very little to do so. One of the things I have committed to with my brand is to keep production local, and ethical. However, one of the obstacles I face, as I look towards the future and outsourcing some of my production to a North American based workroom is that my current pricing structure does not afford it!

That’s capitalism right?

Well, here’s the problem: As a designer, and a maker, I need to price my garments to cover materials and labour costs (also taking into account the behind-the-scenes time and costs involved with pattern making, marketing, design work, sourcing, etc), but I also need to price competitively. If consumers have it in their mind that they can get a comparable garment for $9 (they can’t but they think they can’t!), that puts me in a pretty tricky situation.

Photo by G L Reid

Honestly, I’m surprised when I see those memes on social media where a shopper buys a ridiculously cheap dress online and then is utterly shocked  to see it looks like absolute garbage in real life. I feel like critical thinking must have gotten lost in the process somewhere! At the same time, these sites use extremely deceptive marketing tactics to sell their knock offs, like not using actual photos of the garments they are selling.

I don’t have the answers, I mostly just wanted to raise awareness. The only way to stop this type of theft and deception is to stop buying from them.

I know it’s not a possibility for everyone, as people’s financial situations vary widely, but money talks. Instead of dropping $100 at H&M on a pile garments you’ll forget about in 3 months, spend $100 on something an Indie designer made. I promise, you’ll love it longer, wear it more and they will love you for it.

So, what can designers do? Indie designers are in a tricky position, but we can do a few things. Practice integrity with your own work. Give credit where credit is due. Treat each other with kindess and respect. And when another indie gets ripped off, let them know you’ve got their back!
 

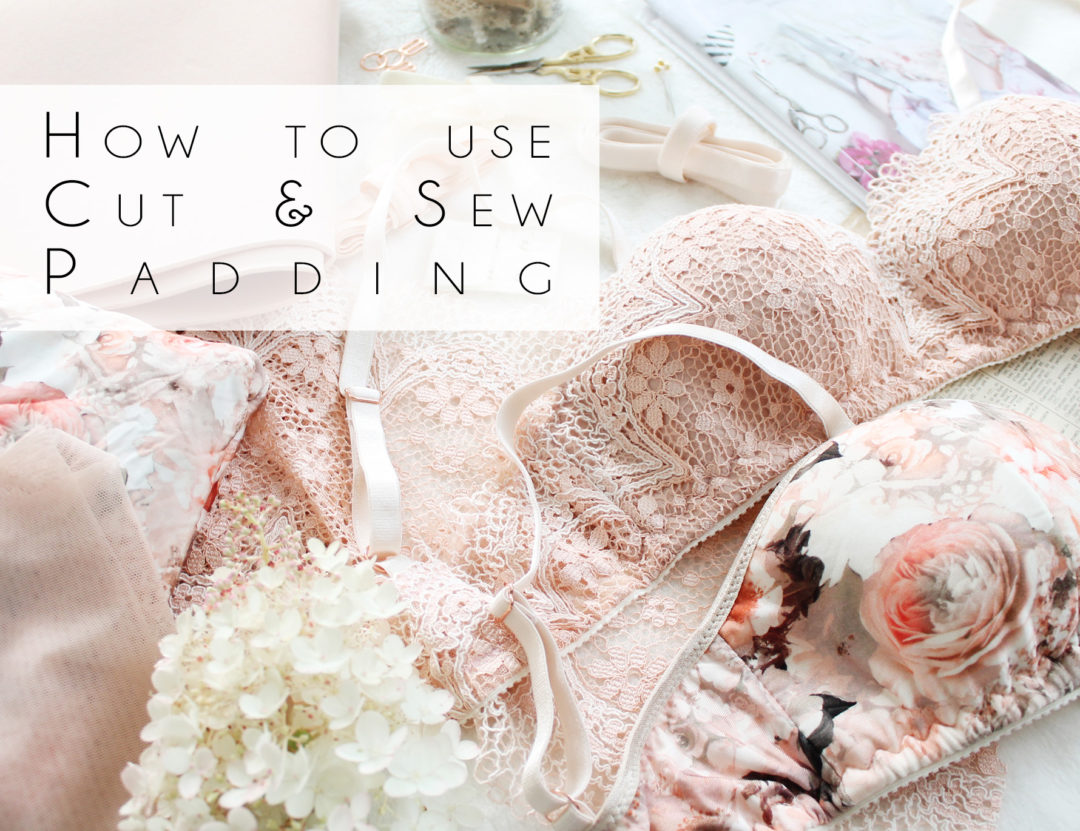
How to add Cut & Sew Foam Padding to the Jasmine Bra (and more!)

Sewing Patterns, Tutorial, Videos

Way back when, I wrote up a tutorial on padding the Jasmine Bra with balconette style pre-formed cups. Over the last few months, I’ve been experimenting with a new method, using cut and sew foam.

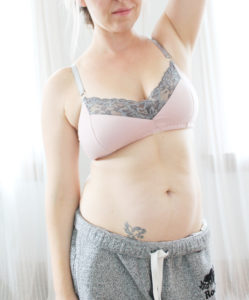
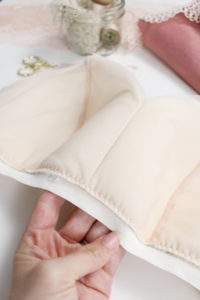
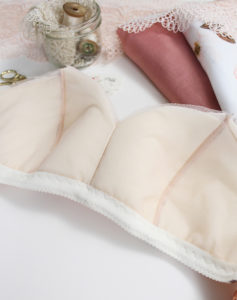
Cut and sew foam is available through most bra making suppliers. There are lots of options, but I recommend Bra Makers Supply in Canada or Arte Crafts in the US. Cut and sew foam is quite thin, maybe 1/8″ or so thick. It has some 2-way stretch. Adding foam to your soft bras will add a little bit of body and structure, as well as a little extra coverage if you are concerned about visible nipples. My personal preference is still for non-padded bras, but this is a nice option if the things above are of concern to you! Or, if you just want to try something new. I will say, I’ll be adding this to my bikini top sewing repertoire, but I’m still not sure padded bras are for me.

Aside from the foam, you won’t need any other special supplies – just what it outlines in the pattern for a lined bra.

Feeling cozy!

The method for assembling the bra with foam padding is essentially the same as a lined Jasmine. The main difference comes with how we will finish the interior seams.

Instructions:

Begin by cutting out your pieces. Cut the bra exactly as you normally would, but also cut out the cup pieces in cut and sew foam.

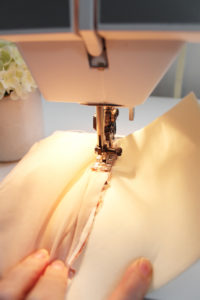
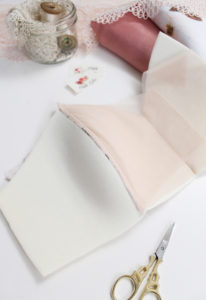
Place the Centre Front Self/Exterior pieces right side together, aligning the CF seam. Place a piece of foam over top of that, then the lining pieces with the right sides facing each other. Finish with the final piece of foam. Stitch together down the centre front seam.

Trim back both pieces of foam as close to the stitching line as possible.

Open the Front up, separating one half of the foam. With your fingers, press the seam allowance towards the foam.

Using a zig-zag stitch, top stitch the seam allowance to the foam. When your needle “zigs” to the left, it should just catch that little bit of foam left in your seam allowance. The idea here is to flatten the seam, and in addition, the zig-zag stitching almost acts as an understitch, helping the lining and exterior fabrics fall into place.

Trim back the seam allowance as close to the stitching line as possible and open the Centre Front pieces.

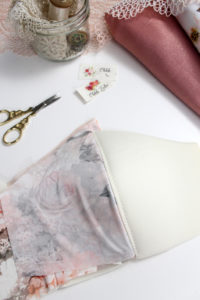
To assemble the rest of the cup, place the Side Front Self/Exterior against the Centre Front curved cup seam so that the right sides are facing. Place the Side Front foam against the wrong side of the Side Front Self. Flip the garment over, and then place the lining down the curved seam, sandwiching the Centre Front between the Side Front Self/Foam and Lining. Stitch together.

Once again, trim back both pieces of foam seam allowance as close to the stitching line as possible.

Fold the seam allowance towards the Side Front Foam, pushing the Side Front self and lining towards the centre front.

Just like you did with the centre front seam. Zig zag stitch the seam allowance to the Side Front foam.

Trim back the remaining seam allowance as close to the stitching line as possible and flip the Side Front self and lining over the foam.

Attach your Back Band pieces as indicated in the pattern instructions and sew on the band elastic.  It is very important that you trim any excess fabric beyond your  band stitching line back to allow the bra to fold under properly.

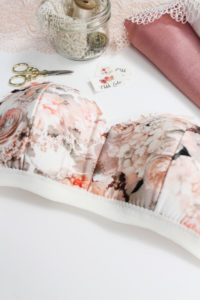
Top stitch the band elastic in place. Be careful here, it gets quite thick. Go slowly and take your time! Finish the upper edge with Fold Over Elastic as outlined in the instructions, and complete the bra with a back closure and straps.

I would say this is more of an “advanced” tutorial. It can be quite tricky to get all of the layers to line up properly. That is definitely the most challenging part.  Getting the fit just right is also a little more of a challenge because the foam will limit the vertical stretch of the bra, which tends to be more of an issue for the DD+ crowd.

If you prefer video format, I’ve uploaded a quick tutorial on how to add foam padding to the Romy Bra:


… And how to add padding the the Lace Jasmine Variation!

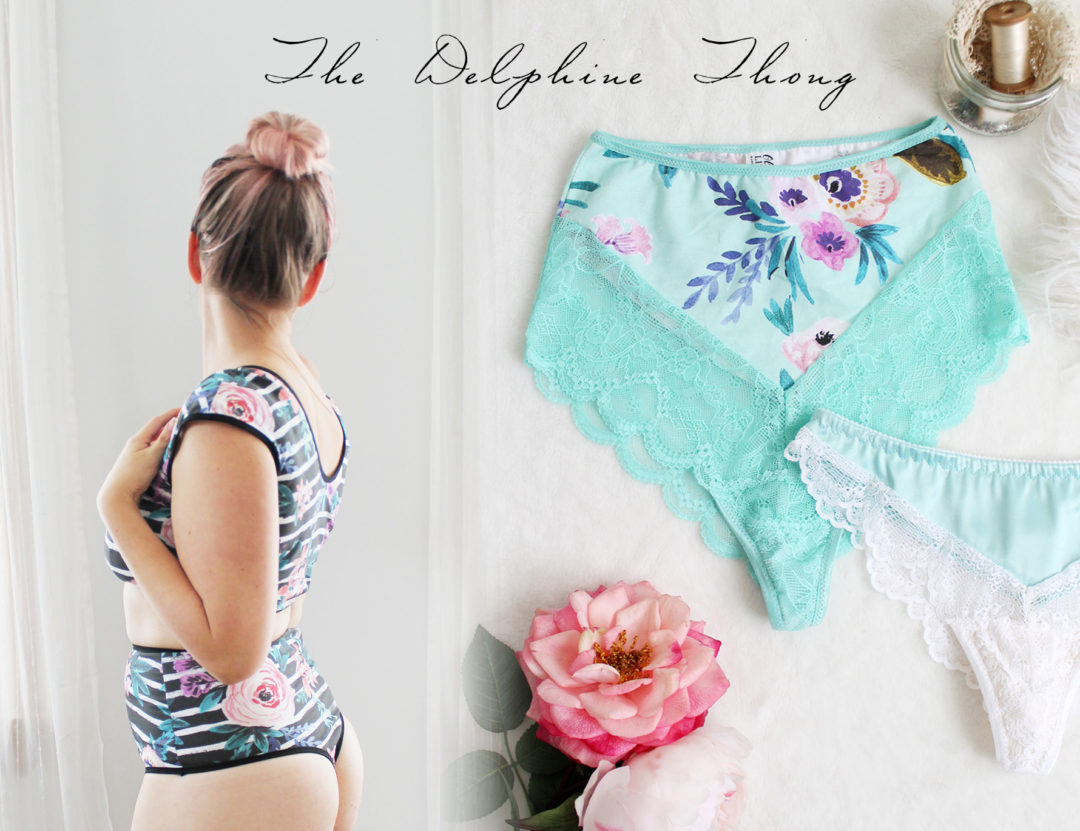
The Delphine Thong

Design Diary, Lingerie, New Items, Sewing Patterns

Warning: butt cheeks ahead!

In my younger days, I wore thongs a lot more. It was the style of the times.  As I’ve “matured” I’ve replaced most of my skimpy thongs for more comfortable (still pretty) styles. That’s not to say that thongs aren’t comfortable – they definitely can be! And they serve a practical purpose…

A High Waist Thong may not be super practical for every day wear, but hot damn… it looks great on. I was skeptical when I first started getting requests for a high waist thong, but I thought I’d try it out. I was very pleasantly surprised!

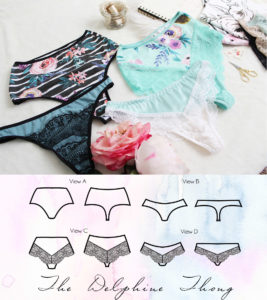
The Delphine Thong

As I was developing this pattern I wanted to come up with a way to use scalloped stretch lace on a high waist thong – that’s View C of the pattern. It’s a little bit Ultimate Lace Panties mixed with a little Ava Panties and I’m really happy with how it turned out. The style lines allow you to mix and match colours and fabrics, one of my favourite things to do with a design!

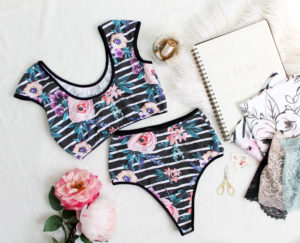
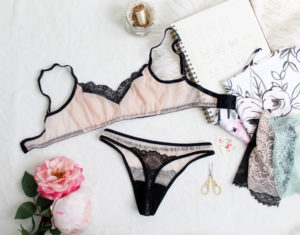
I made a few different sets as I was sewing up samples, pairing the basic high waist version with my Natalie Crop Top, then I made some bottoms for a Romy Bra and Jasmine Bra (from my Valentine’s Day Sew Along) from my own lingerie drawer.

Continue Reading

Fall Update

Home, Personal, Sewing Patterns, updates, Videos

Ugh… I’m sick! Isabel came down with a cold late last week and I seem to have gotten it. In a way, it’s good timing to be laid up with a sore throat and aches and pains since I have a lot of computer work to do on the couch…
I posted a new video on my YouTube Channel last week with some Ohhh Lulu related updates. I’ll be finishing up most of what I talked about here over the next couple of days…


Summertime tends to be a little quieter work wise, which is nice because life tends to be a little busier around that time of year. Dan had a couple of weeks vacation. We didn’t really do much, just a few day trips and did some work around the house.

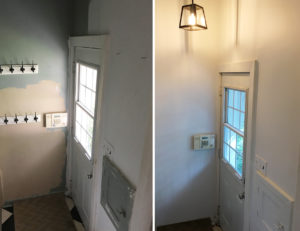
When I first saw our house I fell in love right away… You know how when you first start dating someone, you see all of their wonderful aspects, but it’s not until you’ve been dating for a while that you start to see their flaws? That happened with this house (ha!).  I saw all of the wonderful bones of the house and some how didn’t notice until I moved in that the exterior was only half painted. Every single wall was half painted.  It was like someone started painting all of the easy bits, then when the job got too high to reach, they stopped. In my defence, I was juggling a 1 year old, a business, and a pending nervous breakdown (only semi-joking).  The side entry and kitchen also had some water damage, which was repaired by the seller prior to closing.  Big mistake. The person who did the repair did a really crappy job. We’ve stayed dry, but the drywall job in the side entry was terrible. There were huge gaps between the  door frame, baseboards and milk door that no one bothered filling and the side entry was left three different colours. It took me a good portion of a morning to fill and patch that area and we ended getting the painters who did the exterior of our house to paint this area white. The ceiling in this area was super high and would have been difficult to do on my own.

So many things went wrong with the closing of this house that I’m still irritated about. Our lawyer totally screwed up our closing and was unhelpful,  the house was filthy (like disgusting filthy… like a pile of rotting food in the backyard, a tampon under the stove filthy), there was junk left everywhere despite stipulations in our purchase agreement… We ended up renting a dumpster over the summer to get rid of all of the previous owners old junk which cost us almost $400. SO frustrating! I think what upsets me more than the additional expenses we incurred, was the TIME it took to address all of the things went wrong… I wish I had’ve been in a better mental state when we first moved in because I should have sued to cover the extra costs we encounter… However, I’m super happy with the house now. I just am having a hard time letting go.
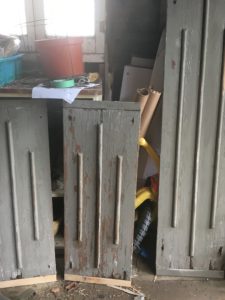
We had the exterior of the house painted white (actually a very very pale grey), and used a darker grey on the shutters. The wood shutters were in pretty rough condition, but with a little TLC, a lot of caulking and fresh paint they have a little more life left in them! I also painted the front door bright blue for a pop of colour. I love how it looks, fresh and modern colours on a traditional storybook cottage base.  We also put up a new, more modern light fixture. We’re supposed to be having new soffit and fascia installed as ours is in very rough shape but I haven’t heard boo from the company we hired for a little while… So hopefully that is still happening!

Our poor shutters pre-painting.


Painted and pretty!

Isabel started at a new daycare this month. I was so sad to hear that her previous daycare provider was going back to work for a local school board. We had such a great connection with her and the kids there! But we were lucky to find someone else who is close by, and happens to have some chickens, which (aside from horses and dogs) are Isabel’s favourite animal (a frequently heard phrase in our house is “Mom, let’s talk about chickens.”).  Isabel is a pretty amazing kid. She is so easy going and flexible as far as changes go. She’s adapted so well to the new daycare. I, on the other hand, have a hard time adjusting to changes like these and find myself missing the old daycare! Mostly, my morning chats with her provider…

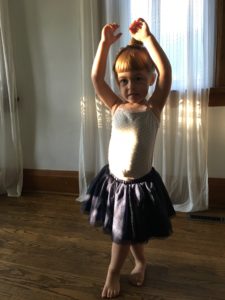
We’ve also started a few other things this month. Isabel went for her first swimming lesson two weeks ago, and is starting gymnastics at the end of the month. I’m loving this stage of parenthood. She is developing her own interests and her personality is really coming out. She is sweet and funny, loves horses and dancing, but also likes to fix things with her dad and get dirty in the garden.  I’m amazed every day by how smart and well spoken she is for an almost-three-year-old. She just is the light of my life.

Practicing her dance moves.

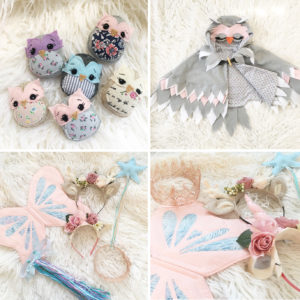
This summer I’ve made time for some fun crafty things too. I made little owl “good bye” gifts for the daycare kids, as well as an owl costume for Isabel. I also made up a whole bunch of dress up items, like butterfly wings, unicorn and deer headbands and crowns for Isabel and a friend of hers. I love making these little things.

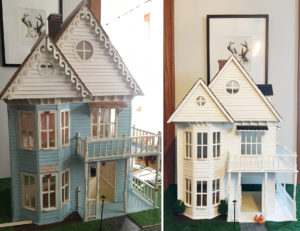
Lastly, I’ve got a new obsession… a dollhouse! This dollhouse was made by my uncle for my cousin Amanda years ago (like 20 years or so). After he passed away, it got stored at my parents house where it had a bit of an accident (got knocked over). I couldn’t bare to see it go to waste so I stored it in my attic for another 5 years. A few weeks ago I dragged it downstairs, got out some glue and started putting it back together. I took off the gingerbread trim, added a plain fascia and fresh paint.  I did a bit of “landscaping,” made the first floor open concept, and am waiting on new flooring to arrive. I look forward to working on this every day! It has been so much fun and a nice change of pace from lingerie.

So, it’s been a busy summer. I’m looking forward to cooler weather and longer nights.


A free sleep mask project with Spoonflower!

Sewing Patterns, Tutorial

Spoonflower graciously sent me fabric in exchange for this tutorial.

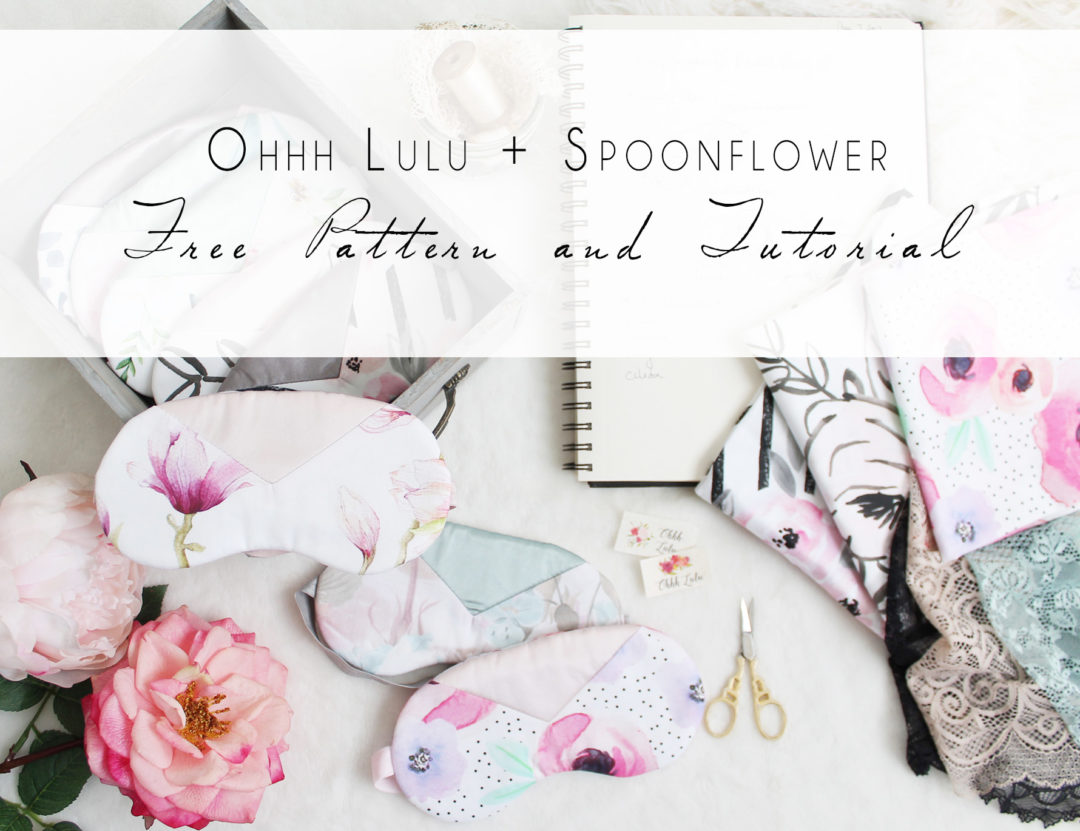
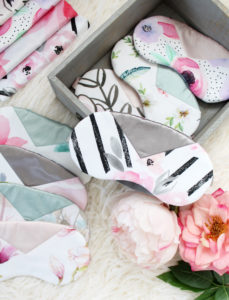
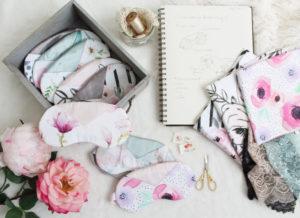
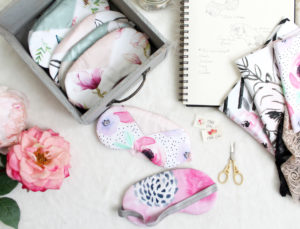
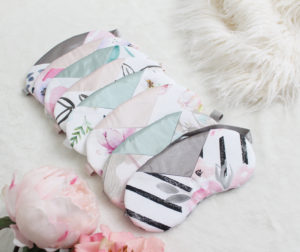
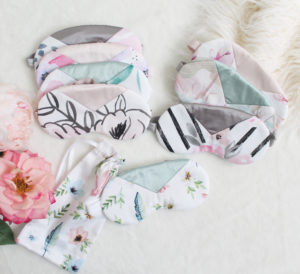
Combining prints and colours is one of my favourite design decisions to make. I love mixing prints and combining unexpected colours – that’s why I love the Clara Sleep Mask Pattern. Not only does it let you use up all the small scraps you’ve been holding onto all of these years (yes, I’m talking to you!), but it also lets you experiment with different colour and pattern mixes!

I was so excited when Spoonflower approached me about working on a “Very DIY Wedding” tutorial. I love Spoonflower because their choice of prints is endless. And you know me, I love a good print. I wanted to create something that a bride could gift to her bridal party, and customize to each persons specific personality. I thought back to my wedding and how each of my bridesmaids were so different and unique – I loved the idea of creating a “set” of something that is also personalized to each bridal party member. I’m not sure about you, but prints speak to me, and in each of these I thought, “Oh, this one is definitely an Abbey (or Amanda, or Pam).”

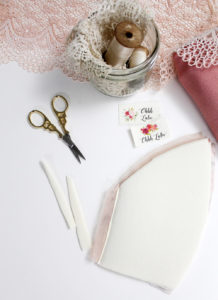
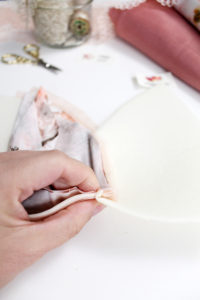
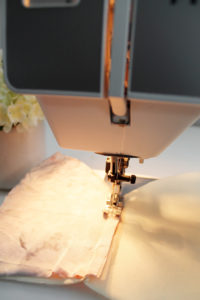
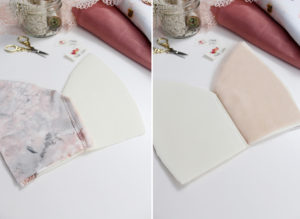
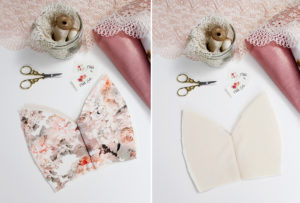
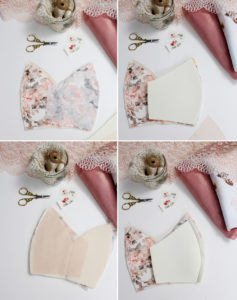
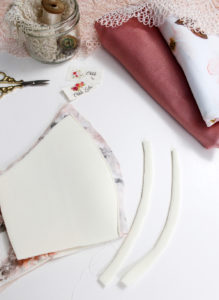
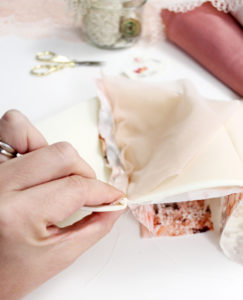
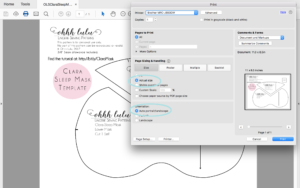
You can head on over to the Spoonflower blog to view my step-by-step tutorial on how to make a Clara Sleep Mask. The template is available for download on Spoonflower, or Here on my site.

Just a quick note about printing, and this goes for all printable sewing patterns. Make sure you’ve selected “No Scaling” and “Auto Portrait/Landscape” To ensure your pattern prints right the first time.

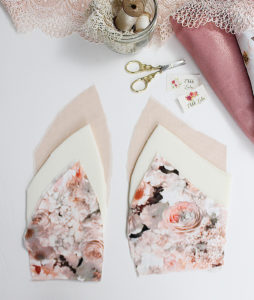
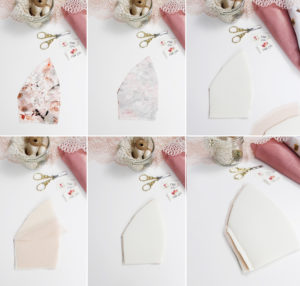
For my project, I used Spoonflower’s Fill a Yard 2-yard cheater quilt in Cotton Sateen. Sateen is one of my favourite fabrics for sleep masks as it is easy to work with and has just a slight sheen. I paired each of the prints with scraps of silk charmeuse (backed with interfacing) from my own stash.

I wanted to select floral prints that incorporated some modern elements, and contained shades of blush, and grey-blue/green. I went through some of my favourite prints and created a collection, and from there filled up my cheater quilt with 8 different prints. You can see the prints I used here!

Even after making these with self lining (they are reversible!) I had a plenty of each print left over to make a little gift bag, and the rest is now at home in my quilt box.

Thanks again to Spoonflower for this fun project!


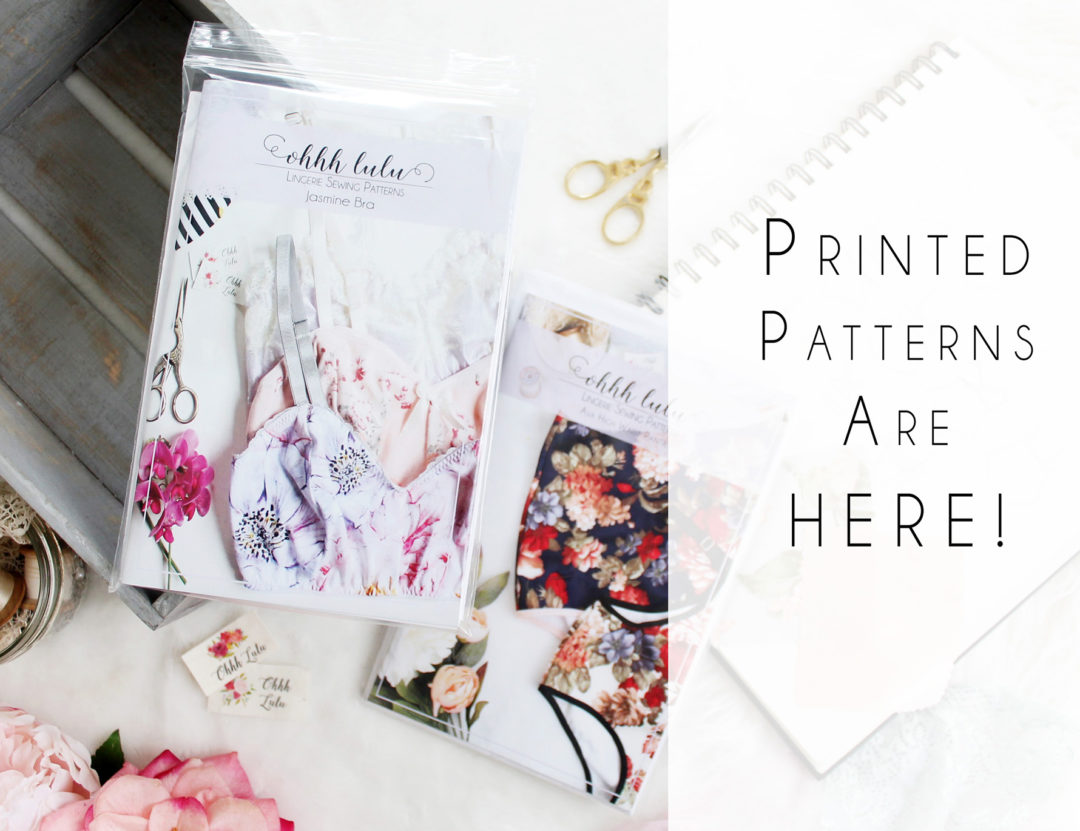
Printed Patterns are Here!

Sewing Patterns

The hardest part of running a small business, aside from feeling like you’re always at work, is having to do things that you have no idea how to do. For instance, I’ve had to fumble my way through figuring out how to file sales tax, how to set up import numbers, how to build a website (still figuring that one out!). Truth is, I just can’t afford to outsource all of these things, so I DIY it. I spend a lot of my day going, “I HAVE NO IDEA WHAT I’M DOING!!!”

Printed patterns was one of those projects where I had no idea where to start. Lucky for me, my best friend Abbey just happens to work in printing! She amazingly took on this project with me and helped me get professionally printed paper patterns and gorgeous glossy booklets!

When these first arrived in the mail a few weeks ago, my jaw dropped when I opened the box of booklets. I’ve looked at my PDF’s until my eyes were ready to shrivel up like raisins, but I had never seen them in full glossy professional print! They look so beautiful! I’ve always wanted to create products that are not only fun to use (or wear!) but also beautiful to display, and I have to say that these nail it!

And… I have to give a HUGE shout out to my dear Abbey for working on this for me.  I could not have done it without her.

I’ve started out with my Jasmine & Ava patterns (but hope to release more if there is the demand) as they are two of my favourites.

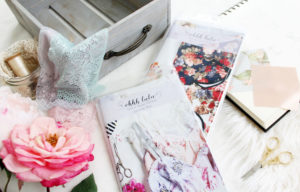
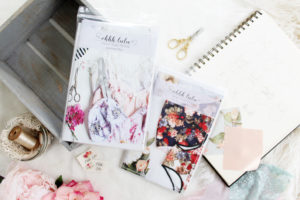
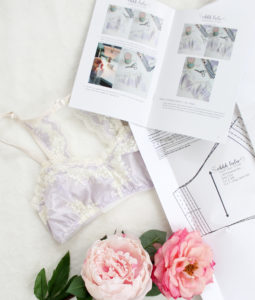
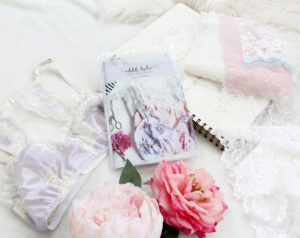
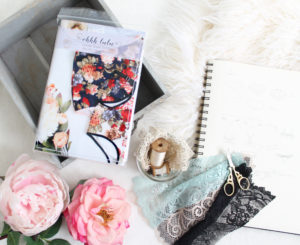
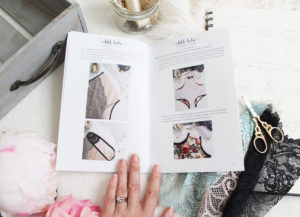
With my printed patterns you will receive the pattern printed on a single sheet of paper,  no taping required, and a pretty glossy booklet containing large, full-colour photographs, all packaged in a re-sealable plastic pouch.

You can purchase the printed patterns HERE or through my Etsy Shop!

If you run a sewing shop or boutique and would like to carry my printed patterns, please send me an email or contact me through Etsy for details.

This project was so fun to work on and Abbey and I already have a couple more things up our sleeves!