Browsing Category

Uncategorized

How to – The Ruffle Thong

Uncategorized
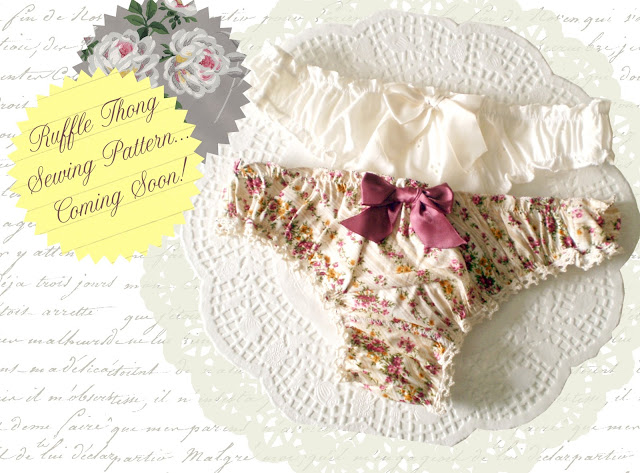
With the gracious help of Anna, from Mrs. Depew Vintage Pattern, my ruffle thong pattern has been fully digitized!  Digitizing is a breeze when Anna does it! 🙂  
I’m really excited about this pattern because it is super easy, quick to sew, and is a great way to use up scraps of fabric since it takes only about 1/2 yard of fabric + a small scrap of cotton jersey, and regular, ol’ 1/8″ elastic that you can get at any fabric store.  This pattern is designed for wovens, so you can use cute quilting cotton prints, woven silks, whatever your heart desires!
First thing’s first, you’ll need the Pattern, 1/2 yard of woven fabric, 3 yards (or a hank) of skinny elastic, and thread to match.  You can also pick up some ribbon for bows, or lace to trim the edges. 

Print your PDF File, selecting “none” for page scaling in your Print Options window.

Tile your pattern pieces on a large table, using the Alpha-Numeric Key to help you align the pieces.  Trim off the excess margins along dotted lines, and tape your pieces together.  You can now either trace out your pattern pieces onto tracing paper, or use the printed pieces for your pattern.  Â˝â€ť Seam Allowance has been added, so do not add seam allowance.

Cut your elastic using the measurement guide provided in the pattern. Double check the length by wrapping it around your waist, and leg (and inseam, where the thong would sit). Pull the elastic snug, but comfortable.

Fold your fabric on a 45 degree angle to the selvedge, this is the “Bias”.  Place your front and back pieces on the fold, and cut out.

 Cut 1 Crotch piece in jersey lining & your self fabric.

 You have a total of four pieces – 2 crotch pieces (one lining, one self), and a front and a back.

 Layer your crotch pieces, wrong sides together.  Treat them as one piece from here on in.

 Stitch your back crotch seam to the back thong piece, and the front crotch seam to the front thong piece.  I serge mine.  You can straight stitch, and zig zag.  Optional, you can topstitch down.

Finish your leg openings with a rolled edge, pearl stitch, OR simply fold under and zig-zag stitch.  You can also zig-zag stitch stretch lace around the leg openings.

Now it’s time to apply your elastic. Take your shorter length of elastic, and pin along the leg opening, ½” to ⅝” away from the finished edge.  The elastic is considerably shorter than the leg opening – this will create the ruffle effect.  You will want to pin the elastic to the start of your leg opening (on the wrong side), at the end of the leg opening, and in the middle, so that the thong will ruffle evenly the whole way around.


Using a narrow zig-zag stitch, and pulling the elastic evenly as you stitch, sew your elastic onto the wrong side of the thong. As you sew you will see that the elastic gathers the fabric, creating a ruffled effect. Finish both leg openings in this manner.
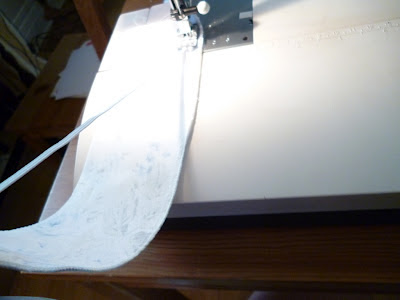

The Elastic is much shorter than the length of fabric you are sewing it on to  

Once you have stitch the elastic onto both leg openings, you should have something that looks like this – all scrunchy and ruffled.  This is a good time to give it a press with a hot iron. 
Now, Stitch ONE SIDE SEAM ONLY, making sure that your finished edges line up, and your elastic stitching line matches up.  I sometimes make a small thread tack so that the fabric doesn’t shift- works better than pins!

To finish, pearl stitch your waist band (or zigzag, add lace, etc), and sew up your final side seam.  Top with a bow, rosette, or leave plain.
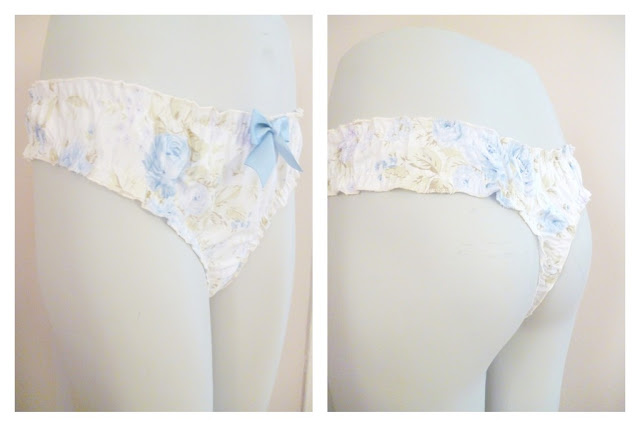
Ta Da!

Meet my new model

Uncategorized

Sadly, the Zellers in our town has been bought by Target and they are liquidating the entire store, including fixtures.  I picked myself up this lovely set of legs for a steal. I’m now itching to sew something new to display on it!

But… today I need to get down to business and sew some orders.  Yesterday ended up being devoted to errands, chores, and other things… And I didn’t get a minute to sew.

In the morning we walked downtown, which was closed off to traffic for a Side-walk Sale.  We ate poutine at 10am, and boy was it delicious.  I wish I could eat poutine everyday.  We walked home, ran errands, took a drive, cleaned the house, then received a message that some friends were up visiting from the city.  So, we walked back downtown again and had afternoon drinks on a patio with them.  It was so, so, so nice to see them.

This evening we are heading out to our second Pugalug Meeting of the year.  You might be wondering what the &@#* is a Pugalug? Well, basically a bunch of dog-obsessed pug owners meet at the park with their pugs and watch them get up to no good.  We only caught the tail end of the last meetup so I’m really looking forward to this one.  Oliver is so funny around other dogs, and much prefers human company.  I hope he loosens up a little more this time and spends more time off my lap!

Well, I’m off to watch some Murdoch Mysteries and sew, sew, sew!

Ginger Sew Along: Planning

Uncategorized

Swimsuit fabric can be expensive and hard to find, but there are lots of sources online that have a good selection for a decent price.

I often scour Ebay for fabric-finds.  A simple search for “Swimsuit fabric” will bring up a few pages of goodies. Fabric.com has a good selection of Swimwear fabrics, as well as polyester ITY knits, that when lined, will work well for this swimsuit. Etsy as well is a great source for supplies. Sew Sassy has really reasonably priced lining, and solids.

Swimwear fabrics often make me cringe.  Neon, gigantic hibiscus florals, cheesy designs… I find that using prints sparingly tends to make a more… sophisticated suit.

Sew in swimsuit cups can be found at most fabric stores and most online retailers.  They usually come in a range of sizes, A-B, B-C, etc.  They come lightly padded or push up, so decide which you prefer.  We will be stitching these directly to our lining. Sew Sassy is a great resource for these kinds of findings. The added cups are 100% optional and do not need to be added.

Swimwear elastic is often quite rubbery – or the clear type.  I hate that clear elastic, it’s sticky and makes me mad.  I am using a chlorine-friendly elastic that looks just like any elastic you would buy at the fabric store.  It is up to you what kind of elastic you use.  You will need a resilient elastic, no wider than 3/8″ for your leg and neck openings, and a 1/2″ elastic (optional) for under the bust.  I am using bra strapping for this.

Clear elastic can be used to stabilize your seams, depending on how structured your fabric is.  I am not going to be doing this.

I’ve kept construction of this suit as easy as possible. I’m a sewist who loves to sew, I’m not a sewist who obsesses over the “rules” (I am a “whatever works” seamstress).  My goal is always to enjoy what I do, and end up with a garment that I feel great wearing!

This pattern was designed as a lingerie piece, but looks pretty darn cute as a swimsuit if I say so myself.  I am by no means a swimsuit expert so I really look forward to learning some trick and tips from all of you along the way!

Ginger Bodysuit to Maxi Dress

Uncategorized

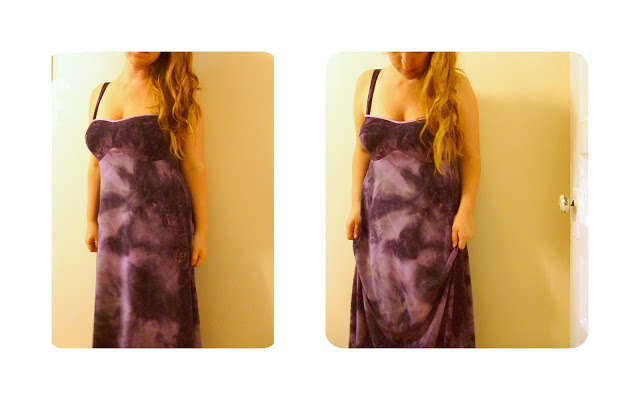
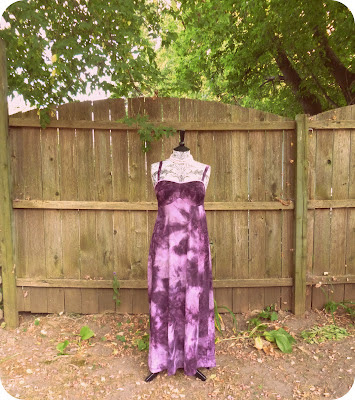
So I got this awesome tie-dyed knit in the clearance section last weekend. It’s been so hot here lately, maxi dresses have been the only thing I’ve wanted to wear.  They are light and airy, cool, comfy, and look more put together than shorts and tank tops.  I used the Ginger Pattern to cut this dress, with a very simple pattern manipulation.

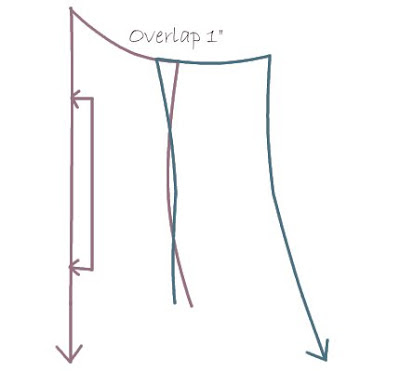
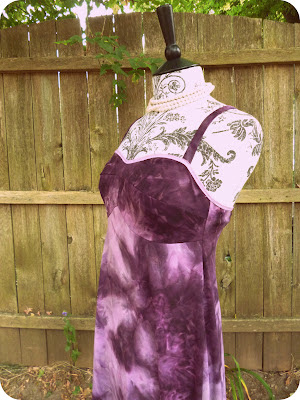
Cut the bust cups as you normally would – I did not line mine.  I overlapped the Centre front and Side Front 1″ (because each piece has 1/2″ S.A.), and eyeballed how I wanted the side seams to lay.  You could just as easily make this a princess seam dress.  I extended my side seam down as long as I wanted the dress, gently curved the hem, then did the same to the back.

As I mentioned, I did not line the cups of this dress, I finished the edges with fold over elastic.  You could just as easily line the cups alone, or simply fold under.

Comfy!  Now… just needs some accessories.

The Ginger Swimsuit Sew Along + GIVE AWAY! CLOSED!

Uncategorized

Oh my goodness… I sewed like a mad woman over the last few days, testing my new pattern… and, I think it’s ready to go! So, I am happy to announce that I will be also hosting a sew along for the 1 piece swim suit version of the Ginger Pattern.

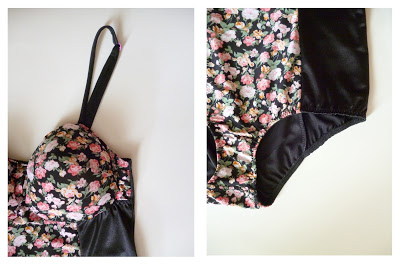
Here’s a sneak peek:

The instructions in the digital pattern do not go over things like adding elastic under the bust, or how to sew in the padded cups, so I will be going over all of these things here.  I’ll also be showing how to sew on the elastic and how to make adjustable straps.

You are going to need a few things that might be hard to source if you are from a small town like me.  First, you will need swimsuit fabric.  While Spandex is the best, it is expensive and not always easy to find.  I am using a combination of black Spandex with a polyester knit that I will line.  If you cannot find Spandex, 100% polyester knits are good because they dry quickly.

 This swimsuit will be lined, so you also need swimsuit lining.  Swimsuit lining is often made of nylon or polyester, and is very stretchy.  It is important that all of the fabrics that you use are 4-way stretch fabrics, or you will need to make some major fit adjustments.

Spandex World has a great selection of Swimwear fabrics. Spandex House is also great.

The most important things about the fabric that you choose are: 1) they will be chlorine and water friendly.  Synthetics tend to dry quicker, and fabrics like polyester tend to have good chlorine resistance. 2) They are 4-way stretch knits.

You will need to buy enough fabric to do a mock up and your actual garment.  I recommend buying 1 yard of inexpensive stretchy knit fabric to test the pattern, and 1 yard of “good” fabric for your actual swimsuit. Don’t forget to buy a coordinating swimsuit lining in either white, beige or black!  I can’t stress enough how important the muslin is for 1 piece swimsuits.  In my experience, finding the right length for the swimsuit on your first go is very, very tricky!

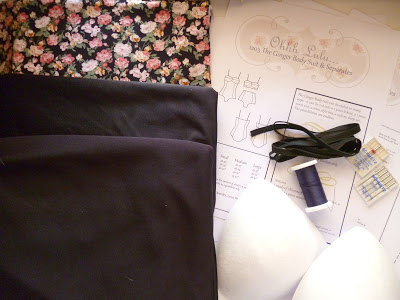
You will also need 2 yards of chlorine-friendly 1/4″ – 3/8″ wide elastic to match your fabric, 1/2 yard of soft elastic for a band under the bust, and sew in swimsuit cups.  Optional are bra strap sliders and clear elastic.

Of course, you will also need a pattern.

To Kick off the Sew Along, I’ll be giving away a free copy of the PDF pattern to TWO Lucky winners! Here’s now to enter:

1. Comment here letting me know what kind of embellishments, fabrics, etc, you’ll be using for your swimsuit.
BONUS ENTRIES!
2. “Like” Ohhh Lulu on Facebook.
3. Tweet about the Sew Along on Twitter


I’ll be choosing two winners on August 1st, and will post my first sew along post on Friday August 3rd!

New patterns coming soooooon!

Uncategorized

I’ve really enjoyed doing the whole sewing pattern thing, so I have decided to team up with Anna from Mrs. Depew Vintage Patterns & Notions to help me digitize a few of my patterns.  We are currently working on bringing you my ruffle thong pattern, which I like because you can use cute quilting cottons and other non stretch fabrics, and no serger is required.

I have been working on this pattern for the swimsuit sew along I am contemplating.  It can be made as a 1 piece, or two piece set and is suitable for knits only.  For the swim suit, it will be fully lined, and will have padded cups for support.

I am going to be opening a NEW shop for my patterns as soon as I get a few more made!

Uncategorized

My parents have been in Wales for almost a week, so we went out and tended to the garden a bit last night. I brought home a bag of potatoes, beans, onions, and peas fresh from the garden – which I am roasting right now.  We stopped by my favourite park and wandered the trails, and kind of got lost…

This morning we woke up early, and headed out to the trails again, this time to a place just on the outskirts of town.  We walked for over an hour, just enjoying the forest.  It’s one of my most favourite things to do.  I got eaten alive by mosquitoes and horse flies, but it was worth it!

My local fabric store was having it’s seasonal clearance sale, so I stocked up on a few things this afternoon, including a drool-worthy chocolate brown stretch satin that is begging to be made into a slip.

When I got home, I worked on a couple orders including this teeny-tiny bodice for a little flower girl.  It’s made of organic cotton jersey, overlaid with antique-white stretch lace.  I smocked the back with elastic to make it extra stretchy.  I understand the little one will be wearing it with a tutu skirt.  I think it turned out pretty darn cute…

Well, potatoes are done.  Time to eat and unwind!

Something Blue

Uncategorized

I’ve been working on getting a few more bridal pieces into the shop.  I’m so embarrassed to admit that I totally forgot about my own wedding lingerie, and was scrambling at the last minute to throw a few things together! I will not let that happen to other brides! 🙂

Last night Dan went out with some friends and I had the house to myself.  It was nice, I finally started watching Downton Abbey, and just chilled with the Cat & Dog.

Yawn…

Uncategorized
I’ve finally decided I need some away-from-my-day-job time, and have requested vacation in August.  I’m really excited to have some time off.  I don’t plan on doing much, just hanging out around the house, maybe a day trip or two, but mostly focusing on new patterns, a couple new designs, and relaxing a little.
My parents boarded a flight to Wales on Monday Night, for a two week vacation and to visit my Aunt. I am so excited for them! This is their first real trip in ages.  I can’t wait until they get back so I can hear all about it.  I, myself, am dying to take the trip out there so maybe they will inspire me to start saving my pennies!
Last weekend I managed to get alot of sewing done.  I also prepared a couple of things to send to a stylist for a photoshoot at the end of July. This is something I’d really like to do a whole lot more of… so, if you are a stylist, and are ever looking for lingerie, send me an email 🙂
Today, I am off to work.  I feel like I’ve really had to drag myself there every day.  Unfortunately, Dan’s job has taken a bit of a downturn, so we are a little more dependant on my day-job income than we would like.  I’m going to see how business goes over the winter, then think about seriously taking the leap!