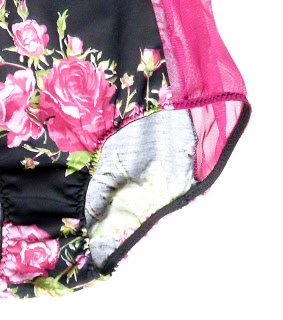
My Etsy Shop lives again. Ugh I worked myself into a real state… a migraine state. Sore neck, sore shoulders, sore head… but totally worth it to have some new goodies listed.
 |
| Here |
 |
| Here |
 |
| Here |
My Etsy Shop lives again. Ugh I worked myself into a real state… a migraine state. Sore neck, sore shoulders, sore head… but totally worth it to have some new goodies listed.
 |
| Here |
 |
| Here |
 |
| Here |
THIS GIVE AWAY IS NOW CLOSED! Congratulations Melody – You are the winner!
As I was saying, I finished up my first pattern, and posted it for sale Here and on Etsy. I also started 2 bra’s and a bikini-style knicker pattern. I’m going to be finishing off the Ooh La La Pin Up Sew Along with my Betty High Waisted Panties Pattern, if you want to sew a long.
Aside from digitizing, I sewed 5 pairs of knickers, and 1 bra and am hoping to have lots of new items in my shop soon. I’ve been so busy with the house, family, work… Poor Ohhh Lulu has really taken a hit.
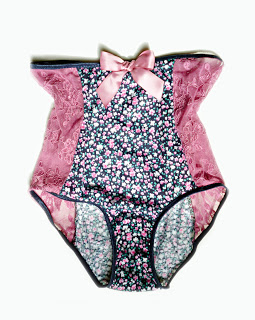
I’m super behind where I hoped to be, but here is a sneak peek at my new pattern collection. I am working on two Bra’s to go with. I cut and sewed all 4 sizes of the knickers today and they go together nicely!
Believe it or not, my sister in law found this in the garbage. Someone had just decided to throw it out with the trash. The lever, and all of the parts (including spare needles and bobbins) were just sitting inside the box (which was locked and had to be picked open.
Possibly the coolest thing is all of the attachments. There is a rolled hem foot, zipper foot, and a bunch of other crazy attachments that I’m not really sure what they do. Luckily, it is pretty easy to get information about these kinds of machines. Neat, huh?
I am hoping to have my shop re-stocked in about 2 weeks with more ready made and made to order goodies, including the new high-waisted style above. I am also hoping to have a few pdf patterns as well!
I sewed my bias tape into a long tube (1/4″ seam allowance), turned it right side out, and pressed it flat. I then cut it into to strips about 11″ long.
I looped my bias straps around my o-rings, and did the same with my strap elastic and sliders (looping around the middle bar). I tacked them down with a narrow zig-zag stitch.
Next, I fed my strap elastic through my o-ring, and back down, weaving it into my slider.
… making an adjustable strap! Don’t have sliders? Do you have an old beat-up bra laying around? Why not harvest it for parts? When I was first learning how to make lingerie, I tore apart all my old, unwearable bras, and used the parts to practice.
I then tacked it into place onto my bra…. And That is it!
To complete the our ensemble, I am working ever-so-hard on a digital pattern of my NEW “Betty” High-Waist Panties… Stay tuned for more info! I am hoping to have it ready to go within the week.
The eye side, I basted right sides facing, to my bra.
I folded it back, and stitched it down with two rows of stitching. I did this to leave a small “flap” to cover the gap between the hooks and eyes.
Next, I hand stitched my hook side down, just like you would with bias tape. (look – I changed nail polish!)
Voila! It’s that easy!
And it looks neat and tidy on the inside.
Our side, and side back seams will be finished with a stitched down french, or flatfelled seam, just like we did on the side front seam. You could also zig-zag or serge your seams.
To finish the upper and lower edge of the bra, I am using a 1/2″ picot edged lingerie elastic. Apply the picot elastic just like we did the bra elastic. Baste the elastic on using a wide narrow zig-zag stitch, pulling gently as you go. Your stitching line should be about 1/2″ in from the raw edge, and the picot edge of your elastic should be facing in towards the body of the garment.
 |
|
Your basted on elastic should pull the fabric 1-2″ shorter.
|
Folding your elastic under, zig-zag your elastic down towards the inside of the garment, pulling your fabric flat as you go.
Add your elastic around all raw edges of the corset, except for the center back seam where we will be adding hook and eye tape.
The inside of your corset should be nicely finished with no raw edges, and the outside trimmed with your delicate picot trimming!
Just a couple of steps left to go – adding the hooks and eyes, straps, and embellishments.
Who wants to sew a pair of panties after?
Ah… my almost weekly Monday Morning Post.
After having 3 & 4 day weekends while we were finishing up fixing up the house, going back to 2 day weekends is agony. By the time I’ve finished cleaning, a bit of socializing (my best friend came up for a visit from the city), unwinding, it’s time to go back to work again. I really feel like Ohhh Lulu has gone to the wayside a bit…
I’ve also taken up yoga, which is taking up my Monday & Wednesday nights. This, I am happy about. Working more… not so happy. But that’s life, right? Yoga has been great. I am doing Bikram once a week; every week I feel like I get a bit better, and I definitely have more energy to fit in more work! ( haha) Seriously though, I am so grateful for my life right now; a job that I mostly enjoy, the free time to slowly nurture a small business…
This weekend, I also snuck in some sewing for myself. I’m working on a few pieces for my personal spring/summer wardrobe, and this is one: a Raglan Sleeve 3/4 sleeve tee which I am actually wearing today.
I added a lace heart to the back for a little interest. When I wear my hair down, it gets covered completely, but when I wear it up in a bun, like today, it creates a little surprise in the back. I really like it, and it was a breeze to sew! Using the same basic pattern, I am making a cardigan out of a lacey knitted fabric.