Browsing Category

Uncategorized

Welcome Summer!

Uncategorized

I’d like to start this post with some random, anxious screaming! Ahhh!

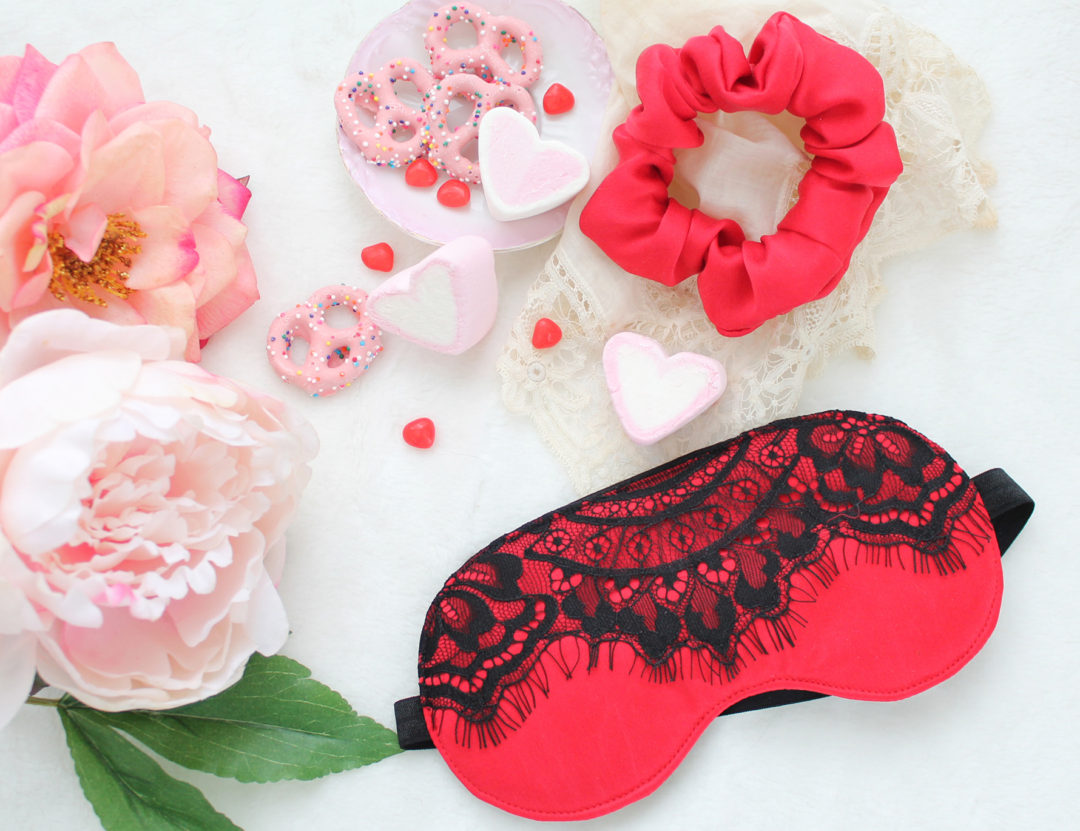
I can’t even believe how fast the last few weeks have gone by. I have 9 more lingerie orders to cut, sew and ship before baby arrives. Silk scrunchies and sleep masks are still on the go as usual, and I’ve even been adding a few new colours and prints.

We had a bit of a scare on Sunday – nothing serious but it seemed like the baby was coming much sooner than anticipated. My whole “plan” was to finish work by the end of July, giving me 10 days or so to finish up loose ends around the house. Well, as we all know life doesn’t always go according to plan. I ended up spending the afternoon at the hospital with contractions coming every 3-7 minutes! You can breathe a sigh of relief though. Baby decided to stay put… for now.

That little scare did give me the kick in the butt I needed to finish up a few projects, but now as the week is coming to a close I’m feeling pretty drained. On the bright side, basically everything I need for the baby’s arrival is done. And that really is the most important thing.

This weekend I’m running a sewing pattern sale here and on Etsy. If you’re shopping here, use coupon code Solstice20 to get 20% off your order. If you’re shopping on Etsy, no code is required, everything is already marked down!

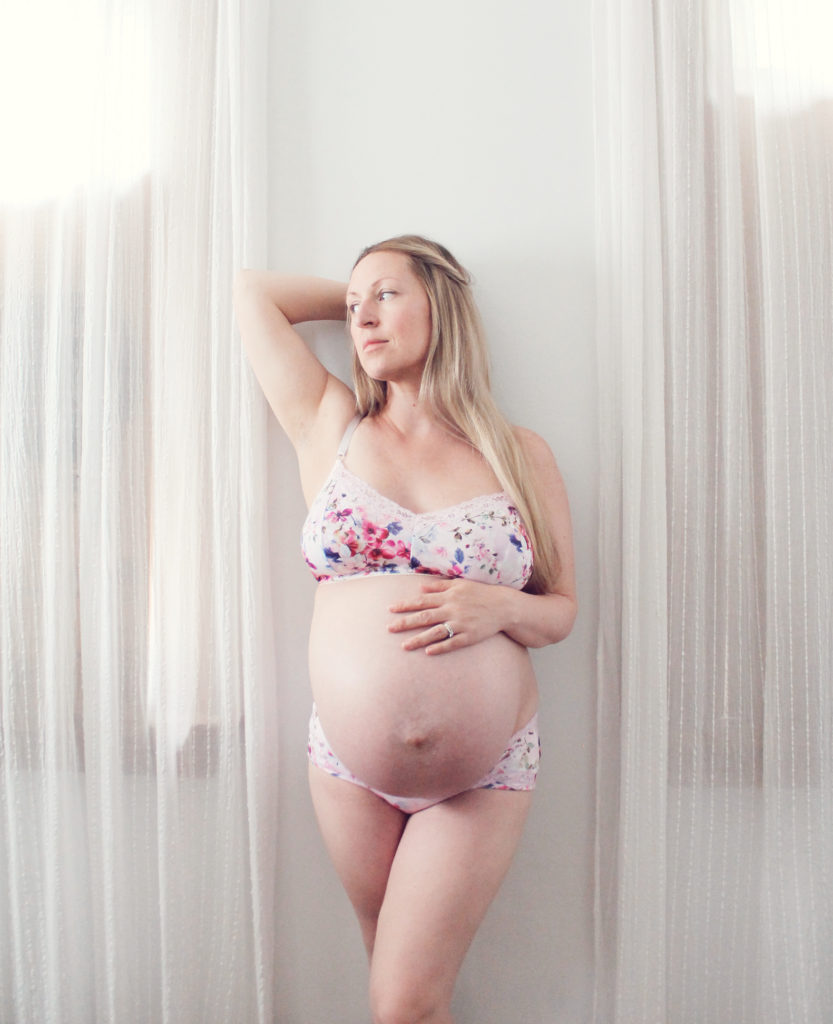
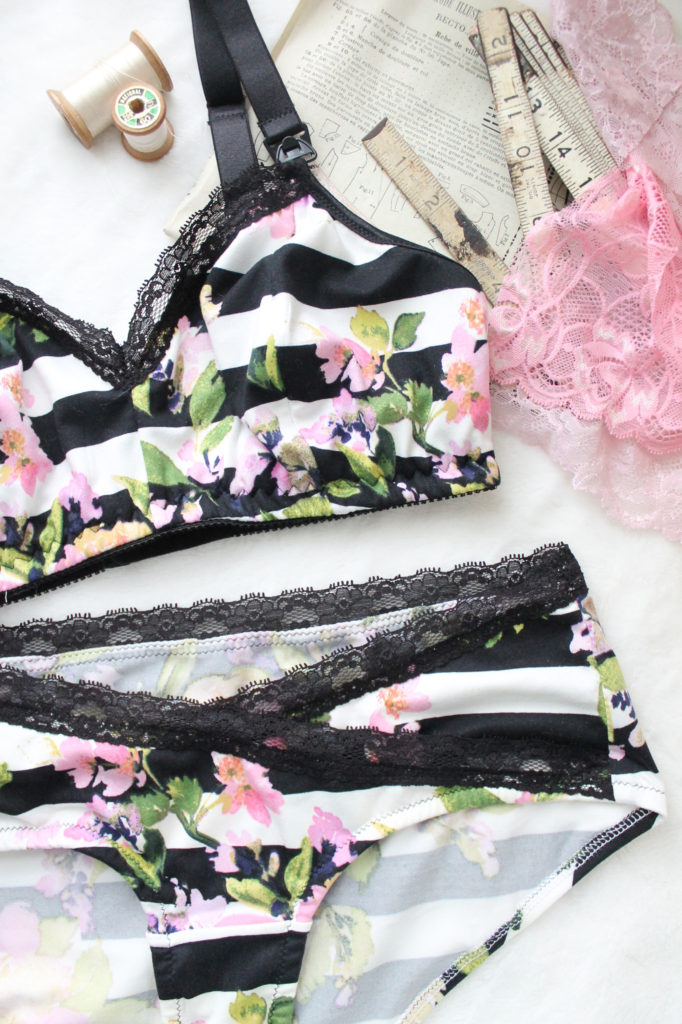
I’m also preparing a couple of new patterns and add-ons, including a nursing bra add-on for the Jasmine Bra and some super comfy faux-wrap maternity panties. I say they are maternity” but in reality they will fit any body state. They just have a super low rise front to accomodate a growing bump. As you can see from my photos, ain’t nothing going over this bump.

Maternity Leave Dates & Sale

Uncategorized

Well, it’s getting to be that time… I’m gearing down for Maternity Leave! I’m not going away entirely. I will continue offering sleep masks and scrunchies until most likely the end of June. Sewing Pattern sales will remain unchanged. The biggest difference is I will stop regularly taking most orders beginning on May 9th. If I happen to have some time free up, I’ll pick up any last minute orders, but that is my plan so far!

I’ve decided to run one last lingerie sale before I go on leave. Right now, all underwear is 25% off! So it’s a great time to stock up on the most comfy and pretty panties you can find!

When you run your own business, taking a leave can feel pretty stressful… It’s so hard to put your business on hold for any amount of time. But with this being baby number two I’m feeling a little more relaxed. And the fact of life is, people have babies and need time to take care of themselves and those little ones after birth. I definitely feel like I’m going into this one a little more balanced. That being said, I’m already thinking of ways to stay active within my lingerie shop without putting too much work on my shoulders. I’m lucky enough to do something I love and that truly is a passion, so I can’t stay away too long.

On a more personal front, this has been a very exhausting few months for me, so in a way I’m actually looking forward to a bit of time away from work. My dad is finally getting out of the hospital in a little over a week. He’s made huge improvements with physiotherapy. I am so incredibly grateful for the Canadian health care system. Everything has just been taken care of without us having to worry any more than we already were! And the staff at the hospital have just been amazing. As terrible as it is having someone you love be in the hospital for such a long time, having caring, supporting healthcare workers around you makes all of the difference. I’m not sure what I’ll do with all of my time when dad gets out of the hospital… maybe I’ll finally get around to finishing up a few patterns I’ve been working on!

I’ve been really lucky with my last two pregnancies. I haven’t had any major issues come up, but I have found this pregnancy to be just generally uncomfortable and exhausting. I have been slightly anemic which I have found really impacted my energy levels. I’ve never been one to nap, but I found myself passing out on the couch at all hours of the day. My back and hips ache and I’m looking forward to having the baby home and feeling a little more in control of my body again!

I did have one little scare this pregnancy. I’ve been volunteering to read with children, and came into contact with fifth disease. Fifth disease is a pretty common, normally harmless childhood illness, but when you are pregnant there is a slight chance it can harm an unborn baby. Of course this sent my anxiety through the roof. Luckily, it doesn’t look like I ever caught it (though I did have a nasty cold around the time I was exposed), but I’m also not immune to it, so I’ve decided to cut back on the volunteering for the time being. It’s too bad because I really enjoyed it! But my anxiety just can’t handle even the slightest risk right now. I’m too close to the finish line!

Moving along

Uncategorized

I can’t remember where I last left off.

My dad is still in the ICU. He is finally working towards getting the tracheostomy removed and just yesterday regained the ability to speak! He can move a little more and is getting stronger day by day. He still has a long way to go, but has made so many steps forward. A few days ago he apparently told his nurse he’s ready to go home and be a full-time grandpa. And I would like that very much.

I’ve been finding it pretty hard to focus. I try to get into the hospital every day, or at least every other day. It’s tough because I can’t bring Isabel in with me for the time being so I have to find someone to watch her so I can go for a visit. I find that once I get home from the hospital I just feel exhausted. The emotional toll seeing a loved one so sick takes on you is really had to explain.

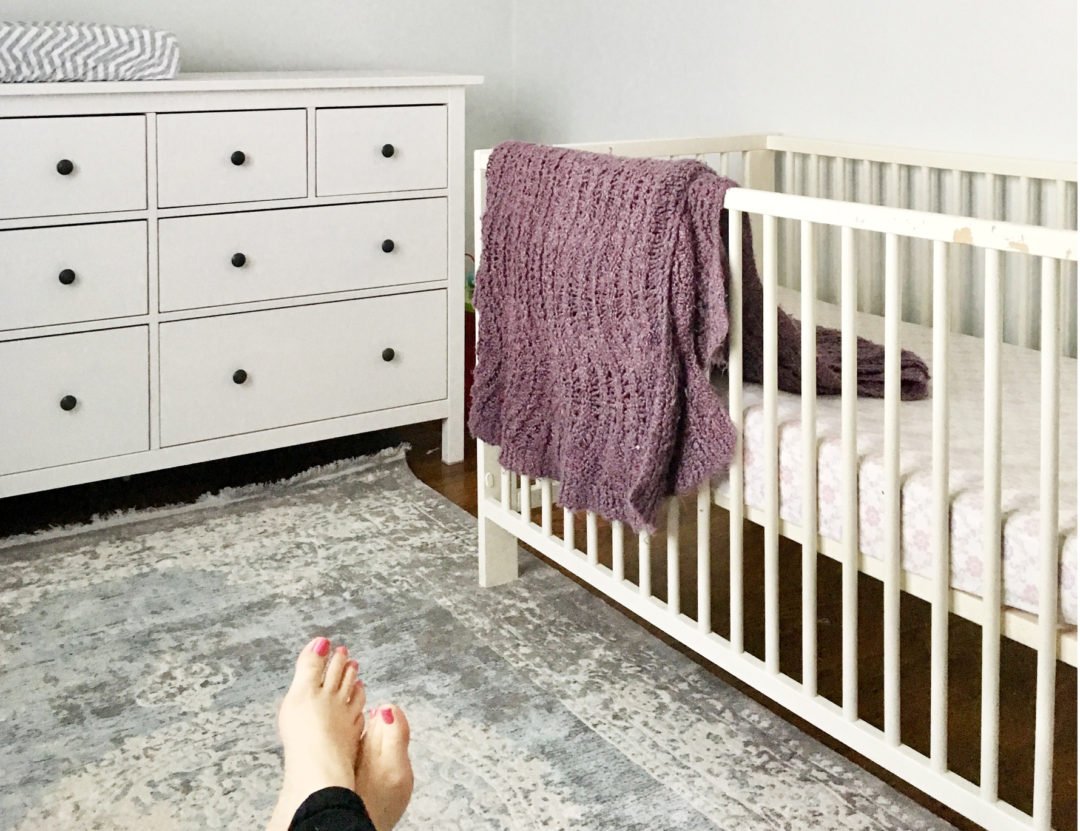
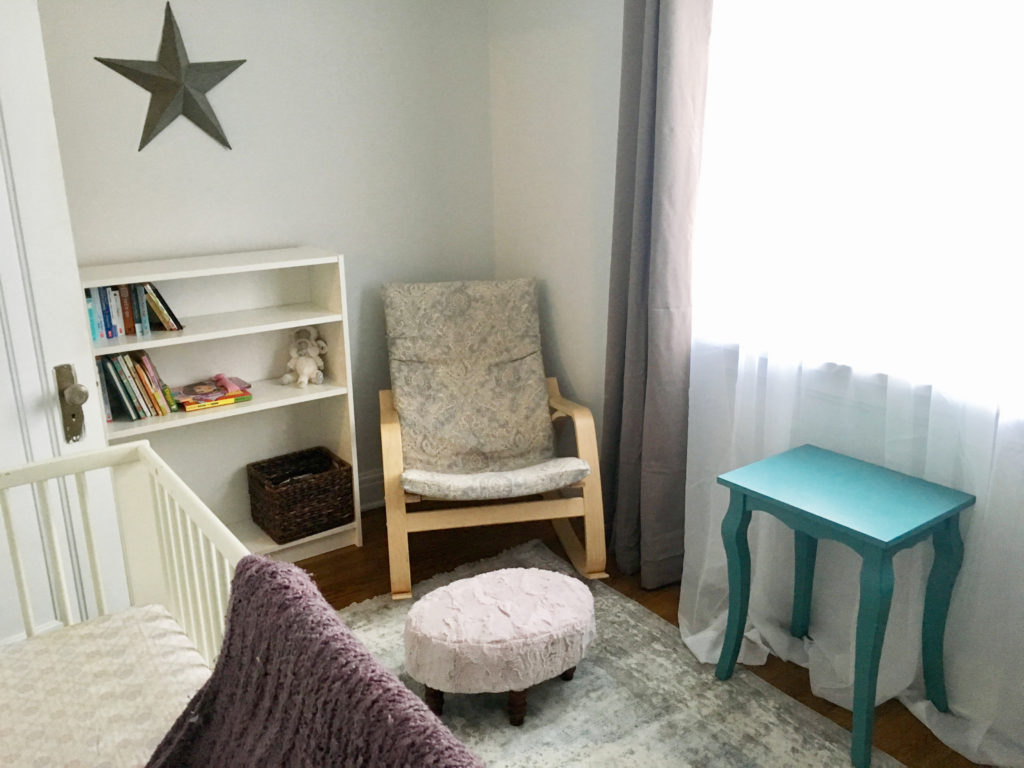
I’ve been trying to focus my energy on positive things, like preparing for the baby. We found out we are having a GIRL! I am super excited and have already started sorting through Isabel’s old clothes. This last weekend we got the nursery put together which was fun to do. We still need some finishing touches but all the necessities are in place. The room itself is really small and doesn’t have a closet, but we’ve made it work nicely I think! Plus, what does a baby really need in a room anyway? She’ll be in our room for the most part to begin with… I just enjoy an excuse to decorate a room.

One fun project I took on was recovering our old ikea Poang rocking chair cushion as well as my grandma’s old footstool, which I recovered in pink Minky! I have to admit, I suck at home decor sewing, so I did this as simply and quickly as I could. I had a few people asking if I could share a tutorial on how I did the Poang, so I will do that below!

Fair warning, there are no real measurements. I recommend taking your actual Poang chair cushion in the cover and using it as a template.

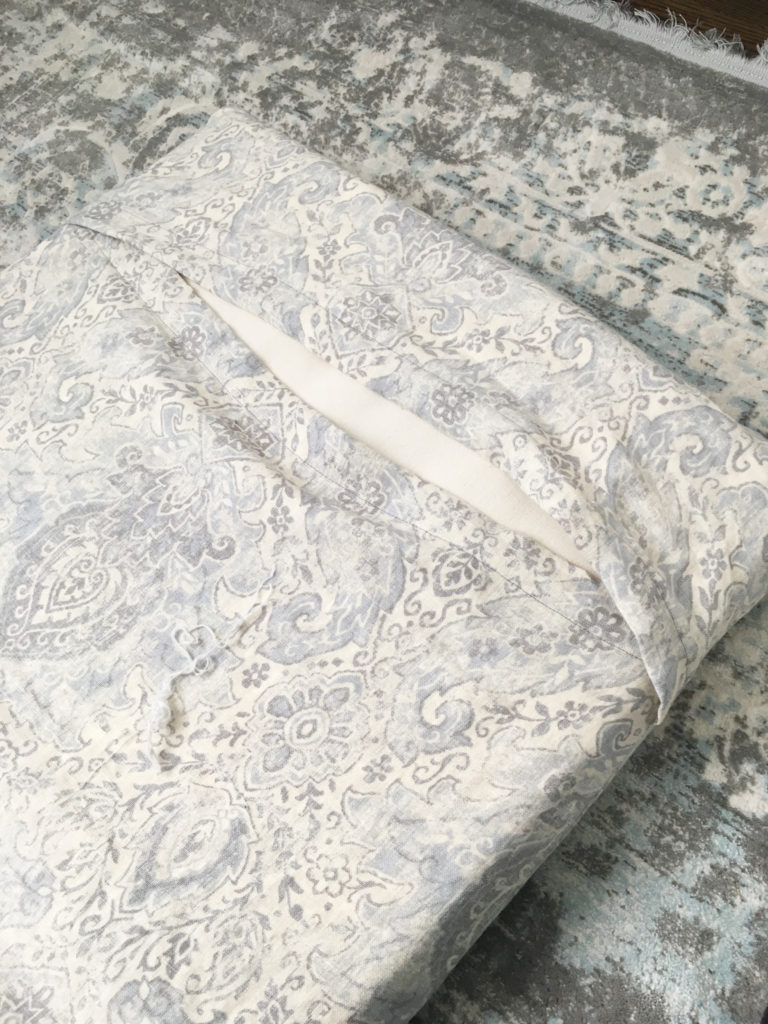
For my cover, I made a simple envelope style covering. This meant I didn’t need to bother with zippers or buttonholes, but you could just as easily add some buttons or ties to keep it closed. I also did not add any velcro to the back, like you will see on your original Ikea cover. Again, this is simple to add. I was just lazy.

How to make a super simple envelope cover for an Ikea Poang chair

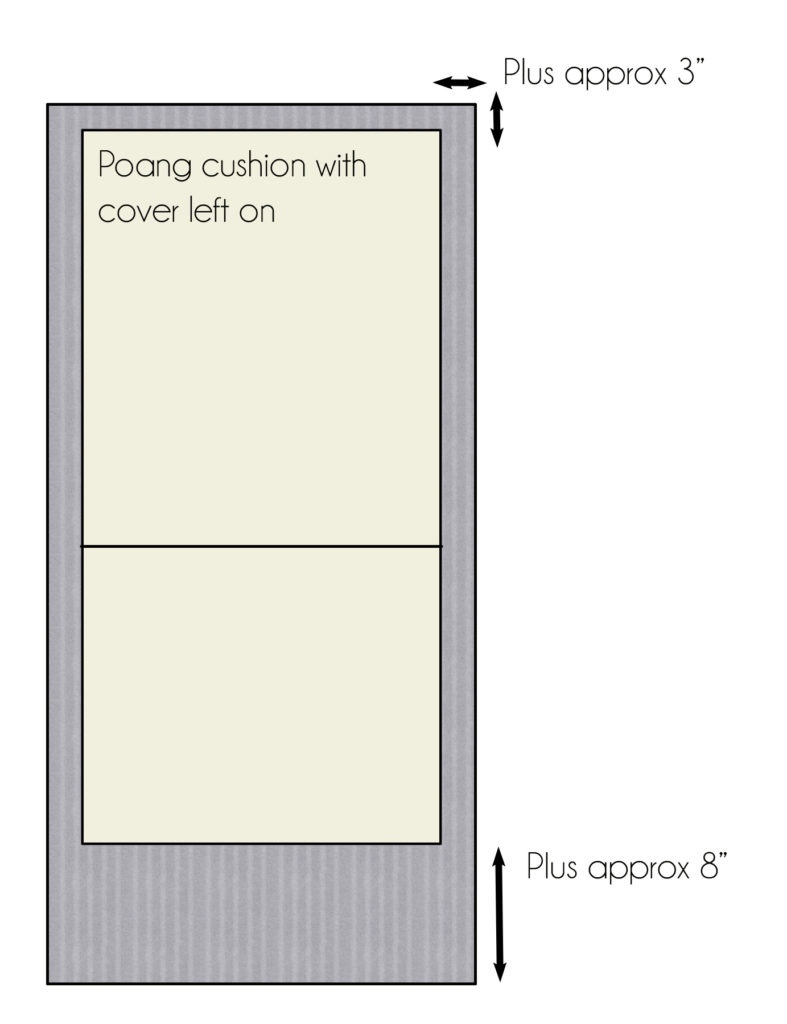
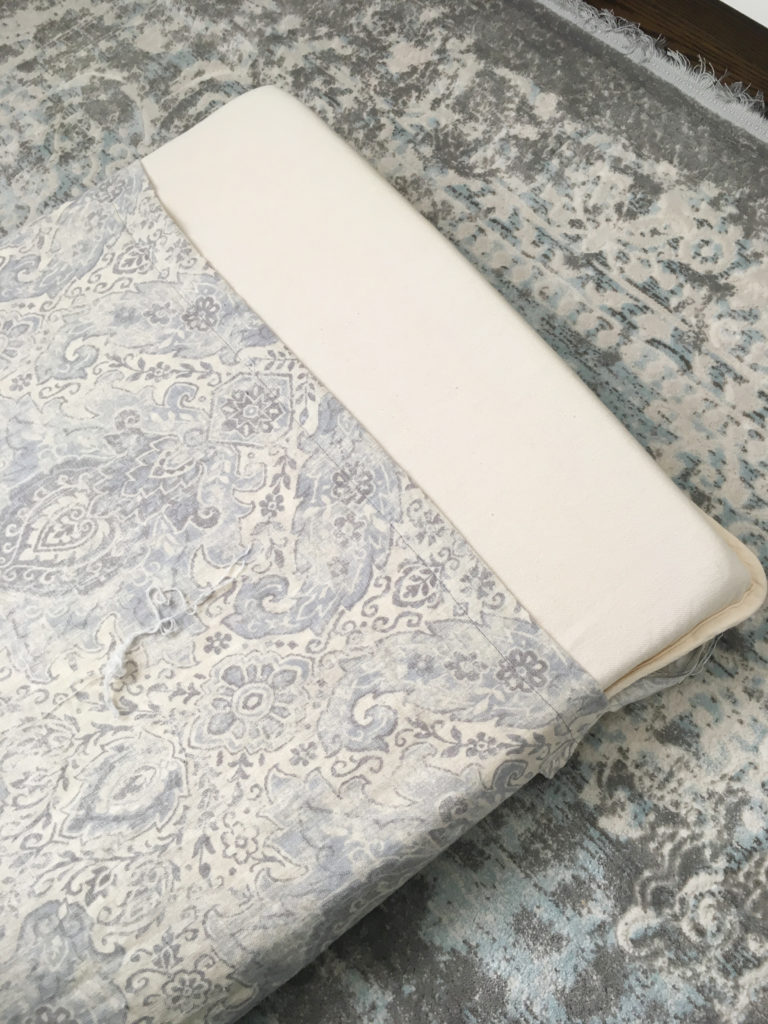
Begin by cutting a piece of fabric that extends beyond the bottom of the cushion by about 8″. This piece gets folded up and hemmed. The rest of the sides should be about 3″ larger than the cushion itself.

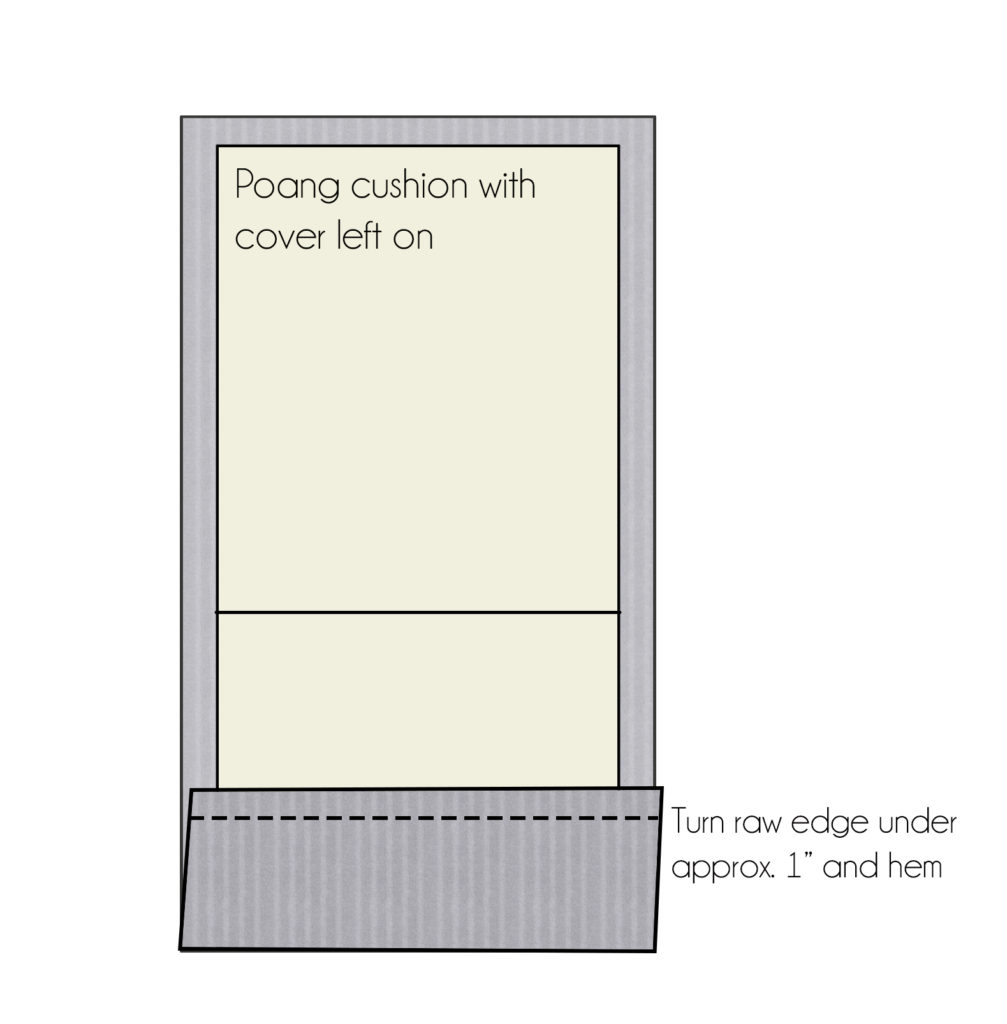
Turn the raw edge of the 8″ extension under by about 1″ and stitch in place.

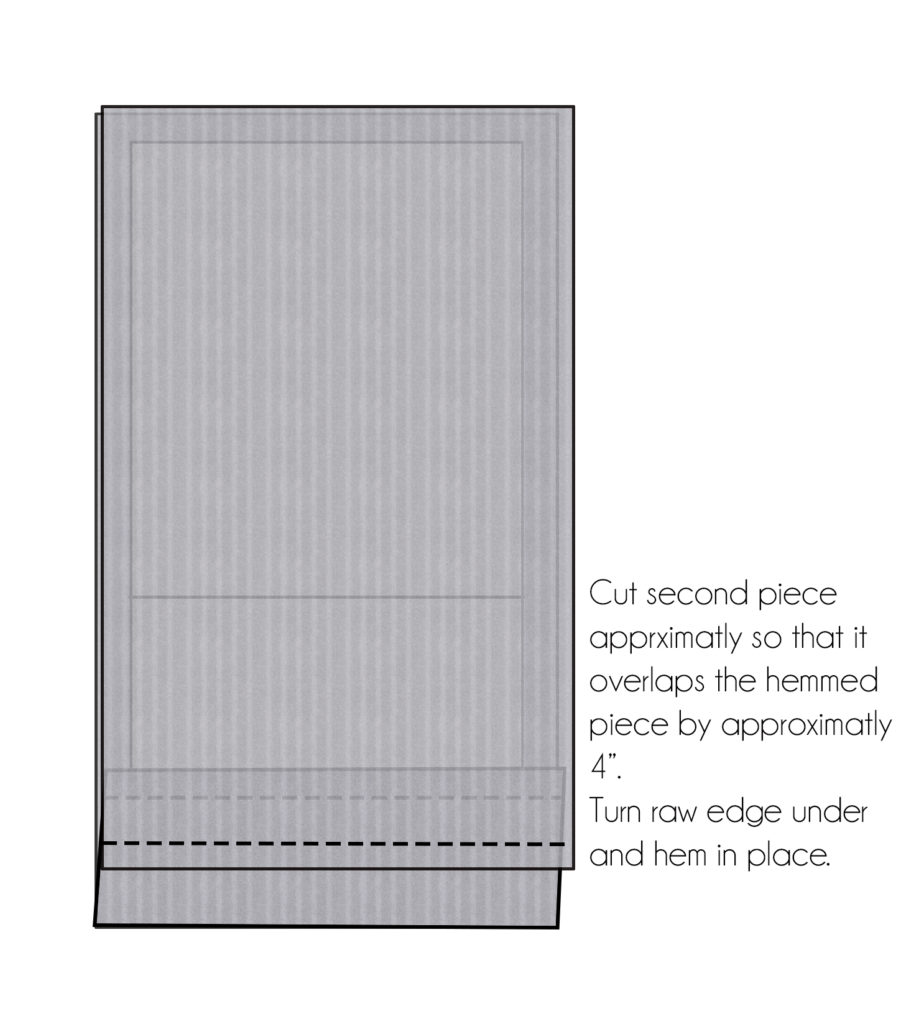
Cut a second piece of fabric out so that it extends beyond the hemmed edge by about 4″. This overlap creates the envelope opening. Turn the raw edge under as you did in the previous step to create a hemmed edge.

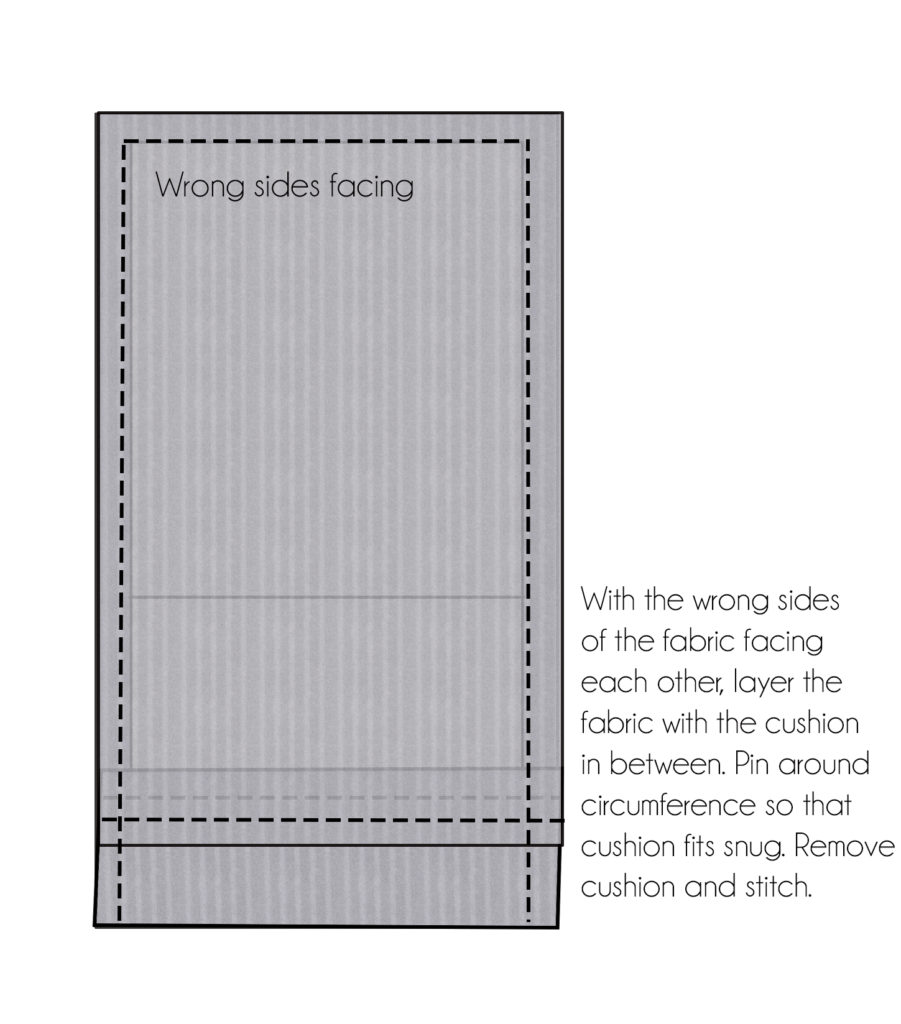
Next, with the wrong sides of the fabric facing out, pin the fabric snugly around the cushion, making sure you have an overlap at your envelope opening. Remove the cushion carefully and stitch in place using your pins as a guide.

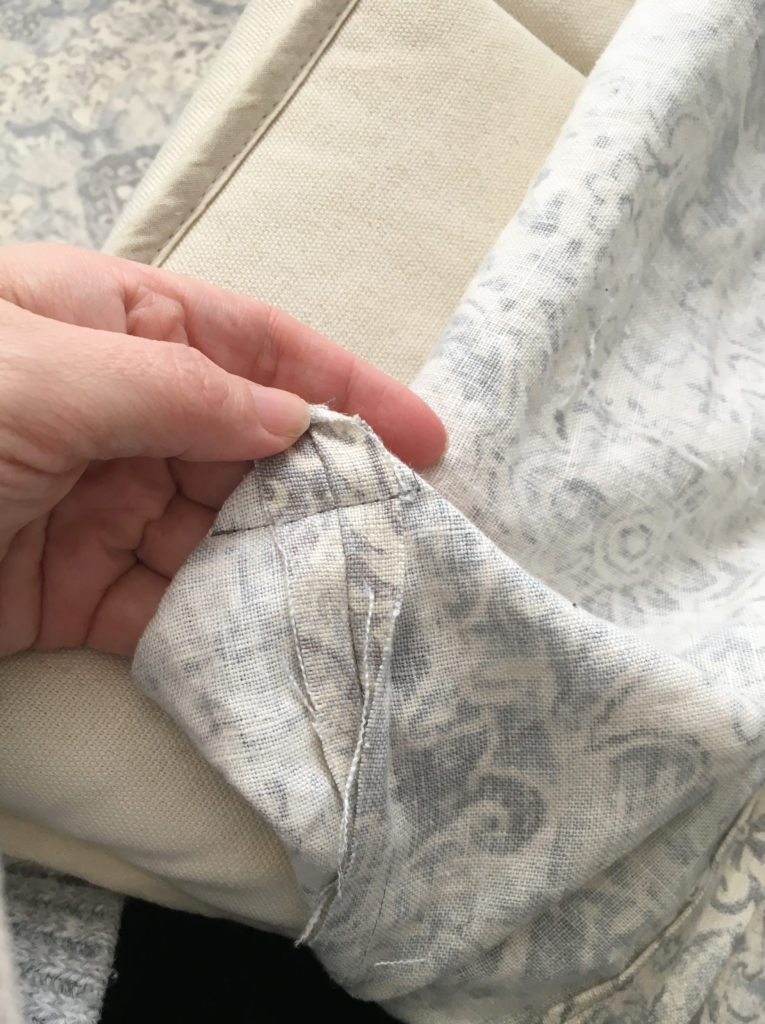
I wanted my corners to look a little neater, so I did a quick box corner. I took the corners of the cover, and folded them so that the seam lines run at a 45 degree angle to the folded edge. Then I stitched a straight line at a 90 degree angle to the seam, approximately 1″ in from the corner.

Flip it right side out and wiggle the original cushion inside. I have to admit, I didn’t measure a single thing when I made this. I just laid out my fabric, threw the cushion on top and winged it! It can be a little finicky to get the cushion in, but I managed on my own.

We also repainted our upstairs hallway a few weeks ago kind of on a whim. I mean, it’s been on our house to-do list for ages, but we finally sprung into action. It had previously been painted a dark sage green which wasn’t terrible, but for a hallway with no windows, it was very, very dark, and the paint was in rough shape. So, like the rest of our house we painted it white. I finally got Dan to hang up some art for me. I purchased a few prints by artists Jessica Roux and Amy Rose that happen to coordinate just perfectly with a large winter-forest painting my mother in law made. I feel happy every morning when I wake up and walk down the hall.

This house has been a real challenge, between leaks and floods and the other unexpected things that come with owning an old house, but I do love it’s character. I feel really lucky to live here and decorating this old beauty has been a dream come true. It’s a great distraction right now.

My growing belly and a dramatic 4 year old who is pretty much always in pyjamas.

Treat Yourself this Valentine’s Day

Uncategorized

Valentine’s Day always sneaks up on me. I always say, “I’m going to do something this Valentine’s Day! A big pattern release, a give away, a sew along…” But it is also the busiest time of year for Made to Order Lingerie and I never seem to have the time…

But, I wanted to do something. After all, today is a day made for pretty lingerie. I like to think of Valentine’s Day as a day of self-care… and that’s kind of how I feel about lingerie at this time in my life. Lingerie that is beautiful and comfortable makes me feel great, whether anyone else knows I’m wearing it or not.

So, I’m having a Valentine’s Day sale. Sewing Patterns and Lingerie are all 15% off, plus get free shipping on Sleep Masks and Hair Accessories! The sale will be running throughout the weekend, so those of you who have a long weekend (Family Day here in Ontario) can take some self-care time to do some sewing or shopping. There is no need to use a coupon code if you are shopping on Etsy, but if you are shopping here, use coupon code LoveYou15 at checkout.

With all that has been happening around me these last few weeks, taking some time for me has been extra important. My dad has finally started to make some improvements and at least no longer has a fever and his sedation is being lowered day by day. He will still have a long way to go, but these are all positive signs.

Self-Care can take so many different forms. I’m a “do-er.” I have a hard time sitting still. This past weekend we decided to paint our stairwell and upstairs hallway, which was long overdue for a fresh coat of paint. Like most of our house, we painted it white to brighten and freshen things up. It’s nice to have a project that isn’t work related to let my mind wander on. I ordered a nice runner and am contemplating artwork and photo arrangements for the walls. It always feels good for me to do something productive like that.

Sewing is also a big form of self-care for me despite the fact that it’s also my job. Creating in general makes me feel good, but sewing is the area where I excel the most. Isabel had a few snow days this week, but luckily Dan was able to take some time off to entertain her. I got ahead of orders again and sewed a few new pieces. It felt good.

Otherwise, I’ve been spending my time hanging out with Isabel and my pups, Marie-Kondoing my house, and playing Stardew Valley. Oh, and shovelling snow. Lots and lots of snow!

I am eagerly anticipating my 20 week ultrasound at the end of the month. I really want to know whether we are having a boy or a girl so I can get the room done. Funny enough, I generally gravitate towards a more simple, neutral design so I’m not sure why it matters so much, but I just want to know.

I’m feeling lots of little kicks, punches and summersaults which is always an amazing and reassuring feeling at this stage. It is crazy how different pregnancies can be. When I was pregnant with Isabel, for the most part I felt great the whole time! I had some pretty bad sciatica but overall felt great. This time around I felt so sick the first three months and seem to have had a resurgence of sickness this week. But, I’m staying active and feel good for the most part, so I am lucky. I took the picture below at 16 weeks, and I’m already feeling quite a bit bigger.

Everything happens at once

Uncategorized

Well, it happened! I’m pregnant and Isabel is a very excited soon-to-be big sister. Baby #2 is due in July, which means I’ll be taking a bit of time off this summer. With Isabel, I was really eager to get back to work, but as last time, I’m going to play my maternity leave by ear. I’m fortunate enough to have that ability.

This pregnancy has been very different than when I was pregnant with Isabel. The first 3 months were very rough and I felt very sick and tired. On top of work being very busy, it was a very trying time… but I’m through the worst of it now and am back to feeling like a regular, albeit achy, human again.

I sometimes I feel apprehensive talking about pregnancy as I know it can be a really triggering subject for anyone who has experienced pregnancy loss or infertility. We lost a baby to a missed miscarriage before Isabel, and I have PCOS which has made it more difficult to get pregnant, but here we are. If you are struggling, I am sorry. I’m always open to lending a listening ear. After my loss, I needed to hide all baby-related news from my social media feed, so I can understand that feeling.

Anyway, that’s my happy news.

Of course, as life goes, a whole bunch of other shit has hit the fan in the meantime. My dad was admitted to the hospital two weeks ago with a severe case of influenza. He has spent the last two weeks sedated and on a ventilator. Today he started breathing on his own again. They suspect he may have COPD in addition to the hell influenza inflicts on a body, but I still want to take this time to urge you to please get a flu shot. Vaccination is something I’m really truly passionate about. It may sound like a weird passion, but I remember hearing my grandma talk about the Spanish Flu epidemic, and measles and the fear of polio… and we are so luck to have these vaccines. Seeing what the flu has done to my dad has really been an eye opener for me. In Canada, it is free and you can even get it from a pharmacist. Isabel was able to get her flu vaccine through nasal mist at our doctors office. No needle required!

Ok, that’s the end of my public service announcement.

I’m not entirely sure if I’ve talked about it here before, but my brother is an addict. He has been for years. He has had some good periods, where he was clean and stable and I’ve felt so incredibly proud of him, but right now is not one of those times. I have been hesitant to bring it up for privacy reasons, but I feel like talking about it is important. I know we are not the only family dealing with this. And if we can talk about it, maybe it will make it easier to get help.

My brother lives with my parents, and although I have gotten to the place in our relationship where I can detach from him with love when he is not well, it’s not as easy for my mom and dad… The hard part about being the sibling of an addict is that you get to sit back and helplessly watch your entire family suffer. Your sibling destroys their own life piece by piece through misguided judgement, and your parents lives crumble as well as they try to pick up the pieces. Isabel misses out on spending more time with her grandparents because “home” is a volatile place when a drug user is around, and she misses out on having a really awesome uncle. It’s a pain that just lingers in the back of your conscience and spreads it’s roots through your entire families life.

Addiction inevitably leads to brushes with the law, of which my brother has had many. He’s working through the court system as we speak. I know this is so hard on my parents. I see how it wears them down physically, emotionally, financially. They are not at the point where they have been able to detach from his problems, and that makes me sad. Sad and frustrated. As insidious as the drugs themselves are, it’s also pretty easy to become addicted to “helping” the addict.

One of the hardest things about living with addiction is the constant fear of the unknown. What bad news will the next phone call bring? You begin to constantly be waiting for the next terrible thing that’s lurking just behind the corner. You are constantly on edge.

I’m hoping that this health scare with my dad will help everyone reevaluate what is important. I’m not sure there is help for my brother at this point, but I do hope my parents can realize that my brothers problems do not have to be their problems. We can support and love my brother when he is ready to be well, but we can’t allow addiction to tear us apart too. If and when he does want help, he will need us to be strong, and as it’s going now, my parents won’t last much longer. I seriously worry that the stress will kill them.

Living in a small town, it’s hard to know where to turn to get help. I’m considering going to Al-anon. It’s taken me a long time but I’ve realized that I can’t help him. I can only try to heal myself.

This has really been weighing on my family. I feel guilty bringing it up, but I also feel like it’s really overshadowed my pregnancy, which should be a joyous time for all of us. I don’t put blame on anyone and am empathetic, but it’s just another example of how addiction can take over the lives of everyone around the addict.

So, I’m going to end this on a happy note, because that is where I want to be. A lot of positive things are happening in my life. I sometimes (ok, often) feel guilty, or like I need to downplay my successes because of the situation with my brother, but I’m done doing that. I’ve worked hard for the good things I have in life. Lingerie sales are booming. In fact, they were up by nearly 200% this holiday season! That means I have been one very busy woman. And a busy lingerie-maker is a happy (and tired) lingerie-maker. I’m also working on a maternity/nursing bra and panty pattern (I’m wearing the undies right now!) and have a few other things up my sleeve. And, I am ridiculously excited to find out whether we will be having a boy or a girl baby for the most frivolous reason… I want to do some baby sewing and get the nursery ready! So, feel free to spam me with your favourite baby sewing projects. I really want to make a few swaddle blankets and a baby nest as well as a snuggly minky blanket.

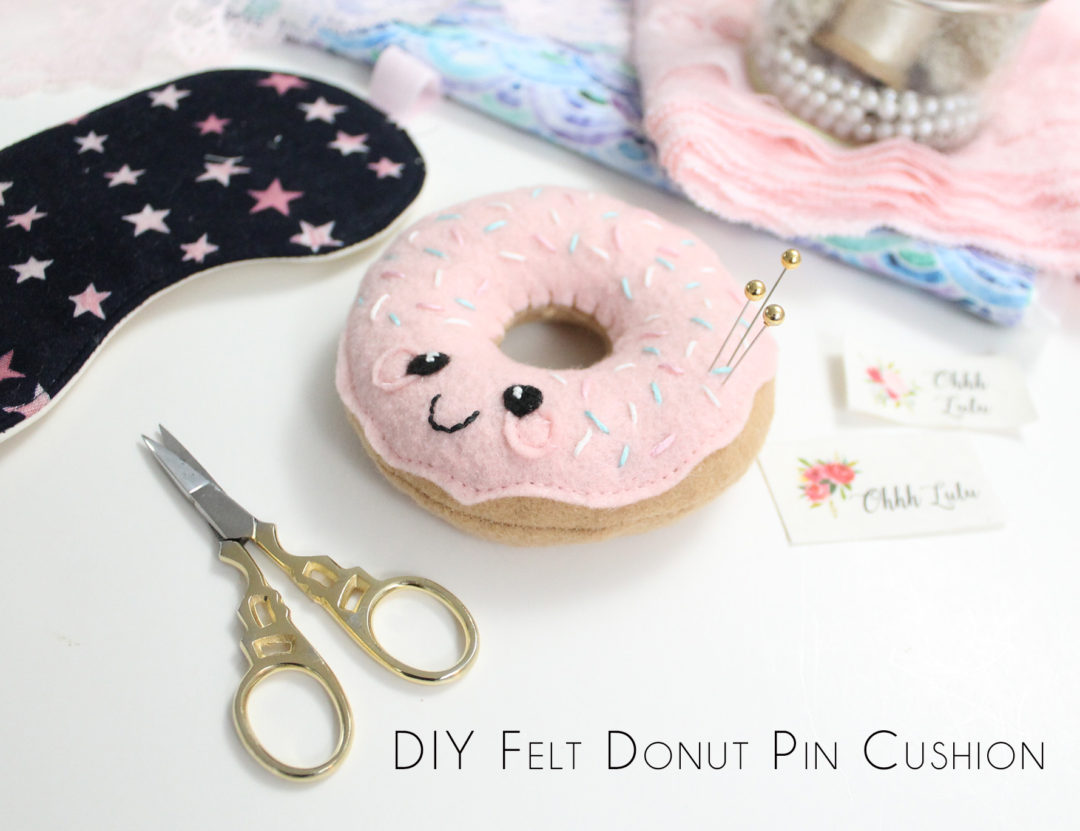
Sew Your Own Felt Donut Pin Cushion

Tutorial, Uncategorized

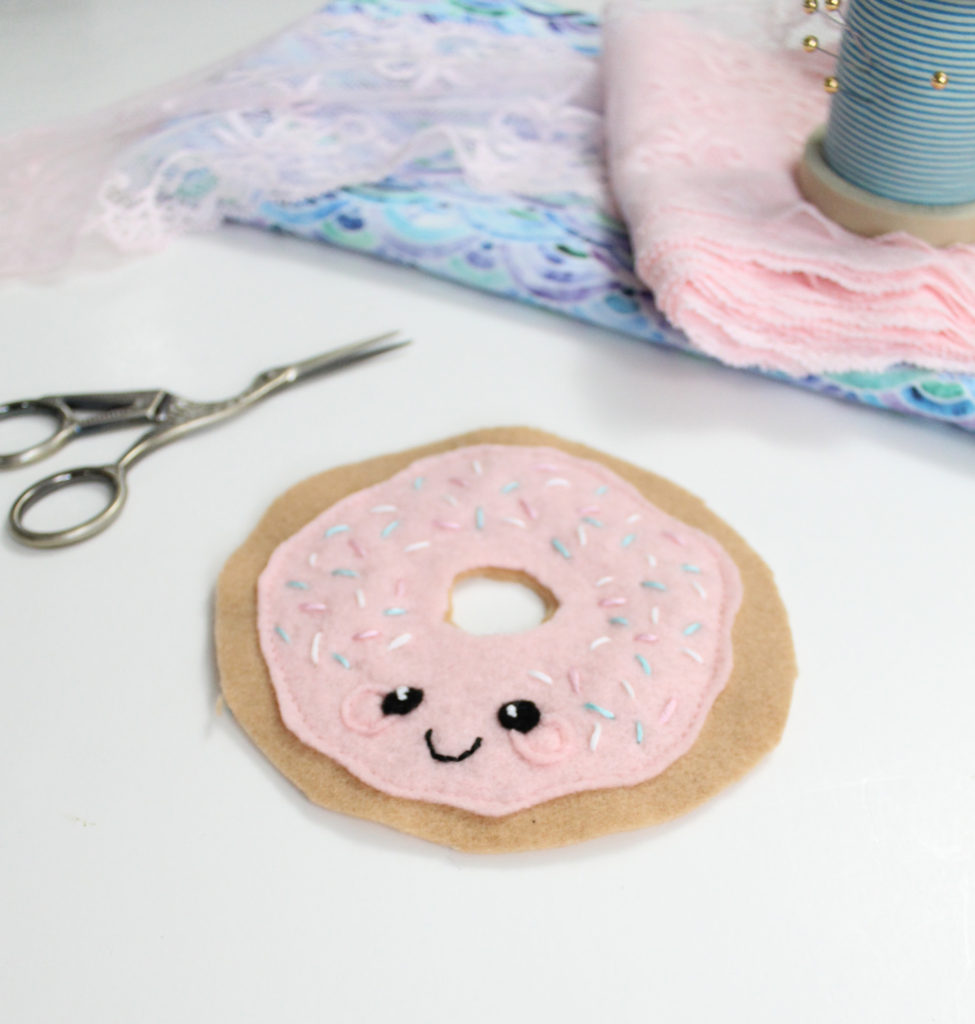
I made this happy little donut a couple of years ago around Valentines Day. Isabel was still in daycare and I wanted to make a little stuffy for each of her friends. So, I made some cute and cuddly donuts out of felt! They were so adorable and fun to make that I snuck in an extra one for myself to use as a pin cushion. I get so many comments and questions about this little guy whenever I post photos of him, so I am very excited to be offering a step-by-step tutorial and printable template today.

What You’ll Need

The supplies required are simple to find at most craft shops, or if you’re a craft-supply hoarder like me, you may have everything you need already in your stash. You can use acrylic craft felt, or if you can find it, wool felt is even nicer to work with and creates a bit of a finer finish. I particularly like the wool blend felt from Dandelion Fabrics. You will need to know how to do some basic embroidery stitches. If you’re not familiar with embroidery, don’t worry, I’ve included links to some helpful videos. And if all else fails, just wing it!

Here’s your shopping list:

  • 1 (8.5″x11″) square of brown or tan felt
  • 1 square of coloured felt for “frosting”
  • 1 small scrap of black felt for eyes
  • Polyester batting or other stuffing material (sawdust, fine sand, ground nut shells can all be used to stuff pin cushions)
  • Embroidery threads in black, white, brown and 3 colours for sprinkles
  • Donut template 

Method

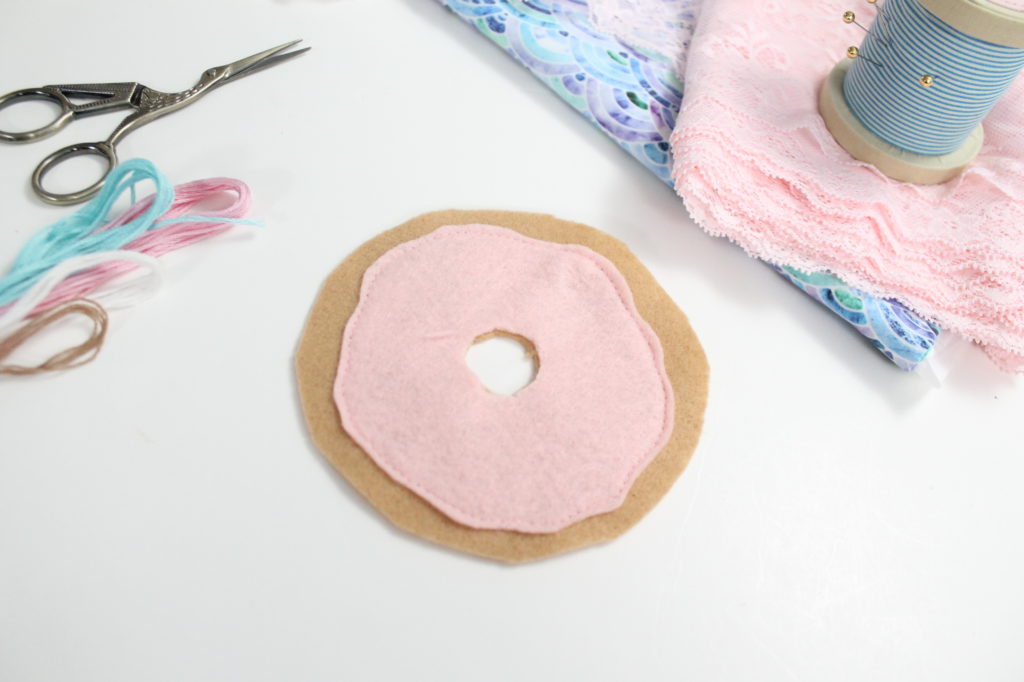
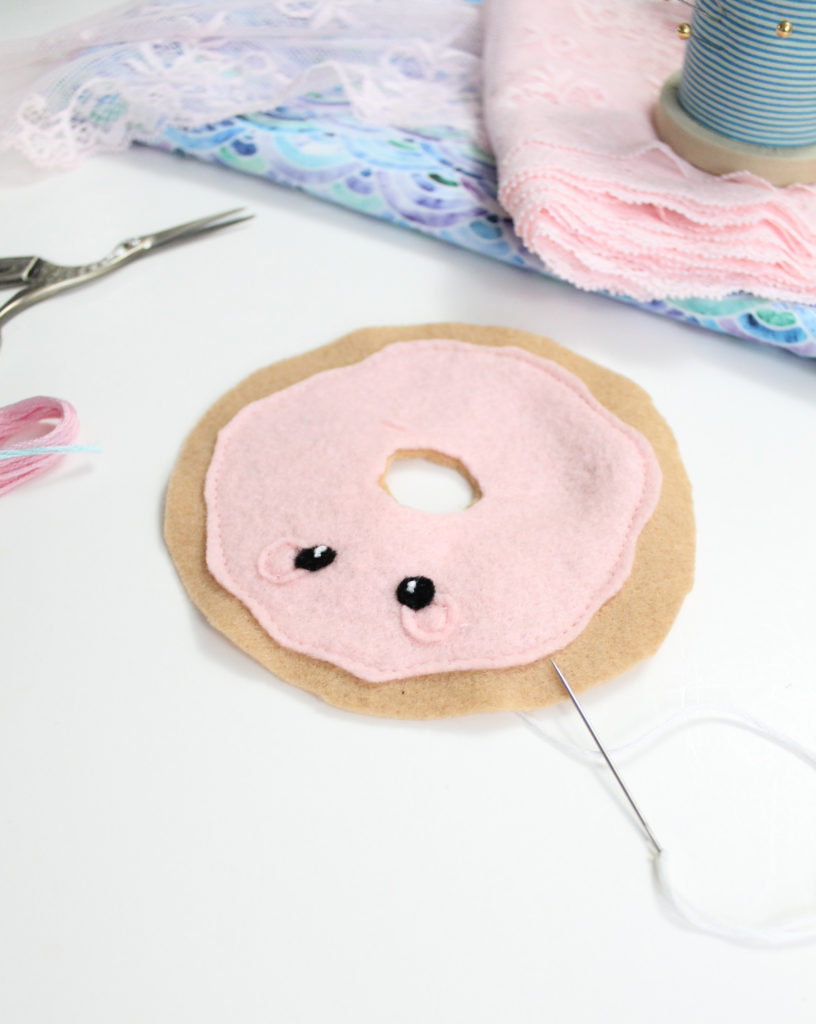
1.Begin by cutting out 2 Donut shapes out of brown or tan felt, and 1 Frosting shape out of colourful felt. Place the Frosting on top of one of the Donut shapes and using a straight stitch on your sewing machine, top stitch around the perimeter of the Frosting. Alternatively, you can use a needle and embroidery thread for a more decorative look. I opted to use my sewing machine for speed.

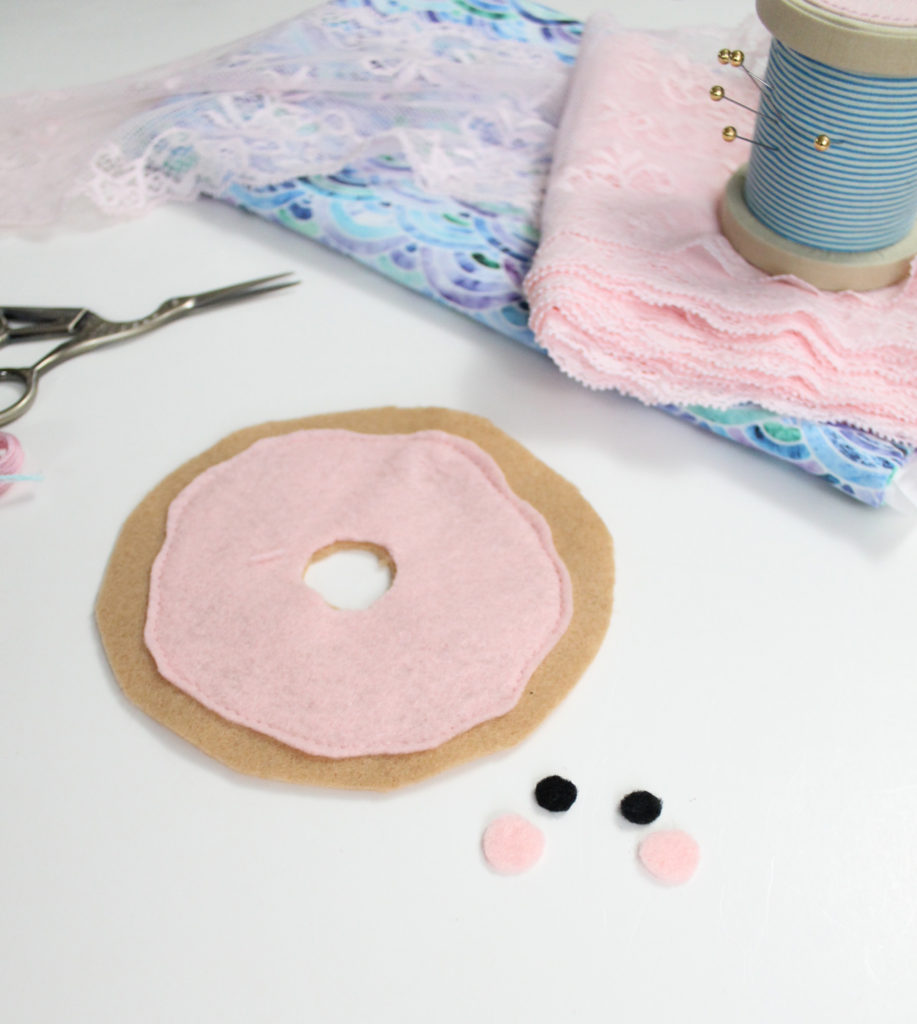
2. Cut small circles out of black felt for eyes and slightly larger circles out of pink felt for cheeks. If you are handy with an embroidery needle, you could skip these steps and just embroider a cute face. I’m not as confident with my embroidery skills as I am with my sewing skills, so I chose to do felt eyes and cheeks.

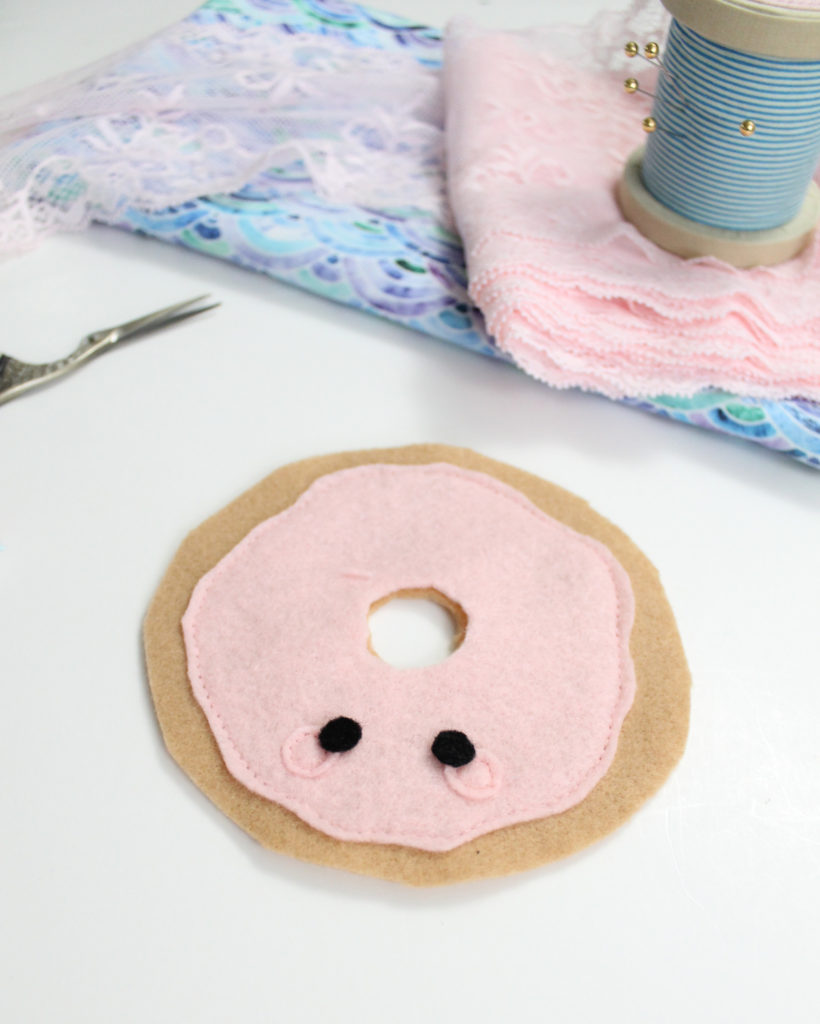
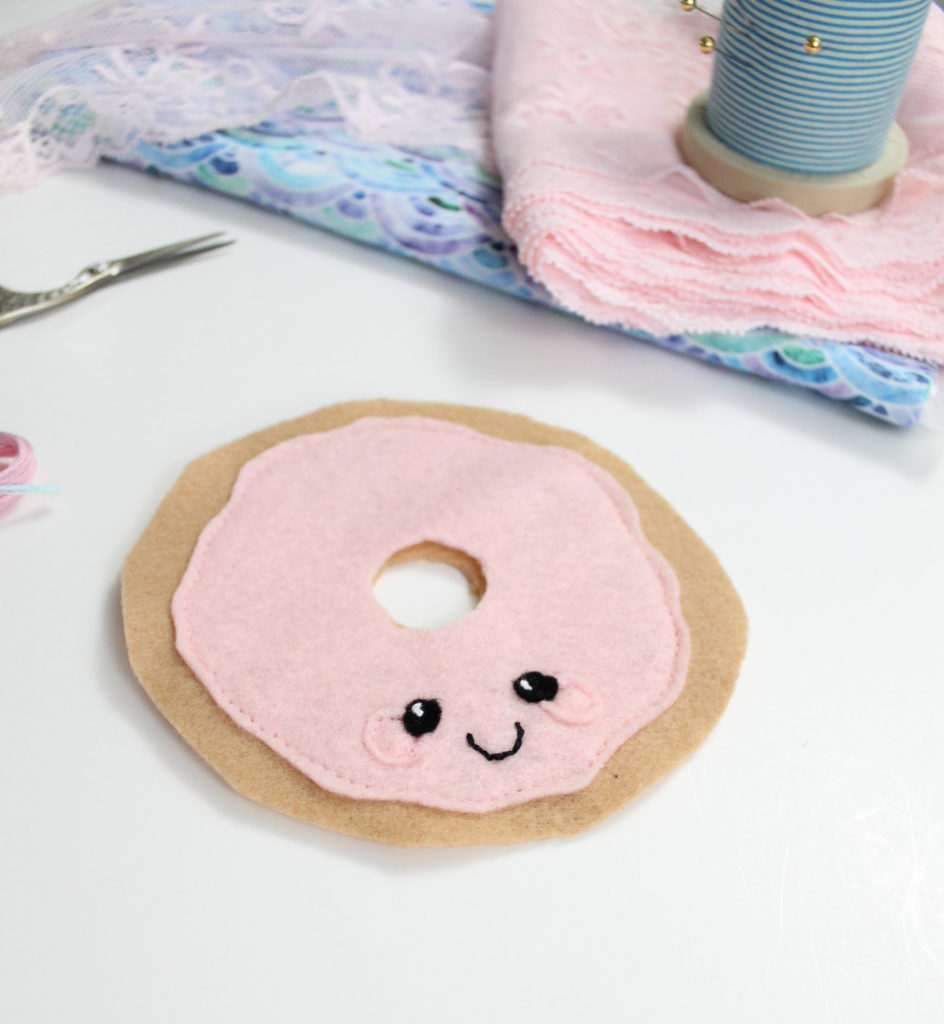
3. Stitch the cheeks in place first, then layer the black eye circles overlapping the cheeks. I chose to sew these on using my sewing machine, but a needle and thread will work just as well!

4. Using the white embroidery thread, sew a french knot in each eye to add a little “twinkle”. Using the black embroidery thread, use a Backstitch to create a little smile.

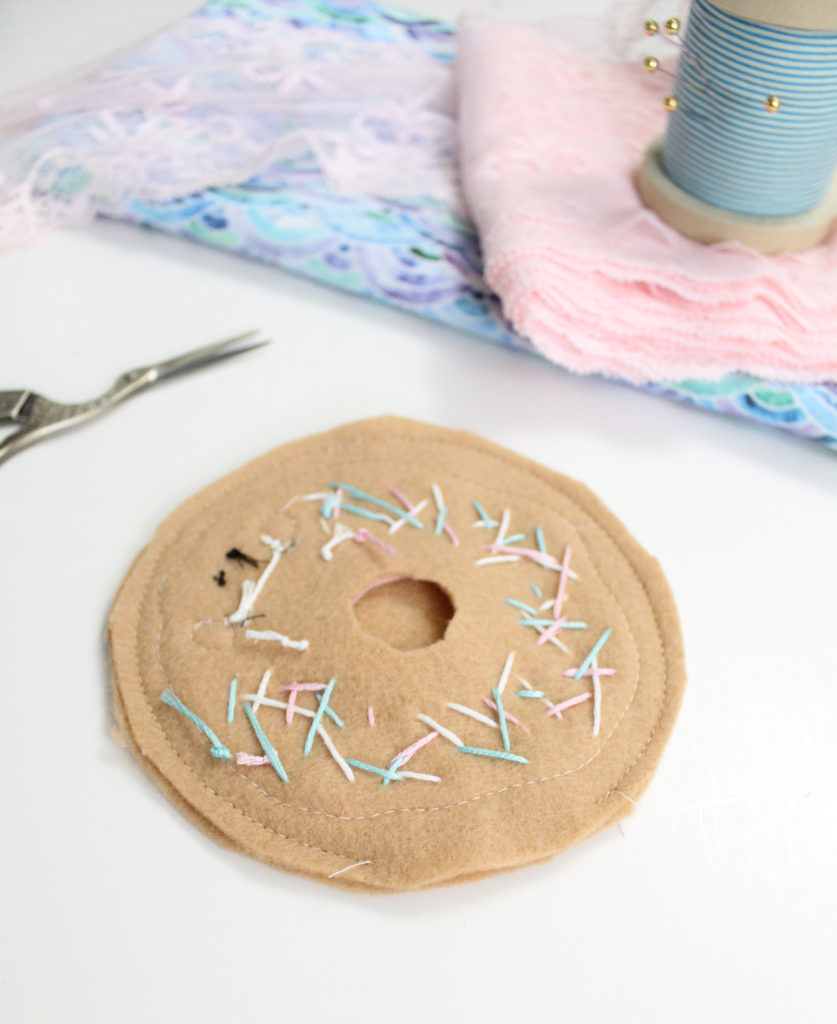
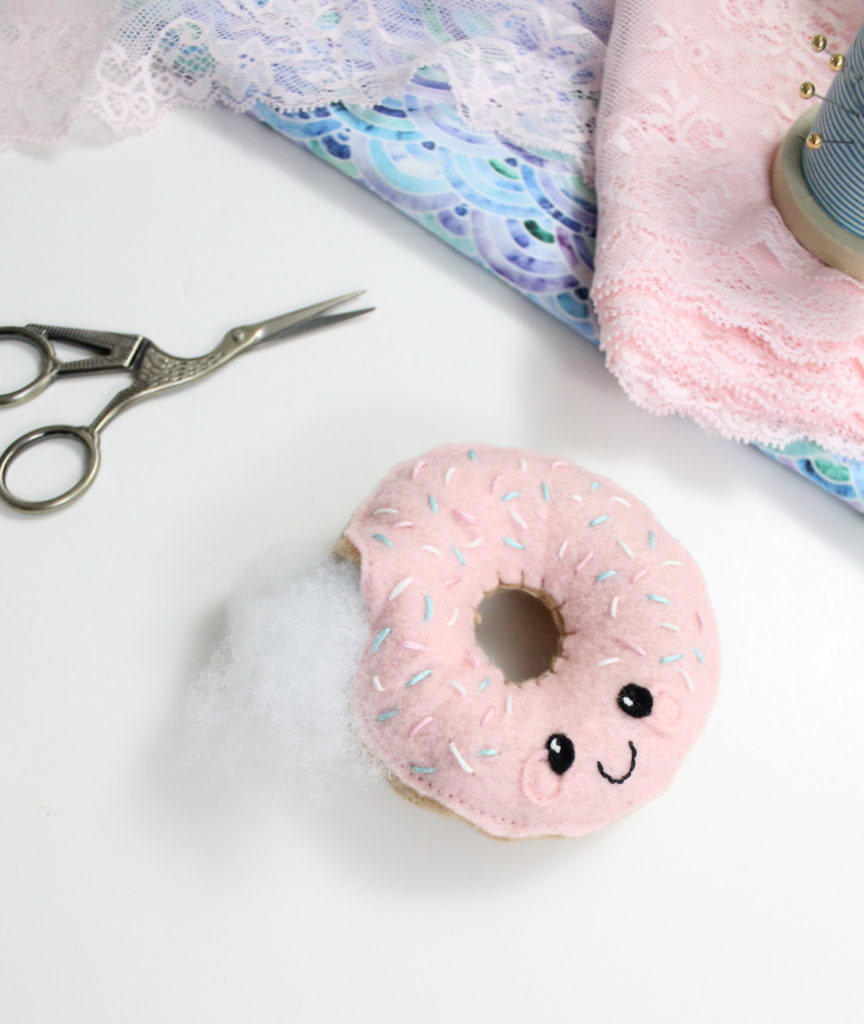
5.  Using your colourful embroidery thread, sew random “sprinkles” across the frosting. I used white, pink and blue for my sprinkles. It’s ok if it looks messy from the back. It will be hidden between the layers soon!

6. With the right sides of the donut facing each other, stitch the donut together around the outer perimeter using a narrow, 1/8″-ish seam allowance. Do not sew the donut “hole” and be sure to leave a 1.5″ gap so that we can stuff the donut in a later step!

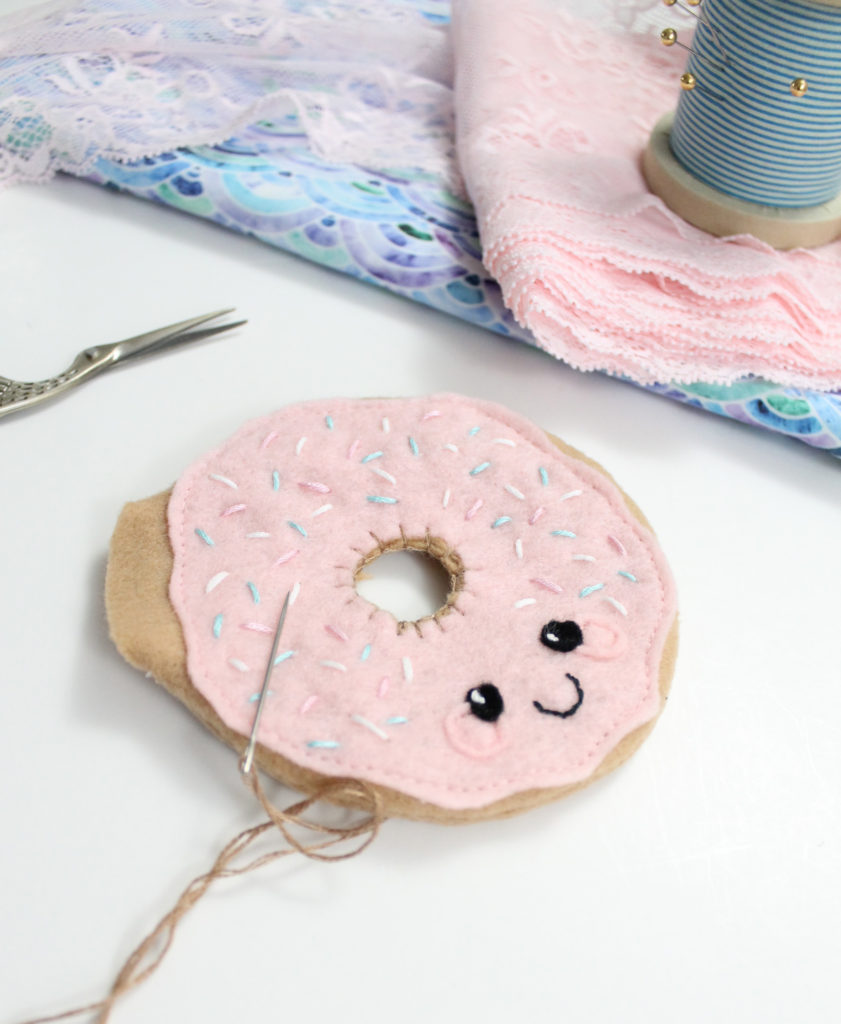
7. Turn your donut right side out. Using the brown embroidery thread, use a Blanket Stitch to close up the donut hole.

8. Firmly stuff the donut the the filling of your choice. Once it is filled up nice and firm, use a needle and thread to stitch the opening closed.

Now you’re ready to admire your handiwork and fill it full of pins!

How to use Boning for Added Support in Bras

Sewing Patterns, Tutorial, Uncategorized

One of the reasons I started making wire-free bras is because underwires, no matter what size I wear, end up giving me terrible chest and back pain by the end of the day. I just love the relaxed comfort of a soft bra.

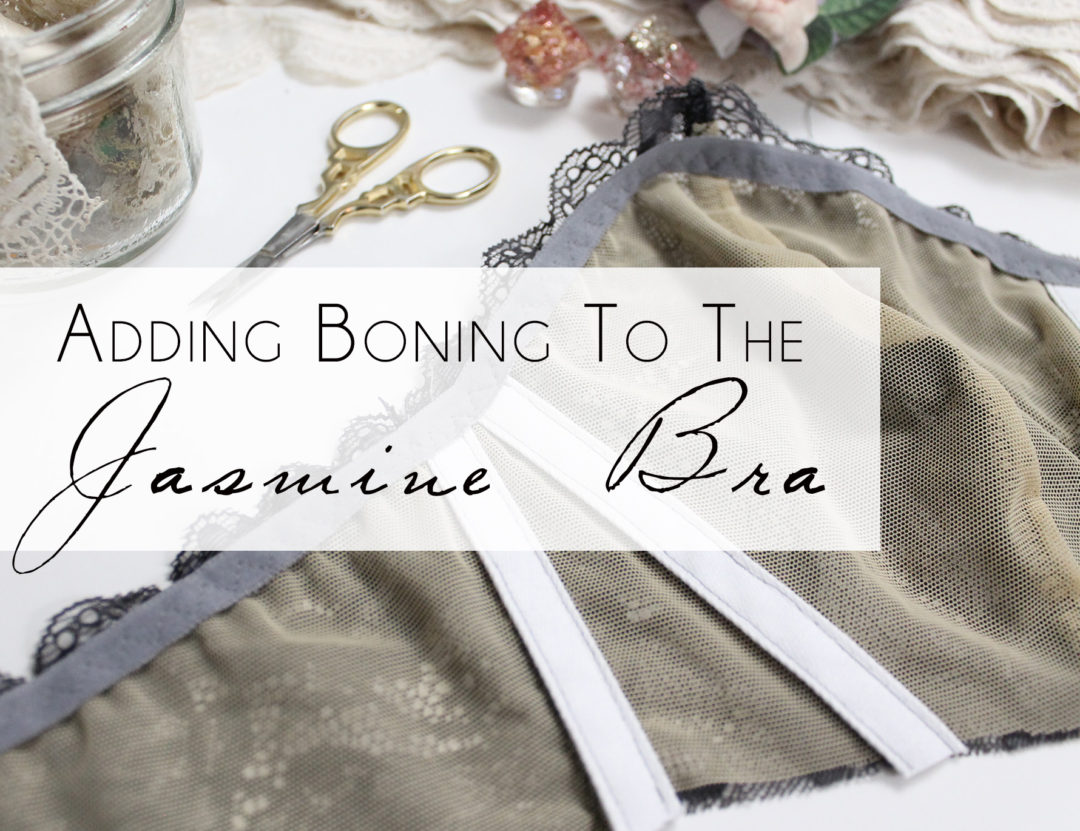
That being said, sometimes you want to find ways to give your wire-free bras a little more structure. There are lots of different ways you can do this, from sewing them with wider band and strap elastic, to adding some light sew-in foam. Over the summer, I finally got around to experimenting with something I’ve been wanting to do for a while: adding boning to the sides of my Jasmine Bras.  Personally, I’m not a big fan of foam bras for myself. For me, a lightweight lace bra is my go-to, but I wanted to add a little more vertical structure.

What is boning?

Boning is best known for it’s use in corsetry, but it’s used in everything from longline bras to wedding dresses to swimwear! Basically, any garment where you need some vertical structure to prevent a garment from folding in on itself, OR when you want to create a garment that shapes the body, you’ll want to use boning.

There are a few different types of boning:

Rigelene / Sew-in boning – very lightweight plastic boning that can be sewn through and does not have a casing.

Plastic Boning – heavier than rigilene boning and often comes with a casing. Easy to cut and sew, but can form permanent bends when used in corsets or shaping garments.

Flat Spring Steel Boning – this boning is very rigid and great for use where a lot of vertical structure is needed, like on either side of corset laces.

Steel Spiral Boning – very flexible but strong steel boning made out of flattened coiled steel. This boning is great for use down side seams of corsets or structured evening dresses as it will bend around the curves of the waist and hips.

Although there are many ways to “install” boning, I usually like to use a casing. You can buy a tightly woven casing meant specifically for boning which I highly recommend using as it will prevent the bones from working their way through, but if you’re experimenting and are not ready to commit to purchasing supplies, bias or twill tape are good alternatives.

Most fabric stores will stock plastic and/or rigilene boning. You can find metal boning at larger bra and corset making supply shops, like Bra-Maker’s Supply.

For this particular bra, I used small pieces of Flat Spring Steel Boning and cotton bone casing, however I’ve made myself a couple of other bras using Plastic Boning that I like just as well. Truthfully, the bones are so small in this variation that either works well.

Installing the bones.

I assembled my Jasmine Bra in lace according to the pattern instructions.
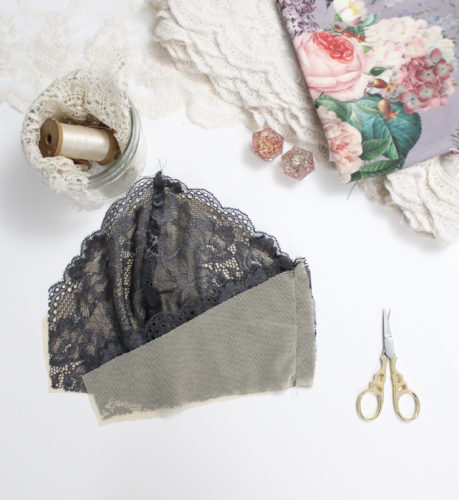
Before finishing the seam allowance on the side seam and applying the upper elastic, stitch a length of bone casing to the seam allowance, along the side seam stitching line.
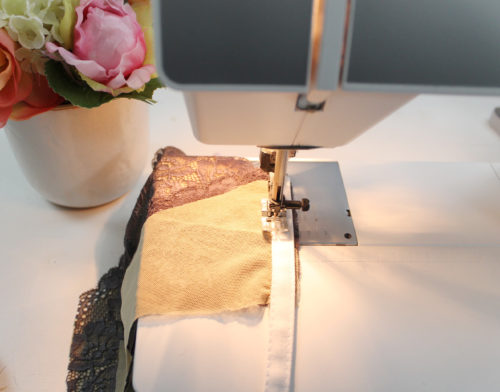
Trim back the seam allowance to approximately 1/4″.
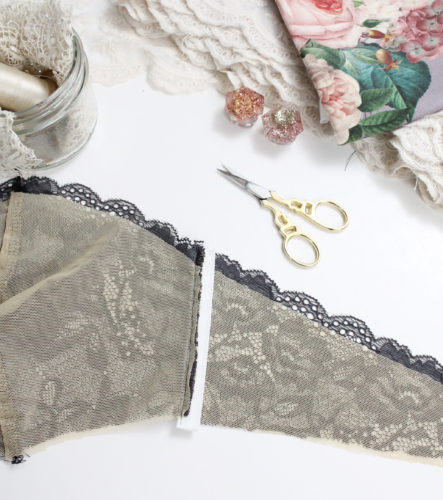
Fold the casing down and top stitch in place along the opposite edge.
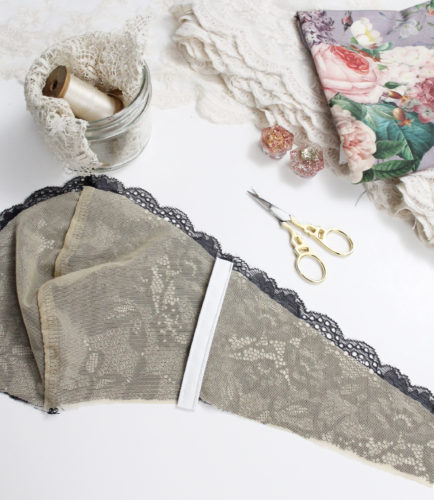
You now have a casing stitched to the bra side seam that will soon house your boning!
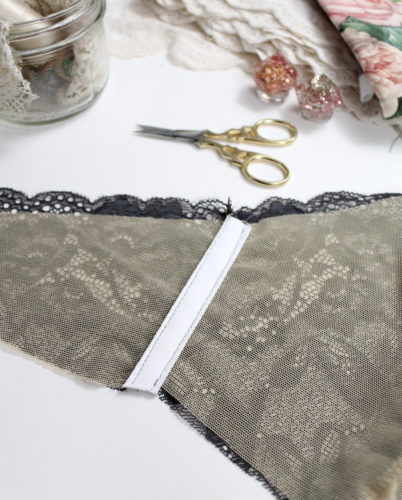
I decided to sew a second length of casing beside the side seam, running slightly on the diagonal. My goal  was to have it slightly follow the side of my breast.
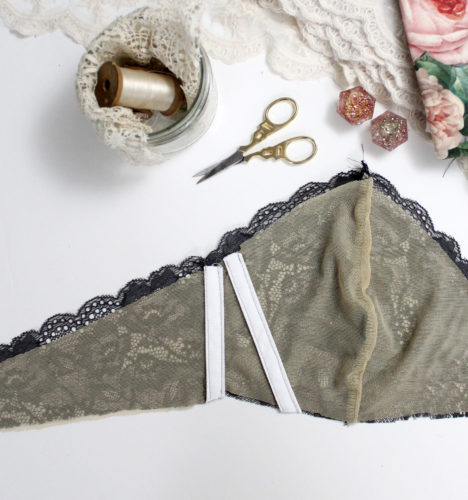
Finish your upper edge according to the pattern instructions.
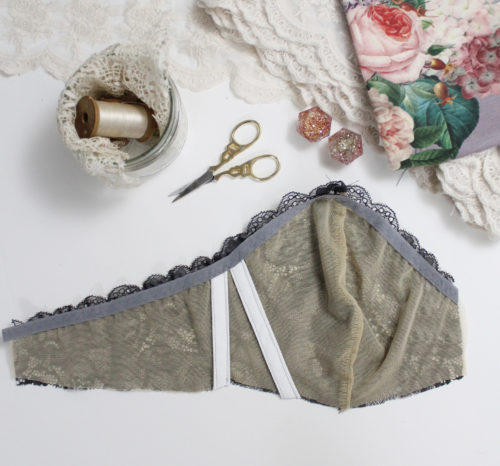
Measure out your boning so that it is at least 1″ shorter than the length of the casing. Remember, you need to leave enough room to stitch on the band elastic.

If you are using plastic boning, round off the ends of the boning and file down any rough or sharp bits. If you are using metal boning, finish the ends with metal boning tips. This will smooth out the ends of the boning so they won’t poke through.
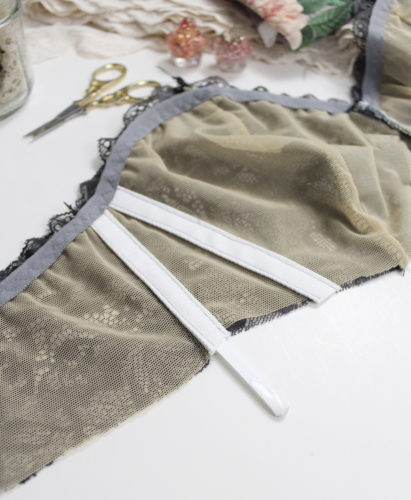
Insert the bones into the casing, making sure you have left at least a 1″ gap at the bottom. From here, you can complete the assembly of the bra.
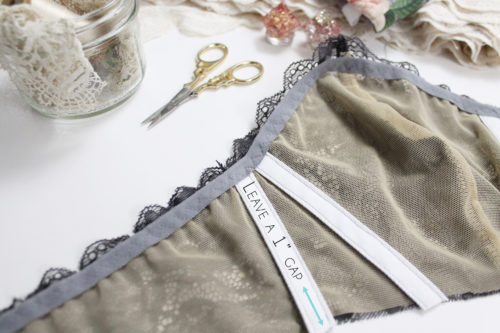
A very important note.

When you are ready to sew on your band elastic, please stitch very carefully past where your boning is. If you are using plastic boning, you may find that your sewing machine will just stitch through the boning, but if you have chosen metal, your sewing machine will spit needle shards at you.

Finishing Up.

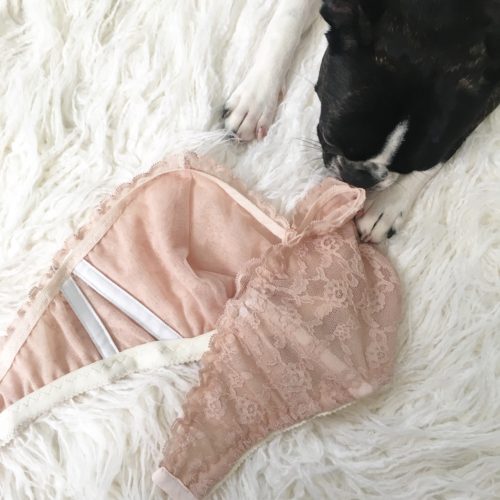
Adding boning this way doesn’t change the overall look of the bra, but it does add some vertical structure which can help your bra stay more up-right while still being comfortable. Here’s another one I made, this time in a neutral beige lace (which had yet to have it’s straps sewn on). Leah thought it looked great! And honestly, it’s my current favourite bra.
 

Important Currency Changes

Uncategorized, updates
I’ve been mulling this over for a while and I have decided to switch currencies in my Etsy shops, as well as my standalone shops, from US dollar to Canadian.This won’t be a big change for most of you. It may look like my prices have increased, but they’re roughly the same. They are just in CAD instead of USD. In a few instances, prices have lowered, but for the most part  I’ve tried to keep them within $0.25, mostly due to rounding.  If you are a shopper on Etsy, you may not even notice much of a difference since Etsy is set up to automatically show you prices in your currency.If you are a US customer, this will likely work in your benefit as the Canadian dollar fluctuates. For my Canadian customers, the total price you are paying will stay the same, you just won’t have to worry about any exchange rate.I understand this can be confusing at first and I apologize for any potential sticker shock if it looks like my prices have jumped by a few dollars! They haven’t… it is just the currency difference. I promise!I’m hoping this will make life easier as far as bookkeeping goes for me!

Floral and Lace

Design Diary, Lingerie, Uncategorized

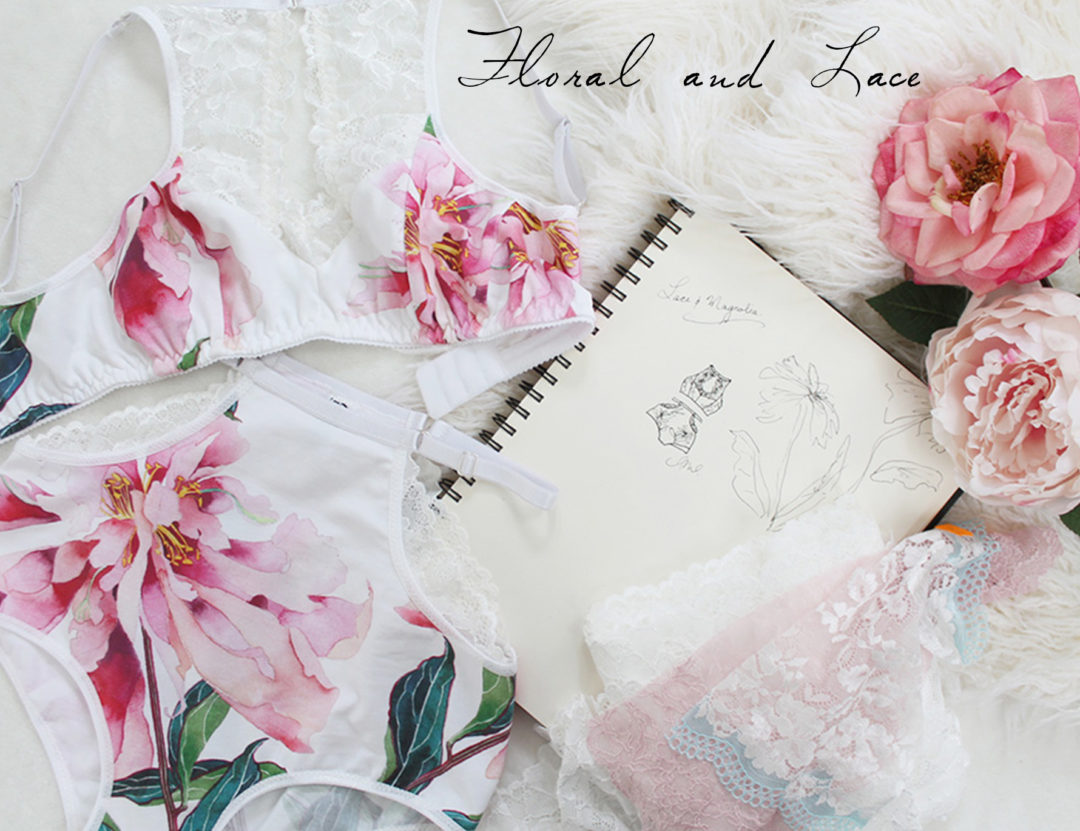
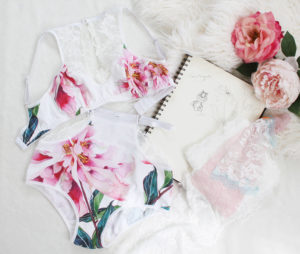
I received this fabric from Spoonflower as part of a creative collaboration for Wedding Month. 

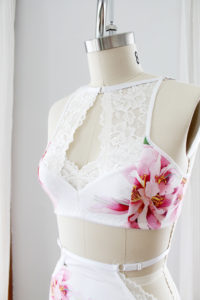
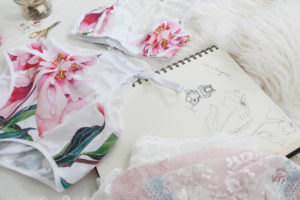
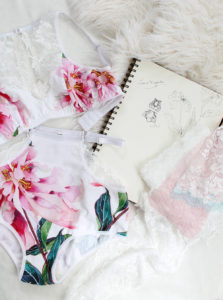
I’ve had my eye on this large scale peony print by Gabby Malpas for a while now. It’s so fresh and feels both classic and modern at the same time.

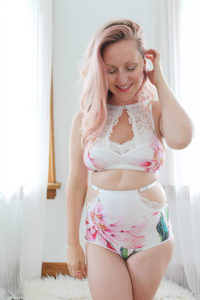
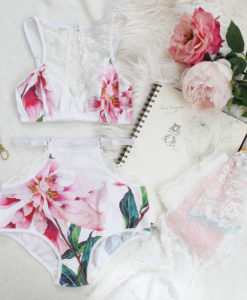
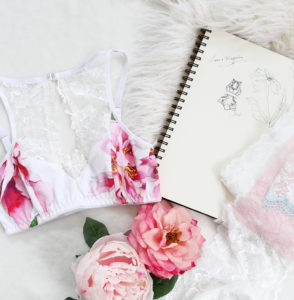
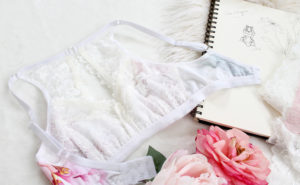
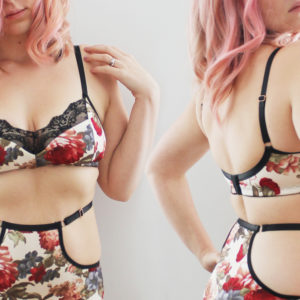
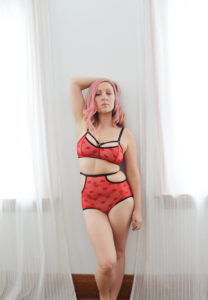
For this bridal-inspired lingerie set I used my Ava High Waist Panties  and Romy Bra  sewing patterns. For the bra, I added a high neckline detail using scalloped stretch lace that closes at the neckline with a small silver hook – a little detail that gives the neckline jewelry-esque look.

I wanted to give this set a really special feel, so I lined the cups in the same soft lace I used for the neckline. Now the inside looks just as beautiful as the outside.

This Romy-adaptation took me four attempts to get it just the way I wanted! I did lots of experimenting with the width of the neckline as well as the overall construction. In a little while, I’ll release this adaptation as an add-on to my Romy pattern.

To bring the top and bottom together, I added small pieces of lace along the curved cutout along the hips.

I took a lot of time plotting out my pattern placement. I used a full yard and carefully placed my pattern pieces so to achieve the effect of the flowers gracefully climbing up the sides of the garment.  Since the front and back of the Ava pattern are the largest pattern pieces in this set, I made sure to feature a large flower, asymmetrically placed, to really highlight the beauty of this print.

Spoonflower’s cotton lycra jersey has is a great weight for lingerie – it’s sturdy and has lots of give making this set as comfortable as it is pretty!


New Pattern! The Romy Bra

Uncategorized

The Jasmine Bra might have a run for it’s money for the position of “favourite bra pattern.”

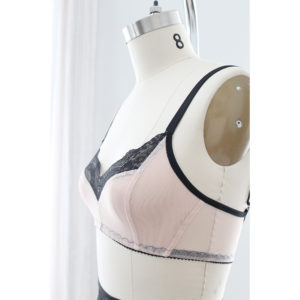
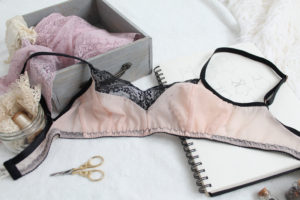
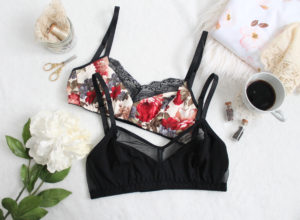
The Romy Bra is a step up in complexity from the Jasmine bra. It has a three-piece, lined “cup” and shaped wing. I really love the scooped back.
The instructions walk you through how to line the bra, how to sew it with a scalloped lace neckline or a elastic-trimmed neckline. I’ve even included a bonus tutorial on how to add a strappy neckline! I kind of thought I was tired of the strappy-bra thing, but when I put this one on, I think I changed my mind.

I’m really happy with the finish on this bra. It’s still relatively simple as far as bras go, but I think it has even more versatility than the Jasmine. You know me, I love a pattern that can be sewn lots of ways.
If you’re looking to sew one of these for yourself, check out my step by step video on YouTube!