Browsing Tag

tutorial

New Pattern! The Claudia Panties Pattern

Lingerie, Sewing Patterns, Tutorial

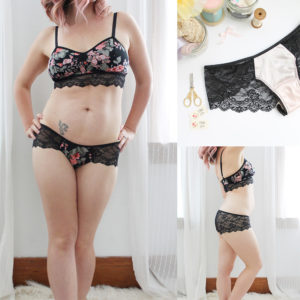
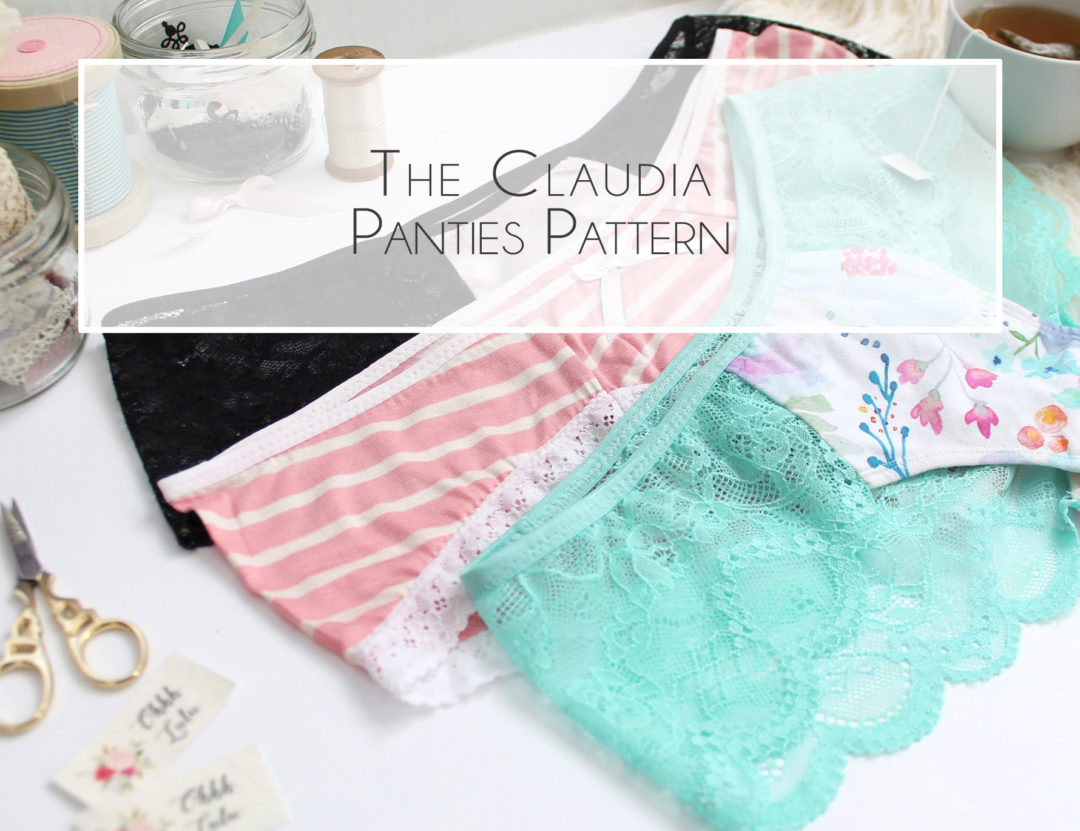
This is my favourite pattern ever (besides the Jasmine bra). I think I may have actually already made 100 of these, maybe even more!!! I am obsessed.

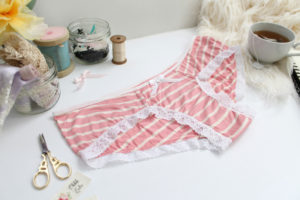
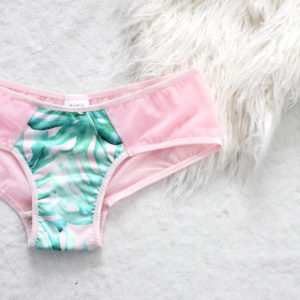
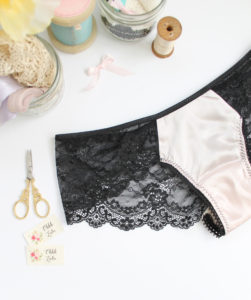
So, what is it that I love about this pattern, you ask? This pattern has the one thing I strive for in a pattern: versatility. You can achieve so many different looks with this one easy pattern.  Included in the instructions are directions on how to sew them with a pretty lace back with picot elastic around the front OR plain elastic edging, or  sewn entirely out of knit fabric with simple lace trim entirely around the legs. But, you can also edge these in fold over elastic, picot elastic, and while these are drafted for stretch knits, I’ve even made them with a silk charmeuse front!

Quick and Easy Directions for a Woven-Fabric Front.

If you want to use a woven fabric on the front I suggest using a light weight woven with a good bias stretch. Silk Charmeuse is ideal, but you could experiment with other fabrics too. I’d imagine a light flannel or lightweight cotton would work as well. Whatever you choose, the hip/back portion has to be sewn out of either stretch lace or stretch knit fabric.

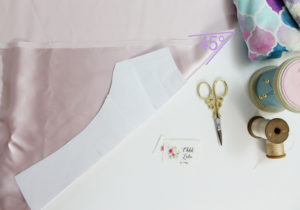
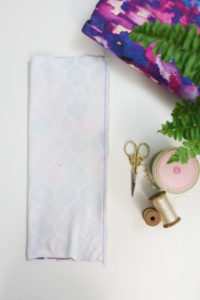
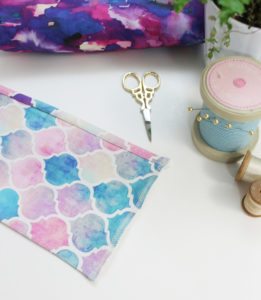
All I do is fold my fabric at a 45 degree angle. This way you can place the “cut on fold” piece against the bias-fold. This is a quick and easy way to cut small bias cut pieces, without tracing the patter piece out mirrored.

You can purchase the Claudia Panties Here, or through my Etsy shop.

Tips and Tricks for Sewing Scalloped Lace

Lingerie, Sewing Patterns, Tutorial

Lately I’ve become obsessed with scalloped lace. I’ve used a lot of it in my latest collection, and have a ton more lace on the way! I just love how pretty and delicate it is, while still being comfortable.

It can be tricky to find wide enough lace for panties or larger size bras. Here I’m going to outline a couple of tricks that I’ve learned along the way to make the most of what you’ve got on hand!

The first thing to be aware of is when you cut your scalloped lace, make sure you lay your lace out so that the scallops are evenly matched up. You want both sides of your panties or bra to be an exact mirror image of one another. When you sew your seams, the most important thing is to make sure that your scallops match up evenly. This may sometimes mean that your waist edge might be off a bit. Don’t worry – just focus on lining up the scalloped edge of your seam.

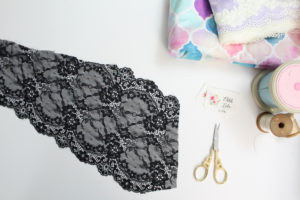
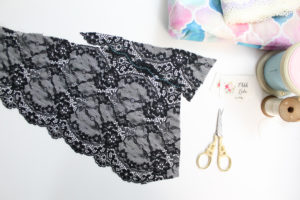
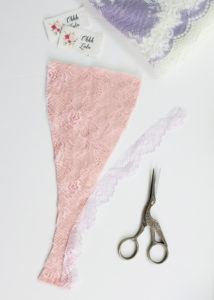
If your lace is a little too narrow for your panties pattern, you can easily piece the lace together to make up for the lack of width. Start by cutting out your pattern piece.

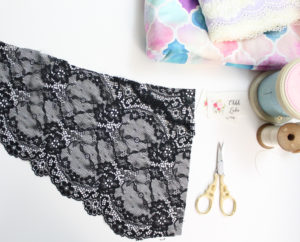
Grab a scrap piece of lace with a bit of scalloped edge. Layer it overtop of the too-short part so that the scallops overlap, kind of like a puzzle piece.

Use a zig-zag stitch to top stitch in place, then straighten out your edges.

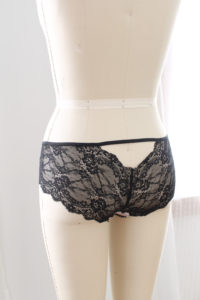
Alternatively, you can use too-narrow lace as a design feature! You can create interesting “cut outs” by just working with the width of lace you have. Here, I’ve just left the scalloped edge of the lace in place, then extended my waist elastic overtop to create a “peekaboo” back.

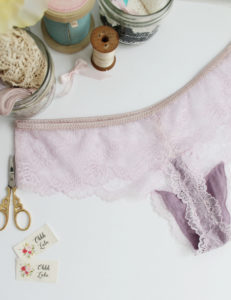
Finding trimming lace to match can sometimes be a challenge, even for myself who has access to wholesale lace suppliers. If you need some trimming lace in the same colour as the lace for the body of your panties, just cut off some of the scalloped edge of your lace, and use it exactly as you would use a trim. Just zig-zag it on, and cut off any excess that extends beyond your zig-zag stitching. I’ve done that with this pretty purple thong.

If you are having trouble finding stretch lace at your local fabric stores, I highly recommend looking online. Below are a few of my favourite resources:

Tailor Made Shoppe

Lace Heaven

Bra Makers Supply 


Easy Running Armband for iPhone or iPod Tutorial

Personal, Tutorial

A few months ago I started running. After I had the miscarriage a few years ago, I felt really lost and depressed… then I found Fitness Blender. It was so motivating and fun and I was particularly enjoying some of their strength training videos. When I was in my early twenties, I went to the gym pretty religiously, but as I got a bit older and busier, being active became less of a priority… Over the last few months, as I’ve mentioned in earlier posts, I’ve really been struggling with anxiety. My mental health approach over the last decade is to bottle up any difficult emotions, because whose got time to deal with that? Walk it off! You’ll be fine.  And some days I am… other days, not so much. And now that life is a little quieter, I’ve had the time to deal with some difficult emotions and things from my past.

When I first decided that I needed to be proactive about what I was going through, I knew being active was going to be an important part of getting better. In the following months after the birth of Isabel, I actually found I had lots of time to be active! She slept in hour long bursts so I could sneak in a workout here and there. Now that she is on the move and constantly wanting my attention, I’m finding it much more difficult. So, my goal was to do an activity that we could both do together. I had a jogging stroller so it seemed like a no brainer.

Let me tell you, running while pushing a stroller is no joke. I think I lasted about a month before I decided that pushing an extra 50+ lbs was no fun. However, I was really enjoying the sense of satisfaction I was getting from my progress, so I’ve been running in the morning, or evening… or whenever I get a chance. There is something so visceral about running. All of the difficult things I have hidden away in the back of my mind, I can literally push past them. Running is hard. Running hurts. Running seems to express all of the things I am feeling but can’t quite express. It is freeing and liberating.

I have some friends/family members who are runners and who have run marathons. I was never interested in running. I thought they were kind of crazy and didn’t get the appeal, but I get it now, as I sit here nursing a cracked toe nail but still wanting to get in just one more kilometer.

Of course, now I am wanting to combine my new hobby with my old hobby. What can I sew for running?

As I’ve been running, I’ve really been enjoying listening to podcasts (I am an addict! Shout out to My Favourite Murder!), but was tired of tucking my phone in my bra and getting it all sweaty. So, I decided to make an armband to hold my phone, and any other items I might need along the way.

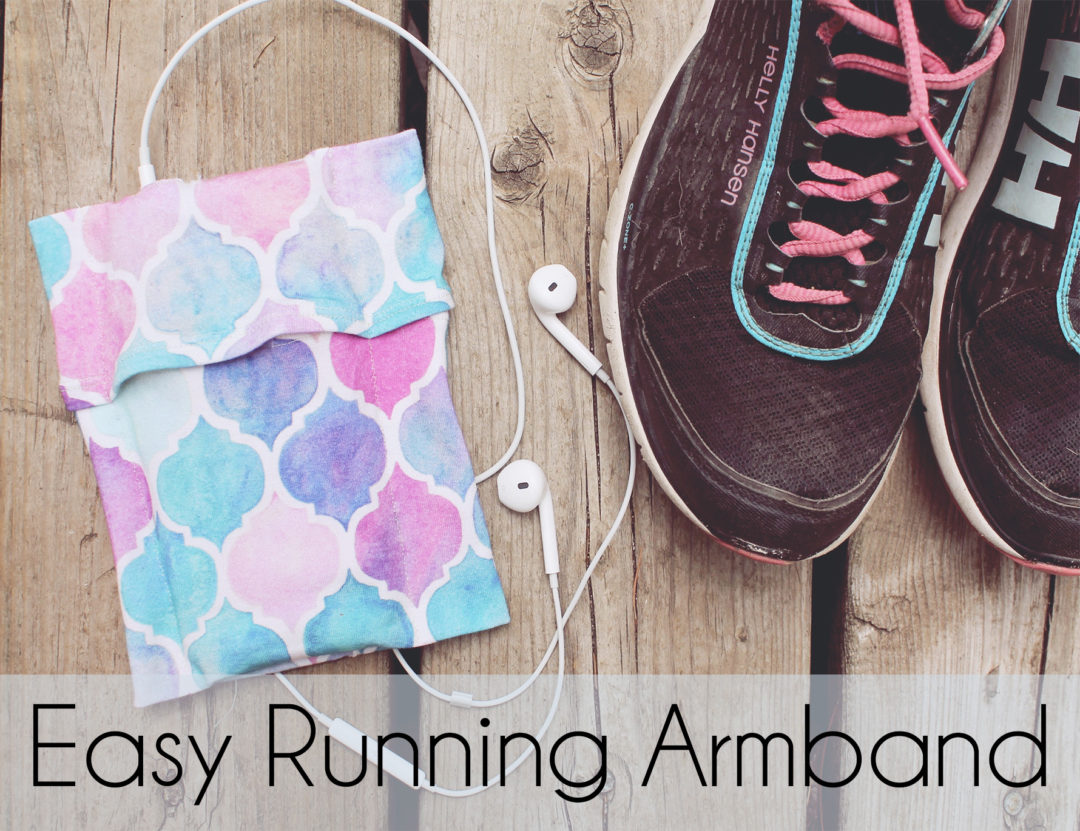
This is a super simple armband with no zippers or velcro. All you need is some stretch knit fabric, like cotton/lycra jersey, a couple spools of thread and a twin needle (though you could zig-zag stitch too), a small scrap of interfacing, scissors, and a measuring tape. This holder fits my arm and an iPhone 6s (not the jumbo one!). It would be really simple to alter this to fit any phone or arm size.

2

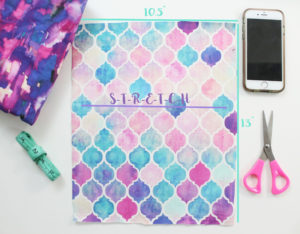
Cut out a piece of fabric 10.5″ x 13″.

1

Fold it in half lengthways and sew it together with 3/8″ seam allowance. Put it on your arm, it should feel like a fitted sleeve, but not too tight.

3

Finish either end with a serger. Fold under approximately 1/4″ and stitch using a twin needle.

4

5

6

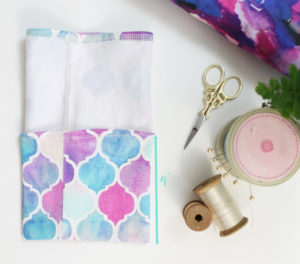
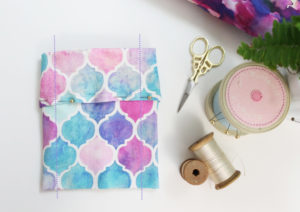
Turn the sleeve inside out and fold up one end by 4″. Fold the top down by about 2″-2.5″, so that the hemmed edges overlap. Make a mark where the earphone jack is.

7

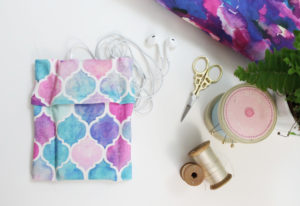
Fuse a piece of interfacing to the inside of the sleeve where you’ve made your mark for the earphone jack. Sew a button hole and slash open. This will allow the earphone plug to stick out. Adding the earphone jack hole isn’t necessary. The first one I made didn’t have one, so I just tucked the cord inside and it worked just fine!

9

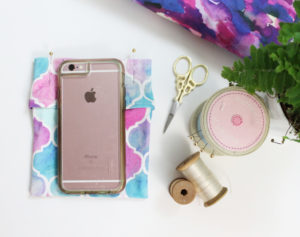
Place your phone/iPod over the folded armband and mark 1/4″ away from either edge of the phone. Run straight rows of stitches down either side to create a snug pocket for the phone.

8

10

It’s seriously that easy! I think this one took me maybe 15 minutes and just a small scrap of fabric.

Next project is a running bra….

11

Pattern Hack: Strappy / Sporty High Waist Bikini Part 1

swimwear, Tutorial

StrappySporty

IMG_2024

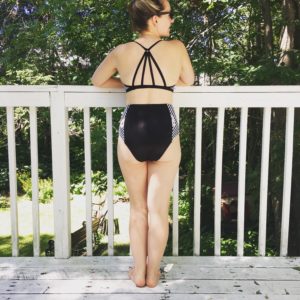
Since moving to Washago, I’ve been spending a lot of time at the beach with Isabel, which means I need a few new bathing suits. I’ve always found it difficult finding RTW bathing suits, since I have a full bust and like a fit with a little more coverage so that I can, you know, actually swim. At the same time, I want something that looks awesome.

So, I made this suit a couple weeks ago and it has had a lot of wear already! I used the Amber Bra for the top and the Panties from my Cindy Pattern for the bottom – I like them because they have  high cut leg, which I find more flattering for my petite stature.

Aside from the patterns, you’ll need the following supplies:

  1. Swimwear Fabric -I used a print and a solid for binding
  2. Nylon swim lining
  3. 1/4″ elastic (you can use clear elastic)
  4. Twin Needle
  5. Two spools of thread
  6. 5/8″ (or larger) metal ring

StrappySportyMaterials

Directions:

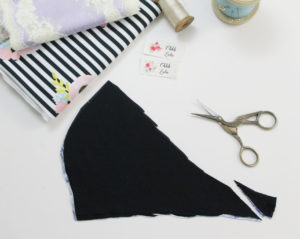
  1. Cut the pattern out of your swim fabric & lining. Taper the Side Back down to a point.
SS2

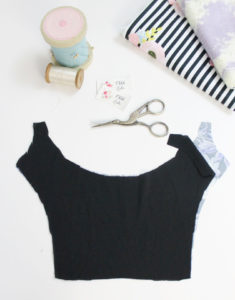
2. Baste the lining to the swimsuit front.
ss3

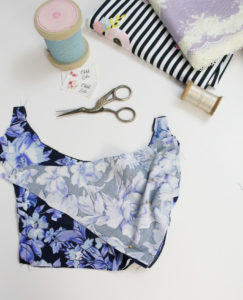
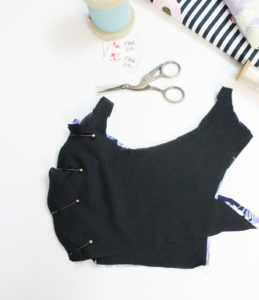
3. Pin the side front swimsuit fabric to the front swimsuit along the curved seam and baste together (right sides facing). Flip over and pin the swimsuit lining along the curved seam of the front swimsuit, so that right sides of the lining are facing and stitch together. This creates a totally encased seam and anchors your lining so you don’t get slipping between the two layers. Repeat on opposite side. If you are feeling confident, this can all be done in one step.
SS4

ss5

ss6

ss7

ss8

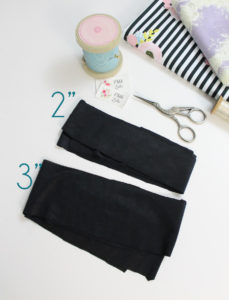
4. Cut a couple long lengths of your contrast fabric to create a binding. I cut two 2″ wide lengths (2″ by approximately 54″) and one 3″ wide length (3″ by approximately 30″) for my size small top.
ss9

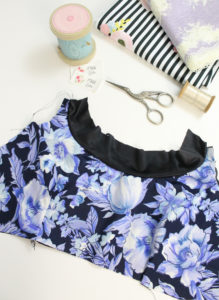
5.  With the right side of the binding facing the right side of the swimsuit top, baste binding along neckline using about a 1/2″ Seam Allowance. Gently pull on the binding to create a bit of tension to carefully contour the edge of the top.
ss11

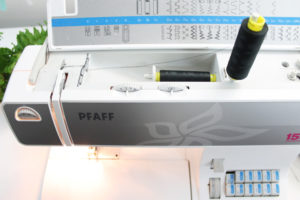
6. Load your sewing machine up with your twin needle and two spools of thread. Fold the binding towards the wrong side and top stitch in place using your twin needle. I do not double fold my swim biding. I just fold it back once and trim back the excess along the wrong side. This way is quick, easy, and less bulky.
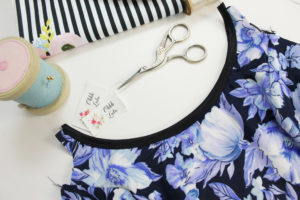
twinneedle

ss12

7. Trim the small strap tab back to a point. Apply the binding along the side in a the same manner as steps 5&6, but leave a 6″ long tail extending past the neckline. As in the previous step, fold the binding in half and use a twin needle to stop stitch. I do a single fold, then trim away the excess fabric.
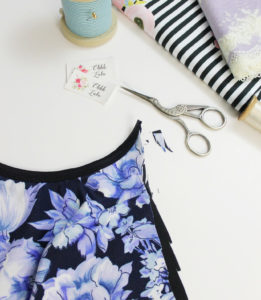
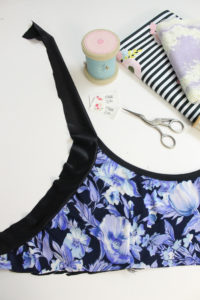
ss13

ss14

ss15

ss16

Extra Credit: add some stability and strength to your straps by wrapping the binding that forms your neck strap around a piece of elastic. I am heavy chested and always find stitches in my swimsuit straps pop! Adding clear swimwear elastic (or something heavier) will help. (I’m really sorry I didn’t take pictures of this part! the next step will give you some idea of what I mean)

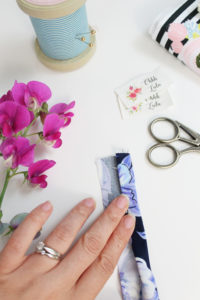
8. Now we are going to create the strap details for the back. I’m adding elastic to mine for some strength and stability. This is optional – you may opt to just sew a traditional spaghetti style strap/tube. I created by straps by basting a length of elastic to the wrong side of a strip of my binding. I folded the binding 3 times to fully encase the elastic. Using a twin needle, I stitched down one edge, then simply trimmed back the excess. This is a quick and easy way. You may opt to double fold your binding, but I find it gets a little bulky. I then cut the strap into 4 lengths of 8″.
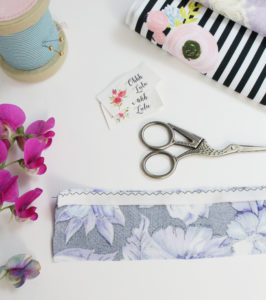
strap1

strap4

strap5

strap6

ss21

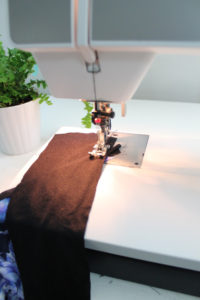
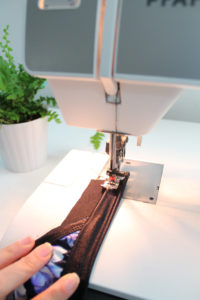
9. I used the wider piece of biding to for my band. In the exact same method as in previous steps, baste the binding onto the lower edge of the top, pulling on the binding as you go to contour the bottom of the top. Fold to desired width, and top stitch in place, trimming back the excess fabric once you are done. Leave approximately a 1″ tail on one end and a 4-5″ tail on the other.
ss17

ss18

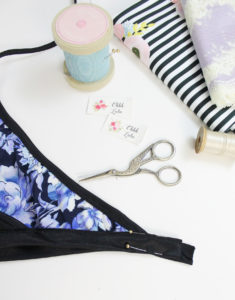
10. With the right sides together, pin and stitch band together.  Fold seam allowance to one side and top stitch down.
ss19

ss20

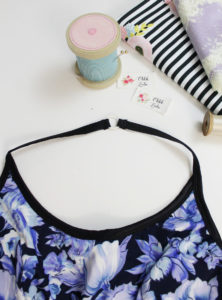
11. Wrap ends of strap around your metal ring and stitch in place using a tight zig-zag stitch.
ss22

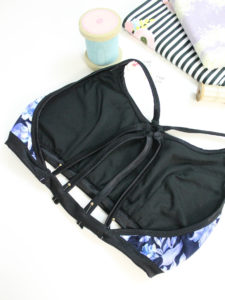
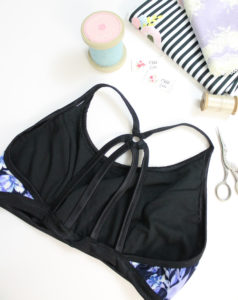
12. Wrap one end of each of the 4 straps you made previously around the ring and stitch using a tight zig zag stitch. Pin the opposite end of each of the 4 straps evenly along the band. I used a tight zig-zag again to anchor them along the band.
ss23

ss24

Last year I posted a video demonstrating how to apply swimsuit binding. You can view it HERE.  To add more stability to the edges of your suit, you can add clear swimsuit elastic. I didn’t have any on hand, so I omitted it, and so far have found it to be just fine!
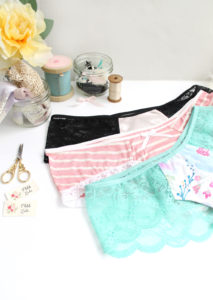
How I join my fold over elastic

Tutorial
This is something I’ve been wanting to post for a while! This is how I sew my FOE into a continuous loop. I’ve posted a video on my YouTube channel, but I know it can be hard to see exactly what I am doing… so, I hope this is helpful!
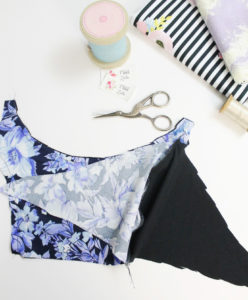
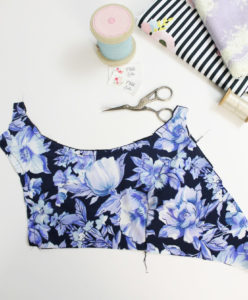
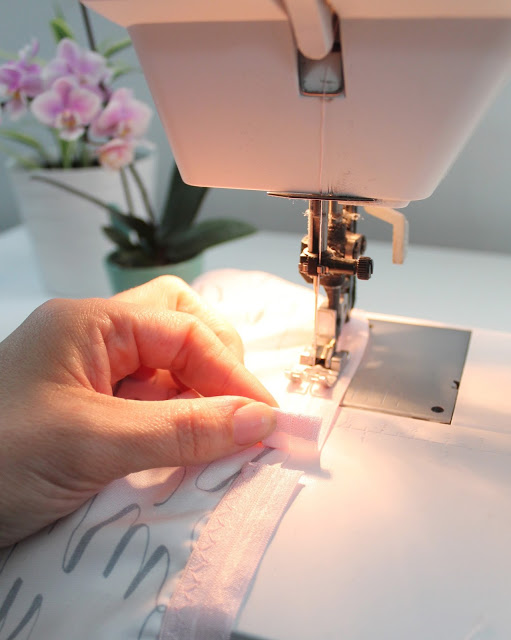
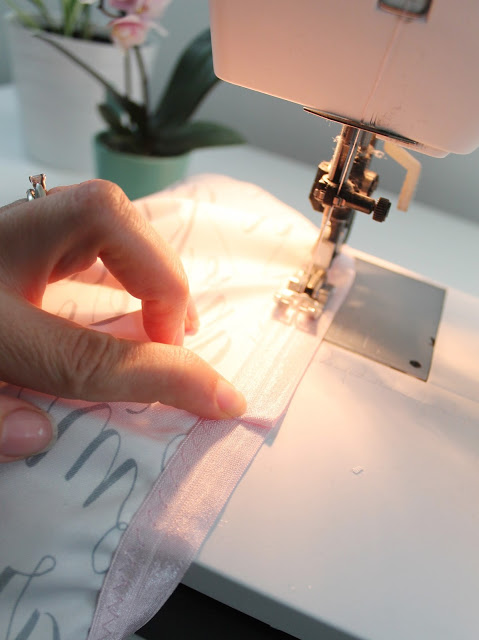
First, I cut the end of my elastic so that it overlaps my start-point by about 1/2″ (keeping the same amount of tension on the elastic as you have done over the rest of your opening). I fold the raw end under by about 1/4″.


Stitch right to the edge of the fold and lower your needle into the elastic. Raise the foot and pivot your garment so that the you can now zig-zag stitch over your folded edge, creating a nicely finished join. Backtack at the end of your stitching.

After that, just trim back any excess elastic on the wrong side and away you go! This area tends to get bulky so you may need to help it through your machine a little – I know my machine sometimes gets a little caught up on the bump that the join creates.
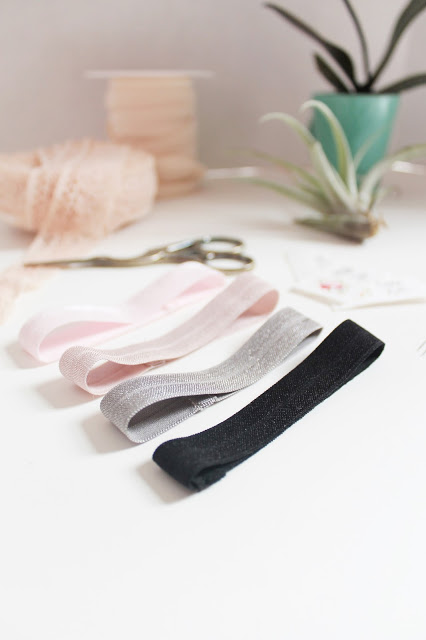
I hope this is helpful! Pretty much all of my patterns use Fold Over Elastic for edging. I like to use it because it comes in a million different colours, so it’s easy to match with almost any fabric, but it can be tricky to finish.
Happy Sewing!

Easy FOE (Fold Over Elastic) Hair Ties that are sewn NOT knotted!

Tutorial

I have a lot of fold over elastic kicking around, and I often end up with little bits and pieces that I hoard away. I also lose things, particularly hair ties, so I’ve found a quick and easy way to use up those small bits of elastic to make hair ties that are amazing
Fold Over Elastic is nice and stretchy, with good recovery and the satin finish doesn’t snag your hair. They are also nice and thick so if you often find your hair getting wrapped up in traditional elastics (like I do), this may just solve your problem. You’ve probably seen the knotted version of these hair ties, which are well and good, but I wanted mine to have a more polished finish.
How to make sewn not knotted FOE Hair Ties!
1. Cut a length of elastic about 8″ long. I’ve got super thick hair, so if you have finer hair, you may want to cut it a little shorter.

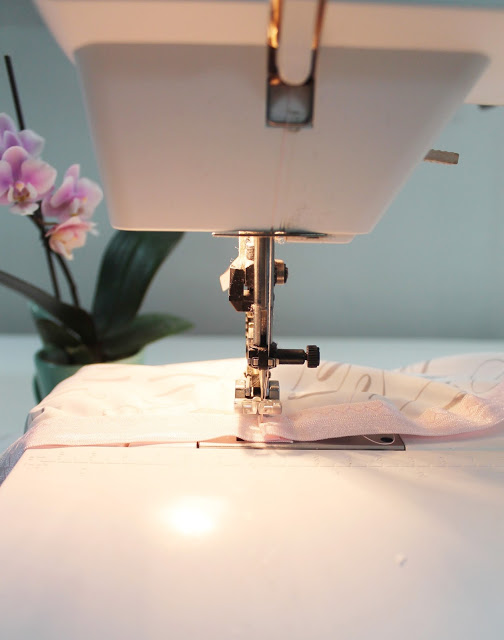
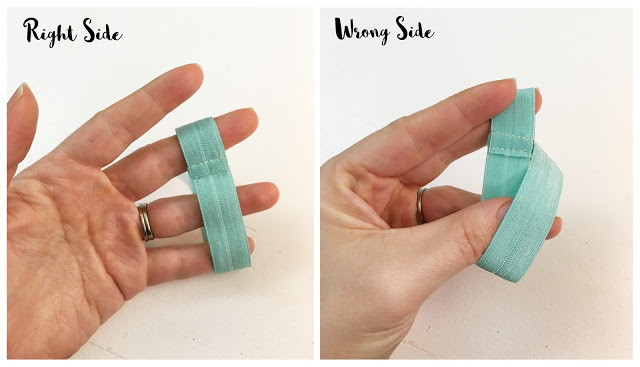
2. Fold the elastic in half, with the right sides (shiny side) facing and stitch together using about a 3/8″ seam allowance.

3. I snip back one edge of the Fold Over Elastic by about 1/8″. I sometimes lightly singe the end with a lighter (please be careful if you choose to do this!), though I don’t find that the elastic generally frays too badly.

4. Fold the seam allowance down so that the shorter end of the seam allowance is covered by the slightly longer end. Top stitch through all layers, being sure to backtack at the beginning and end of your seam. 

And that’s it! It takes just a minute to make them and you’ll never buy a hair tie again.  Wrap a few around a printed piece of cardstock, and they make a great addition to a handmade gift. It’s also a great way to use all of that amazing printed FOE that I’m seeing all over Etsy (check out Peak Bloom, just as one example!).
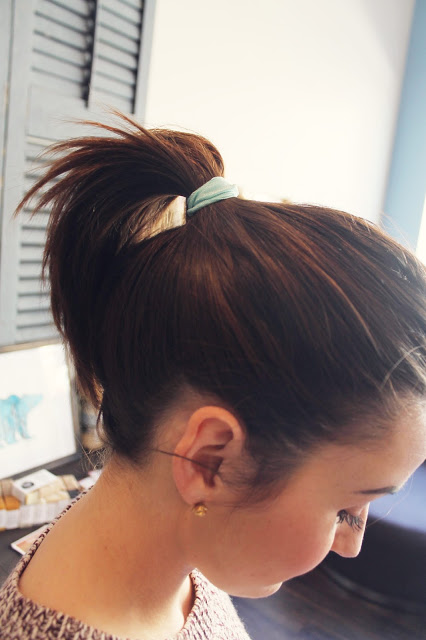
Thanks to my beautiful friend, Susie, from Changing of the Garnet for modeling my little elastic for me!
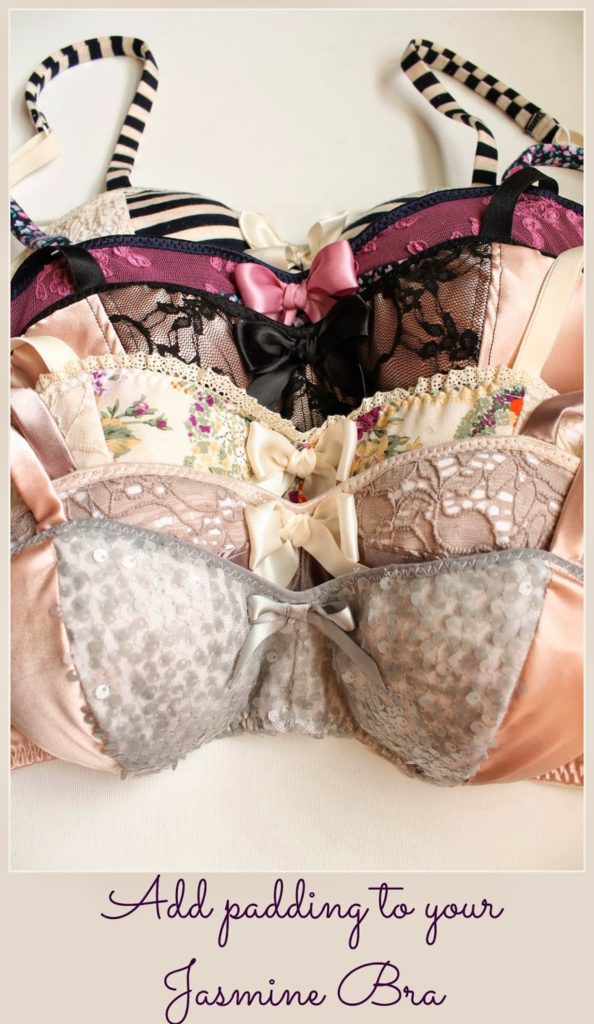
Ohhh Lulu Pattern Hack: Easy front closure

Tutorial, Uncategorized

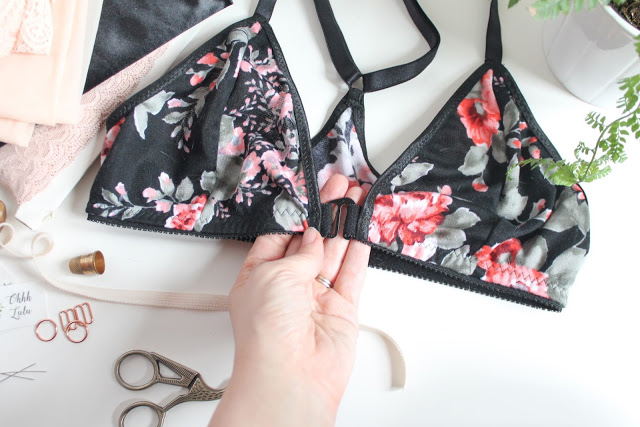
I had a customer email me a month or so ago asking for advice on how to add a front closure to one of my bras. She had some mobility issues and wasn’t able to easily get in and out of a back closing bra herself.  Last week I came down with a cold (my second cold of the month, unfair!) and my whole body was aching. Strangely enough, my right hand really ached and I could barely do anything with it! I really felt for this customer who had to deal with aching hands on a daily basis. 
I like this method because it uses a simple G-hook, but you can also use this method with a front clip. I sometimes also like to add a metal ring to the center front of my pull on bras, which uses basically the same steps. 

What you need:
1. Any triangle front bra pattern, like my Josephine, Scarlett (which I have used here), or Brigitte Pattern.
2. Supplies as outlined in the pattern.
3. G-hook or Front Clip

Instructions:

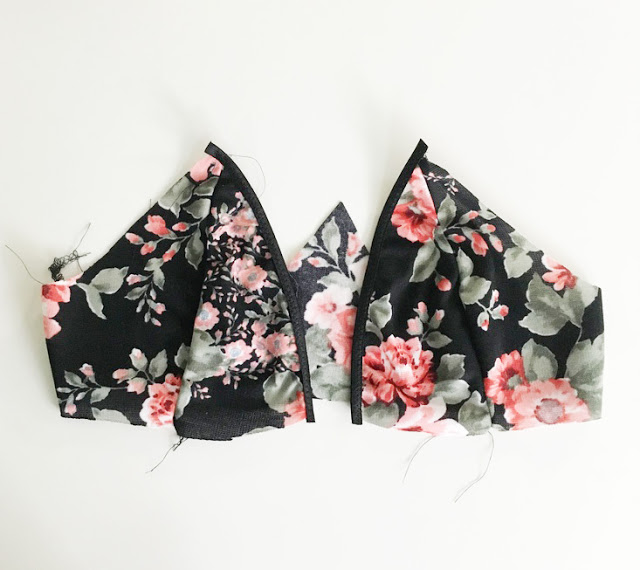
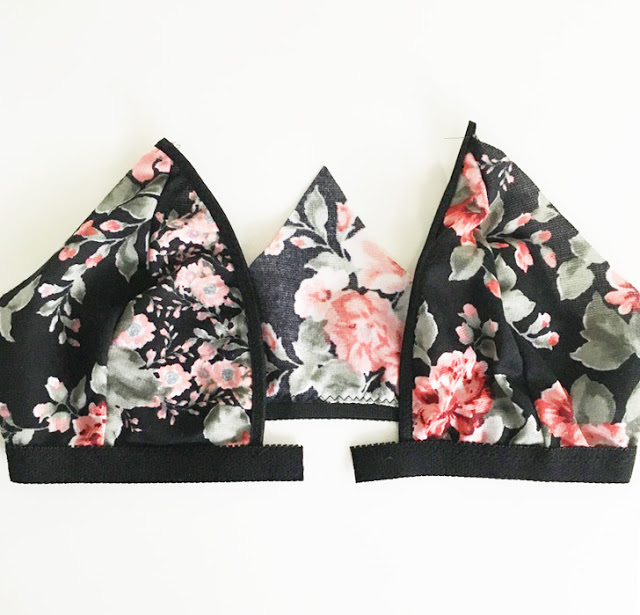
1. Following the pattern instructions, assemble cups and apply elastic around front edge.

2. Beginning at the center front and leaving a 1″ tail, apply the band elastic along the lower edge of the bra. Leave a 1″ tail and the end.

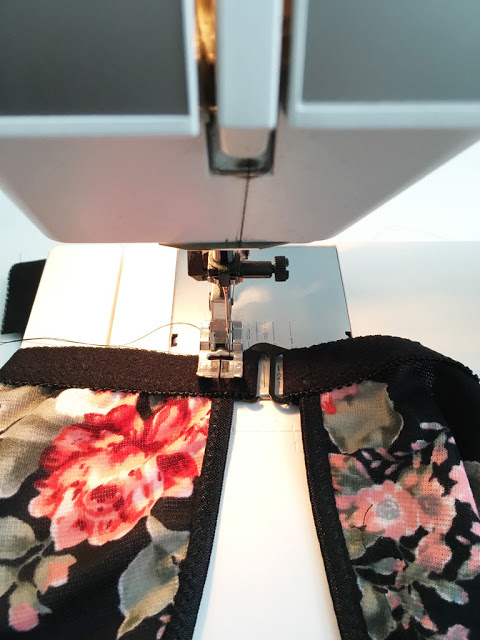
3. Feed one end of the elastic “tail” through the closed end of the G-Hook. Turn elastic towards garment and stitch in place.

4. Wrap the tail on the other side of the bra around the open end of the hook and stitch in place. This creates a small loop to catch the hook into.
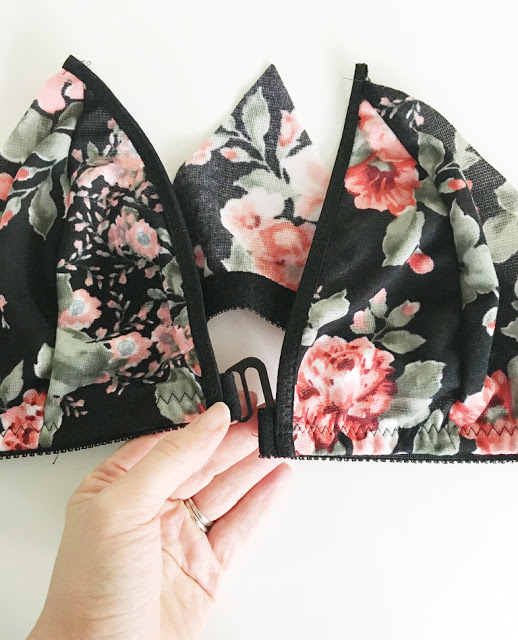
Your hook should be upside down at this stage! It will get flipped around soon.
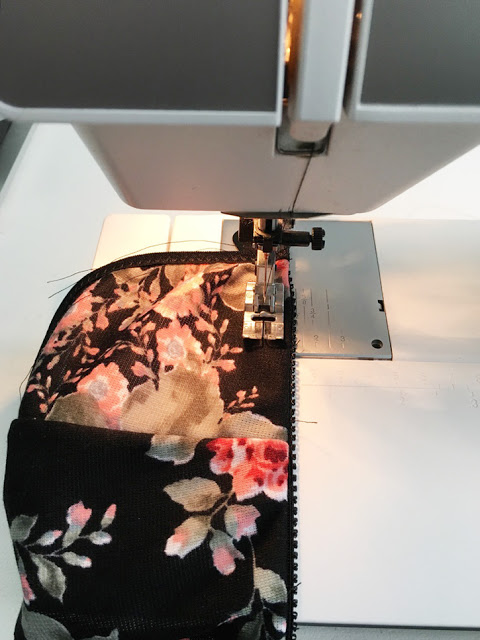
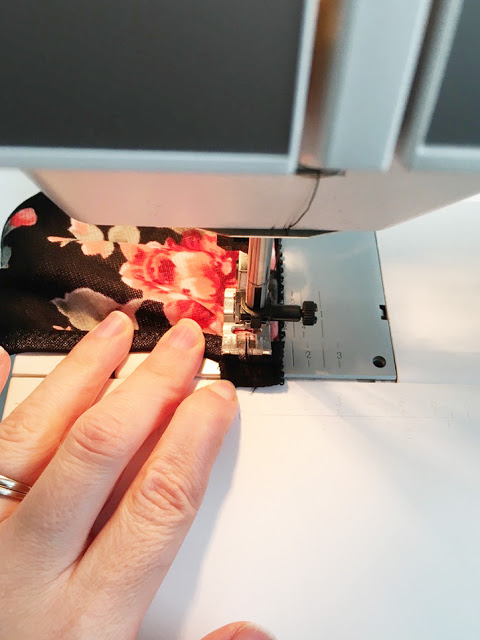
5. Turn the band elastic under and topstitch in place with a wide zig-zag stitch. Make sure to securely backtack at the beginning and end of your stitching line.

6. Finish the garment following the instructions in your pattern.


That’s it! now you have a neatly applied front hook closure! Enjoy!

Sarah & Ava Retro Swimsuit Tutorial Part 2

Tutorial
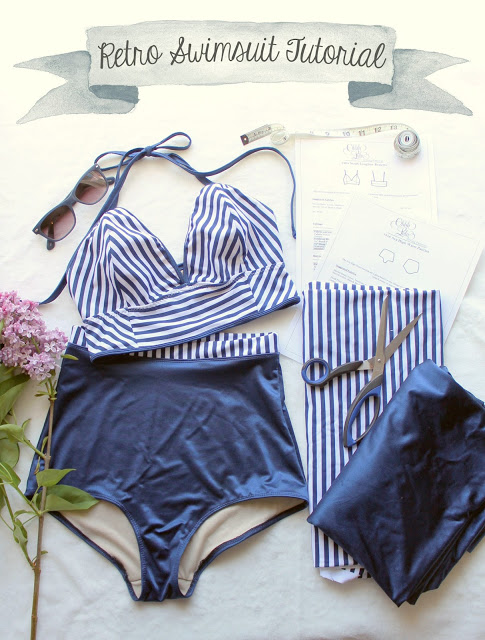
It’s time for Part Two of my Retro Bikini Tutorial. I’ve done a tutorial on how to sew the Ava Panties as Bikini Bottoms before. I did this version just a little differently. I wanted to add a contrasting band around the waist and omit the elastic around the legs. I have full hips and thighs, so these bottoms fit snug as they are. If you’re on the thinner side, you might want to add elastic or bind your leg openings like we did on the Bikini Top.
Instructions:
1. To make the waistband, I roughly measured the waist of the panties front and back. I cut a size medium, which had the same measurement for front and back. I then drew a straight waistband, which was 2″ wide with 1/2″ seam allowance on either side. I indicated cut 2 on my new pattern piece, as my front and back measurement was the same.

 2. Cut your fabric – I’m lining the entire thing.

3. Baste your front lining to the swimsuit front.

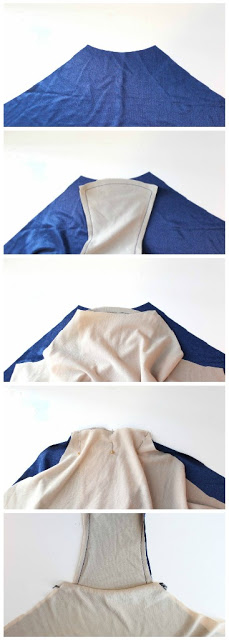
4. Like we did with the swimsuit, we’re going to sew the lining and swim fabric all in one motion. Begin by layering: Back Self (rightside up), Front Basted Self (rightside down), then Lining. Pin together if needed and sew your seam. Now your crotch seam allowance in encased between your layers.

5. Sew your side Seams and try them on. They should fit snug all over.

 6. Sew the waistband into a continuous loop. Fold in half and press with a light iron. Attach to the waist of the panties, lining up your side seams.

7. I top stitched down my waistband seam allowance using a twin needle.

8. To finish the legs I simply finished the raw edges with my serger, then turned the edges and top stitched them with a twin needle. You can also finish with a zig-zag stitched hem, bind the legs, or use elastic.

That’s it! I’ve found it takes some getting used to sewing swim fabrics. They are slippery and can be hard to manage. But, the more bathingsuits I make, the better they get!

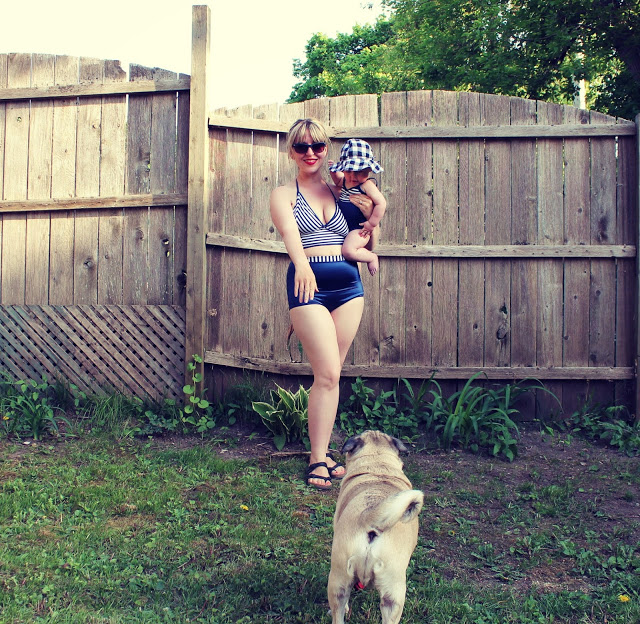
Here I am in mine. Neverind the pug butt and falling down fence. I made Izzy a matching suit too! Now hopefully the weather gets a little warmer so I can test mine out at the beach.

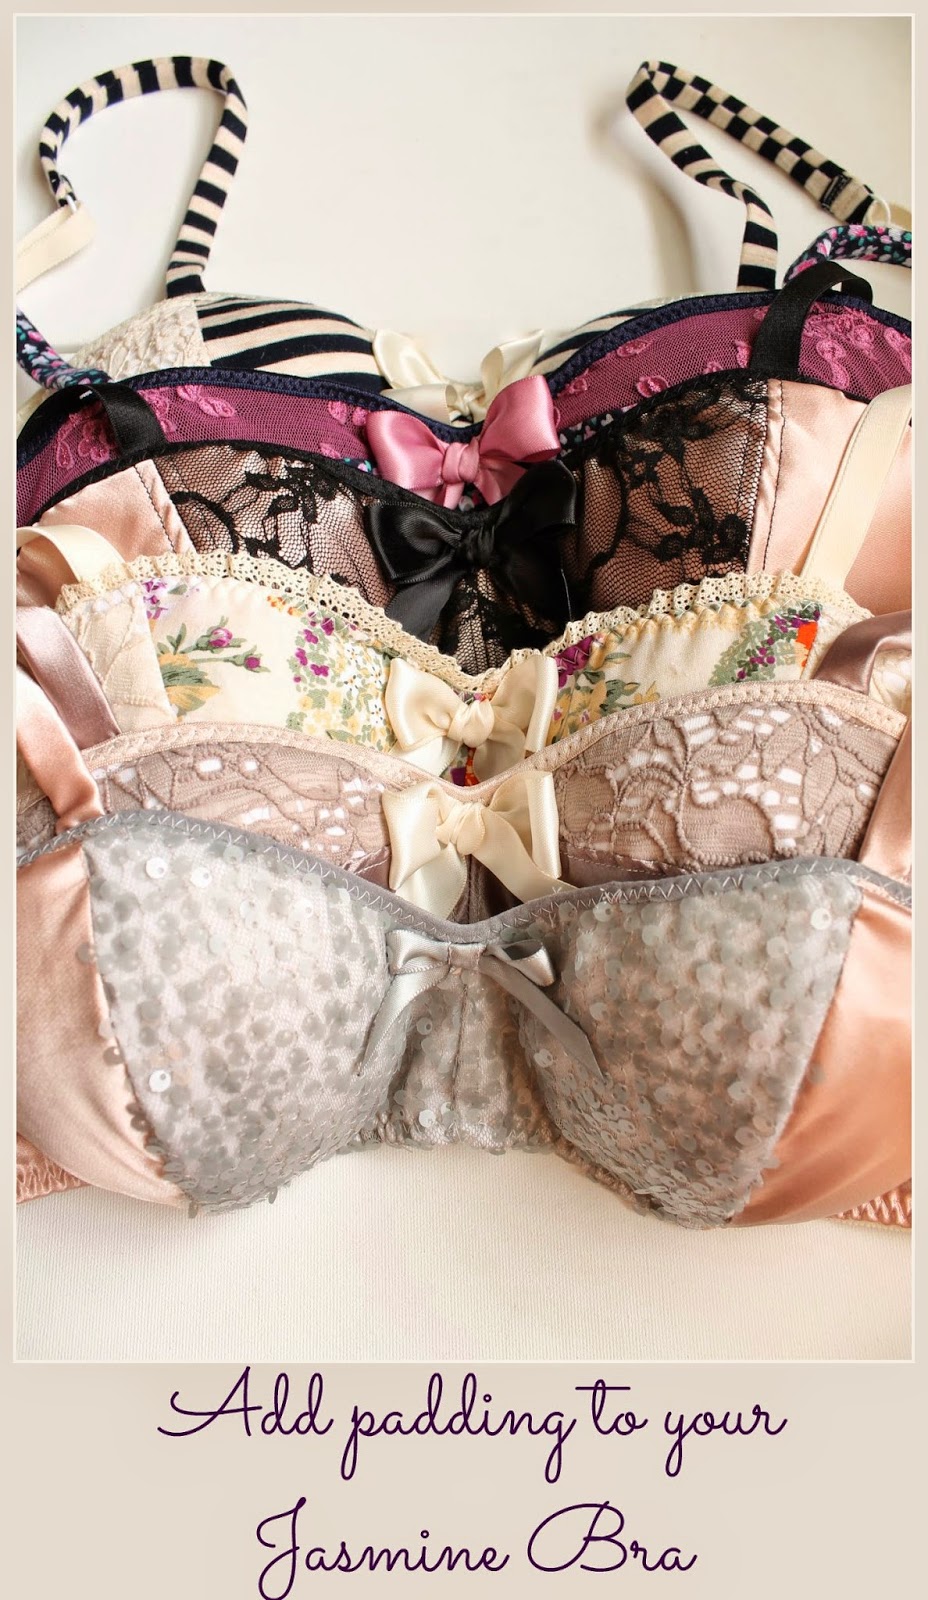
Ohhh Lulu Pattern Hacks: Adding Padding to your Jasmine Bra

Tutorial

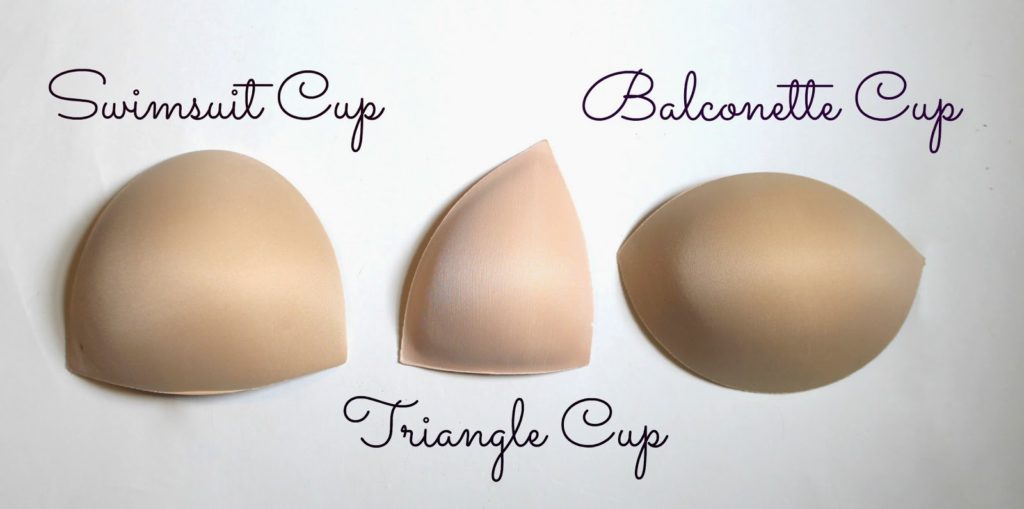
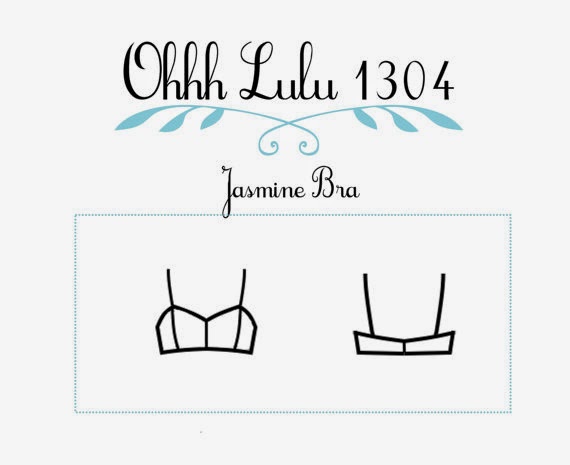
The Jasmine bra is a light support bra.  Adding pre-formed foam cups can help give your bra  a little extra shape and structure.  Foam pads come in a variety of styles – balconette, push-up, triangle, etc, and can be found at most sewing supply stores.  My local Fabricland (for Canadians) carries foam cups, but you can also find them for sale on Etsy and other sewing supply stores – just search for foam bra cups. This tutorial is excellent to use if you want to sew your Jasmine as a Bikini Top. You can also use this basic concept to add padding to any of my bra patterns.

What you will need:
1. The Jasmine Bra Pattern (available on Ohhh Lulu Sews)
2. Supplies for the Jasmine bra PLUS fabric for lining (Lining is a MUST) – I recommend a plain cotton jersey, or swimsuit lining if you are making the top into a swimsuit.
3. Foam Cups

Style Lines for the Jasmine Bra Pattern

A bit about cups:
Bra cups come in different shapes and sizes.  If you were to browse through any large sewing supply store, you may find Balconette, Swimsuit, Triangle, and Push-Up Pads.  I generally use Balconette Cups in the Jasmine Bra – they are the most versatile.  Swimsuit cups, which have a less oval shape and generally tend to be lighter weight, work great as well.  You can also find specially shaped triangle cups which will fit into my triangle shaped bras.

If you are putting in a cup larger than a DD, you will need to adjust the height of the pattern and I highly recommend sewing a mock-up first.

 Instructions:
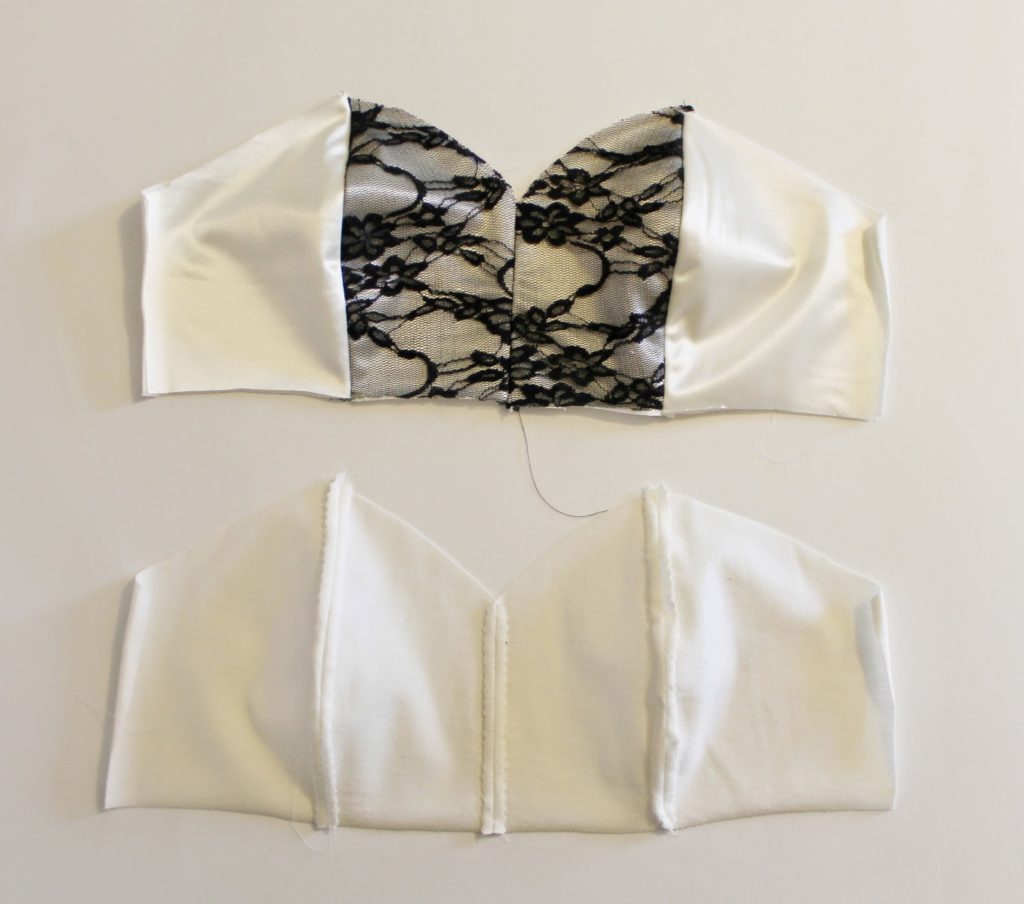
1. Sew your front exterior and lining according to Pattern Instructions.

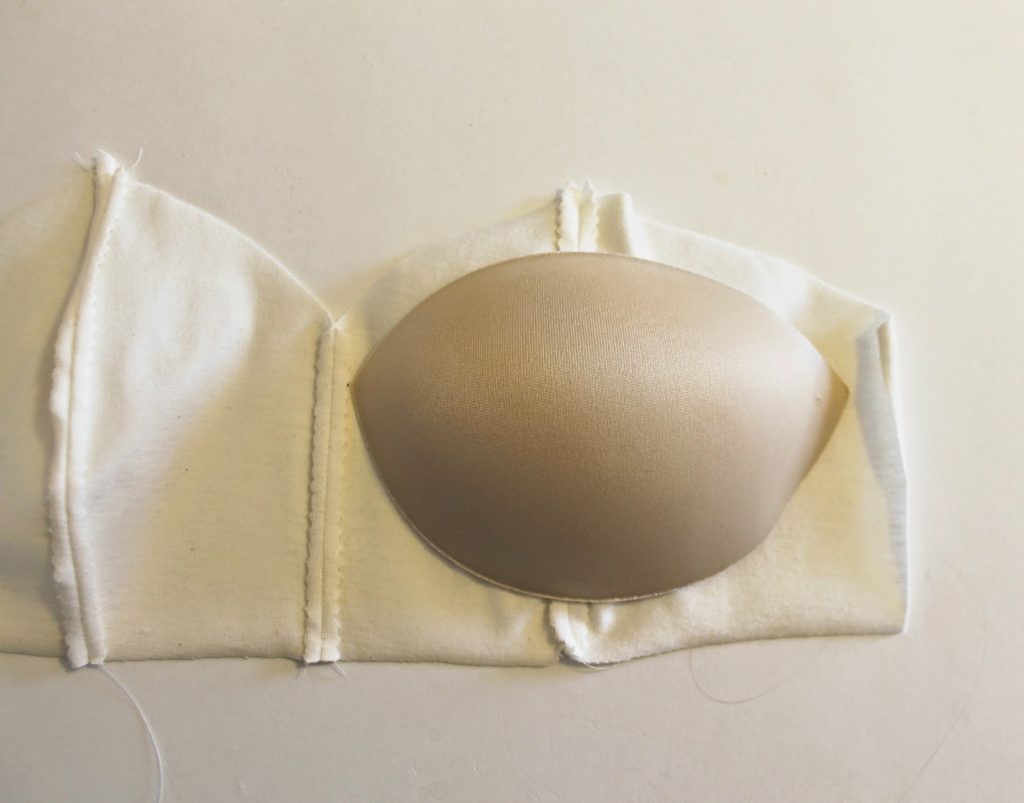
2. Place a foam cup over the wrong side of the fabric. Below, you can see where I’ve placed the balconette cup, the centre front point sits about 1/2″ away from the centre front seam line and is centred vertically along the front princess seam.  When I make these for myself, I do a lot of “trying on” as I go. I’ll actually hold the lining over my body, and place the cup where it sits best on my bust.  The most important part here is that the the wrong-side of the lining fall into the inward curve of the cup.  You don’t want to put your cup on backwards/inside out!

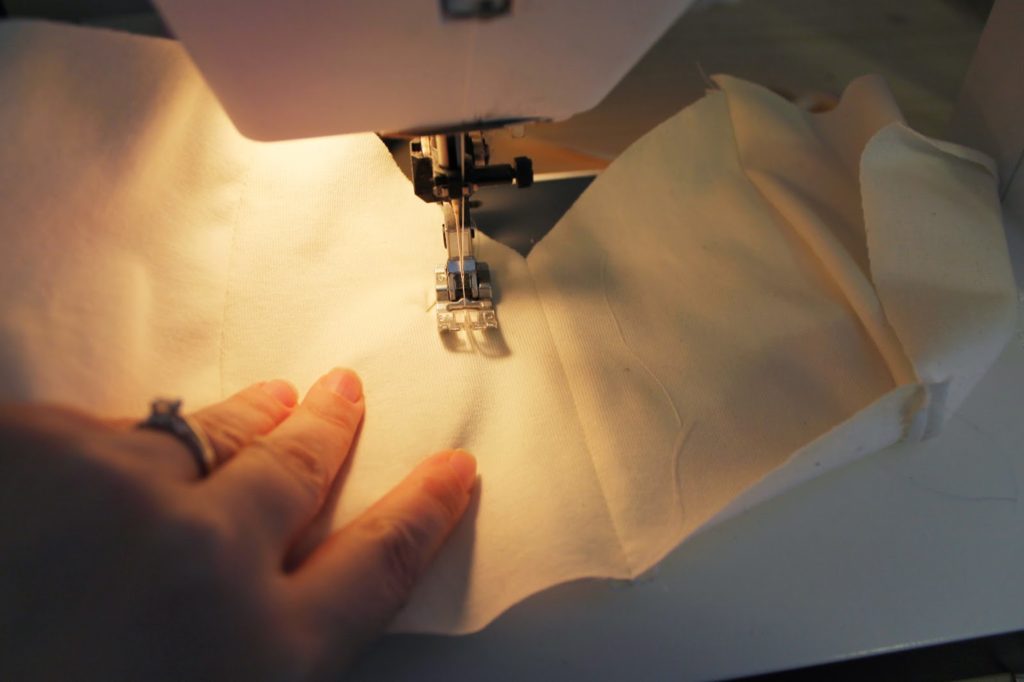
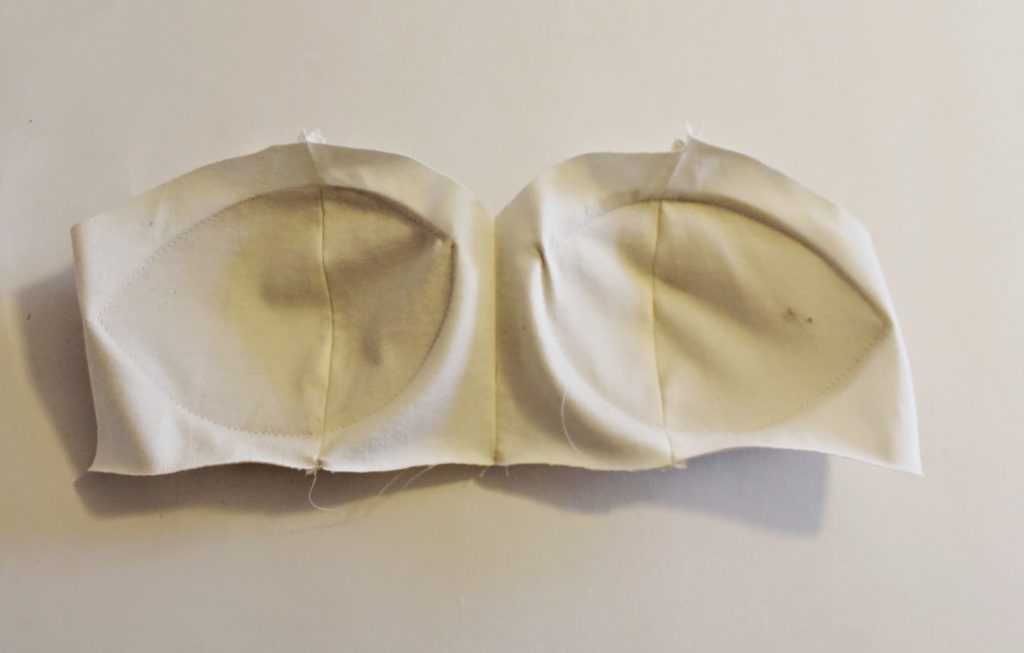
3. Once you’ve gotten your cup in place, put in a few pins to keep it secure.  With the right side of the lining facing up, so that you can make sure that the lining is curving into the cup, and not getting pulled taught, stitch around the exterior edge of the cup. This part takes a bit of practice. You can use your fingers to feel where the edge of the cup is as you slowly stitch around the perimeter. Do the same to both sides.

Using my fingers to feel the edge of the foam cup as I stitch the cup directly onto the interior of the lining
Cups stitched onto both sides of the lining.
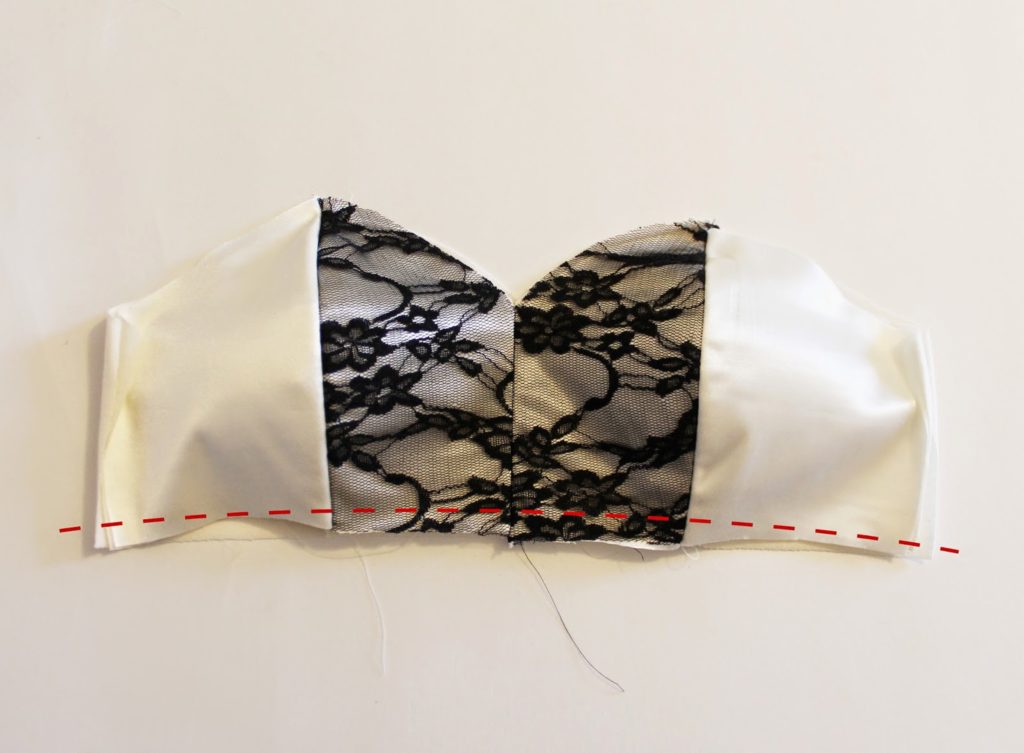
4. Place your outer shell over top of the lining so that the padding is sandwiched between the layers.  Line up your lining and exterior seam-lines, and baste along the lower edge of the bra.  When you are done, you will notice that the outer layer appears shorter.  That’s because it now has to curve over the cup. You can now baste the upper edge in a similar fashion as you did the lower, but just be aware that it is A-OK that the the lining peak out about 1/8″-1/4″ above your exterior – this can be trimmed back when you are done basting.
Baste Lower Edge First
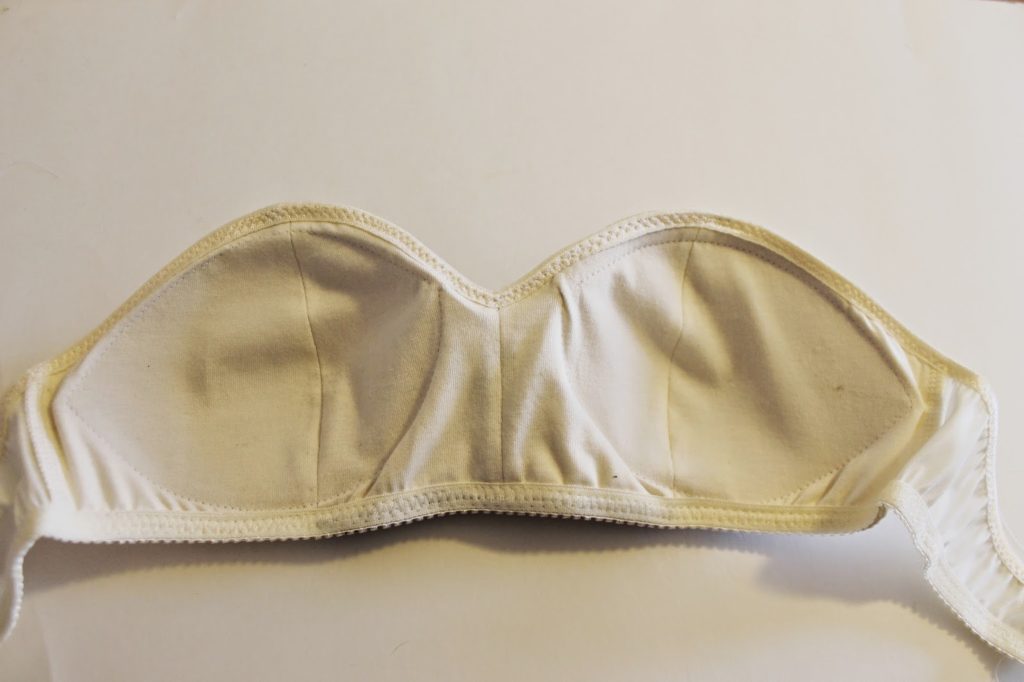
5. Sew on the bra band at the side seams, and complete the bra using the instructions provided in the pattern.  You can use many different types of elastic edging for the neckline of the Jasmine Bra, but when padding the bra, I find that Foldover Elastic is the easiest to manage.
Finished Interior – just needs straps!

Padded Jasmine Exterior

 That’s it! Just a few extra steps and you can make yourself a super-comfortable padded bralette or swimsuit top.

Mini Pattern Hack: Adjusting the Cup Size of the Jasmine Bra

Tutorial


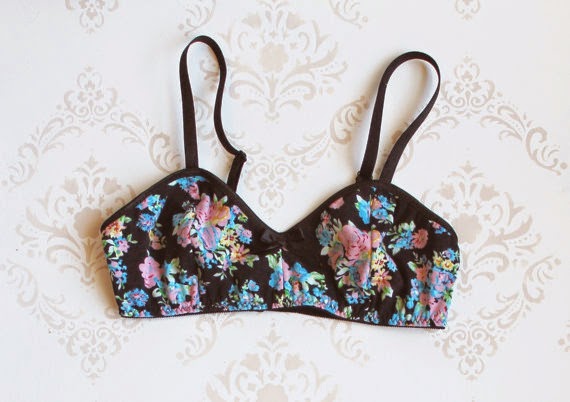
The Jasmine Bra (available in my sewing pattern shop, Ohhh Lulu Sews) is a great bra pattern for a first-time lingerie sewist! It is simple to assemble, and will give you experience applying lingerie elastic.  It’s a comfortable bralette that can accommodate a number of sizes with some simple pattern adjustments. I use this pattern a lot myself.  You may remember I made a boned bikini top with it last summer.  I’ll also show you how to add padding in another Pattern Hack Post. 
First we need to know a little something about how cup size works. Cup size is basically the difference between your Bust & Band measurements.  For the novice seamstress, your bust measurement is measured around the fullest part of your bust, and your band measurement is measured around your ribcage, just below your breasts where your bra band sits.  In general, each Cup Letter represents 1″ difference in Bust and Band measurements.  So, as an example, if you have a 30″ band measruement and a 34″ bust measruement, you should fit a 30D bra.  This is not a fool proof method, but a guideline for finding a size that fits you best.  The person with a 30 band and 34 Bust may well find that a C cup is more comfortable or that they prefer a looser band.  Regardless, this is often a good starting point. 
 I have drafted the Jasmine Bra for about a B/C cup size, which is a very common cup size.  If you are below or above that cup size, you will likely want to make some pattern adjustments.
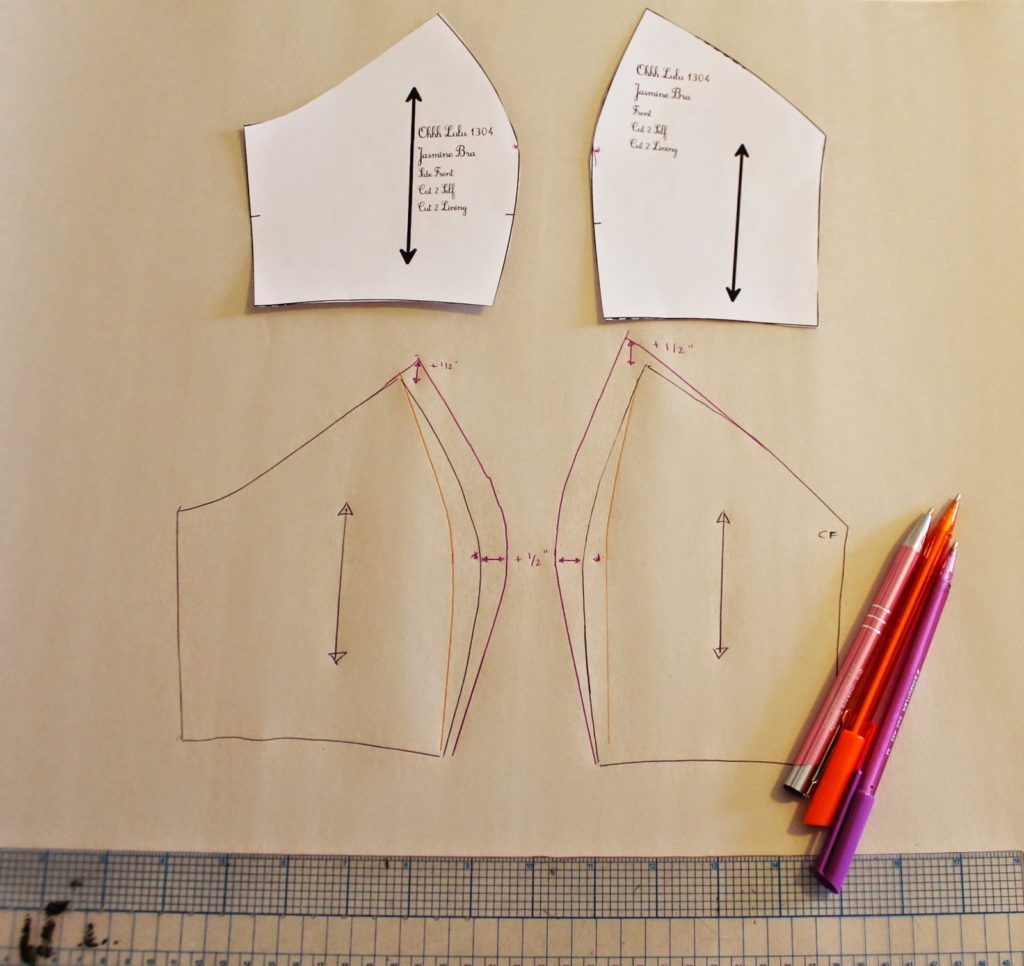
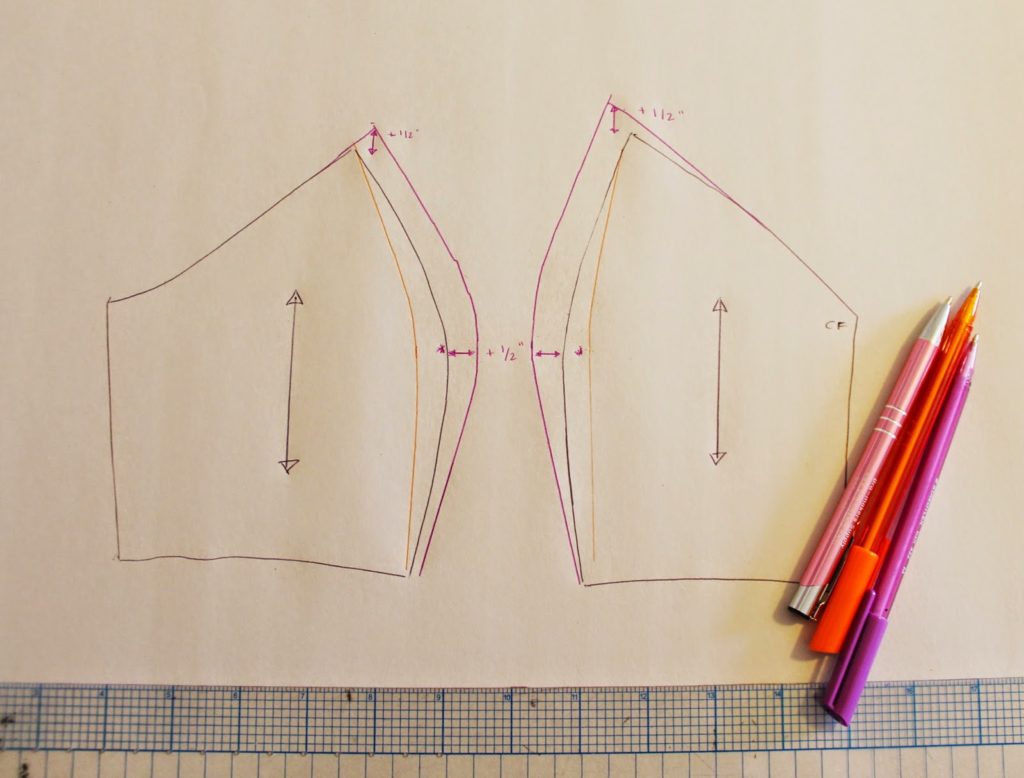
If you are an A or AA cup, you may generally have a 0-2″ difference in bust to band measurement. As a result, you will want to straighten out the curve of the cup (See the illustration below in the orange ink).  The front princess seam gets taken in at the bust apex, which is approximately 3.5″ up from the lower edge of the pattern piece.  When reducing the cup, I haven’t adjusted the height of the pattern pieces, just straightened out the curve of that front seam.  

If you are a D-DD Cup (or larger!), you will want to exaggerate the curve of the cup as well as increase the height to provide better coverage.  Here, in purple ink, I’ve increased the bust curve by 1/2″ on each pattern piece at the apex. I’ve also extended the top of the cup by 1/2″.

Because this pattern is to be sewn in stretch knits, the fit is really quite flexible.  If you are above a DD (this includes myself!), you may find that this simple adjustment, adding 1″ to the bust apex + a bit of height, will be all you need to get a better fit.  Remember, it is really important when sewing any garment, but especially lingerie, that you sew a mock up first in a fabric of a similar weight and stretch.  This way, you can make any pattern adjustments to get a truly custom fit!